
# Fixing iMessage and other services with OpenCore
This page is for those having iMessage and other iServices issues, this is a very basic guide so will not go as in-depth into the issues as some other guides. This specific guide is a translation and reinterpretation of the AppleLife Guide on fixing iServices: Как завести сервисы Apple - iMessage, FaceTime, iCloud (opens new window).
Your Apple ID is the single most influential factor in using iServices.
If you have existing Apple products in your account, such as an iPhone, you should have no issues whatsoever using a generated serial set. However, if you recently created an account, that does not have any existing Apple hardware or App Store purchases, you may be required to call Apple once you have attemped logging in.
The following items will be created below and are required to use iServices:
- MLB
- ROM*
- SystemProductName
- SystemSerialNumber
- SystemUUID
NOTE
For ROM, we use the MAC Address of the network interface, lowercase, and without :.
Note: You and you alone are responsible for your AppleID, read the guide carefully and take full responsibility if you screw up. Dortania and other guides are not held accountable for what you do.
# Using GenSMBIOS
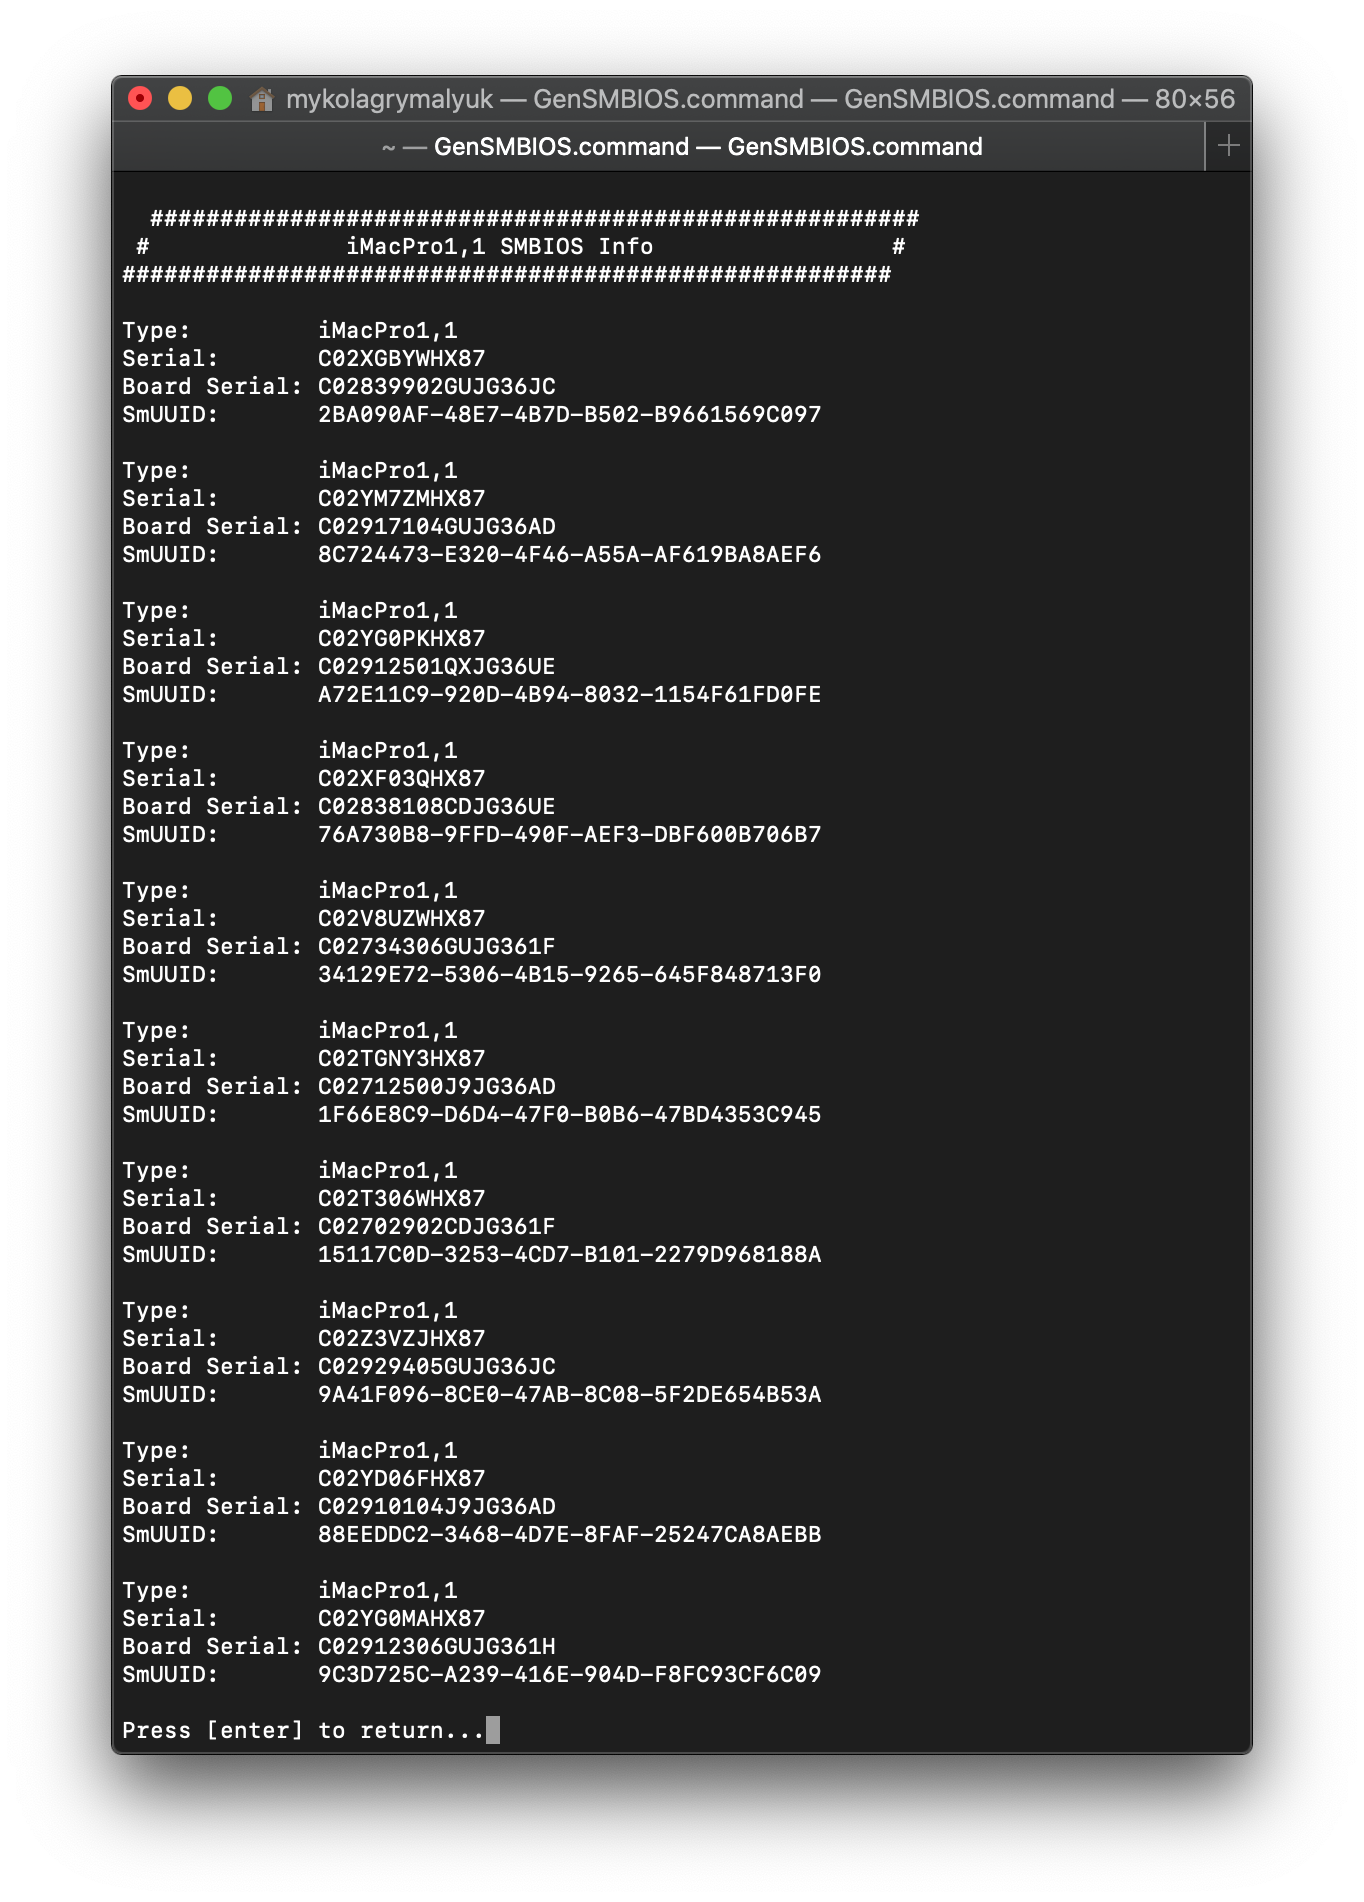
Download GenSMBIOS (opens new window) and select option 1 to download MacSerial and next option 3 to generate some new serials. What we're looking for is a valid serial that currently has no registered purchase date.
Tip: iMacPro1,1 10 will print 10 serials, this will save you some time on generating
# Using macserial
This is for Linux users and an alternative to using GenSMBIOS.
Generate a new Serial and Board Serial (MLB) for your model.
To generate this you will need macserial.
You can download the latest release of OpenCorePkg from here. (opens new window)
Or compile the development macserial (opens new window) from source.
git clone --depth 1 https://github.com/acidanthera/OpenCorePkg.git
cd ./OpenCorePkg/Utilities/macserial/
make
chmod +x ./macserial
Find your SystemProductName in your config.plist file. That is your model number.
Replace "iMacPro1,1" below with SystemProductName in your config.plist.
./macserial --num 1 --model "iMacPro1,1"
Example output:
$ ./macserial \
        --model "iMacPro1,1"
Warning: arc4random is not available!
C02V7UYGHX87 | C02733401J9JG36A8
The value on the left is your Serial number. The value on the right is your Board Serial (MLB).
# Choose a MAC Address
Select a MAC Address with an Organizationally Unique Identifier (OUI) that corresponds to a real Apple, Inc. interface.
See the following list:
https://gitlab.com/wireshark/wireshark/-/raw/master/manuf (opens new window)
For example:
00:16:CB Apple Apple, Inc.
Make up the last 3 octets.
For example:
00:16:CB:00:11:22
# Derive the corresponding ROM Value
ROM is calculated from your MAC Address.
Lowercase your MAC Address, and remove each colon : between the octets.
For example:
MAC: 00:16:CB:00:11:22
ROM: 0016cb001122
# Generate an UUID
Type uuidgen in Terminal
$ uuidgen
976AA603-75FC-456B-BC6D-9011BFB4968E
Then simply replace those values in your config.plist:
| Key | Data |
|---|---|
| MLB | C02733401J9JG36A8 |
| Mac Address | 00:16:CB:00:11:22 |
| ROM | 0016cb001122 |
| SystemProductName | iMacPro1,1 |
| SystemSerialNumber | C02V7UYGHX87 |
| SystemUUID | 976AA603-75FC-456B-BC6D-9011BFB4968E |
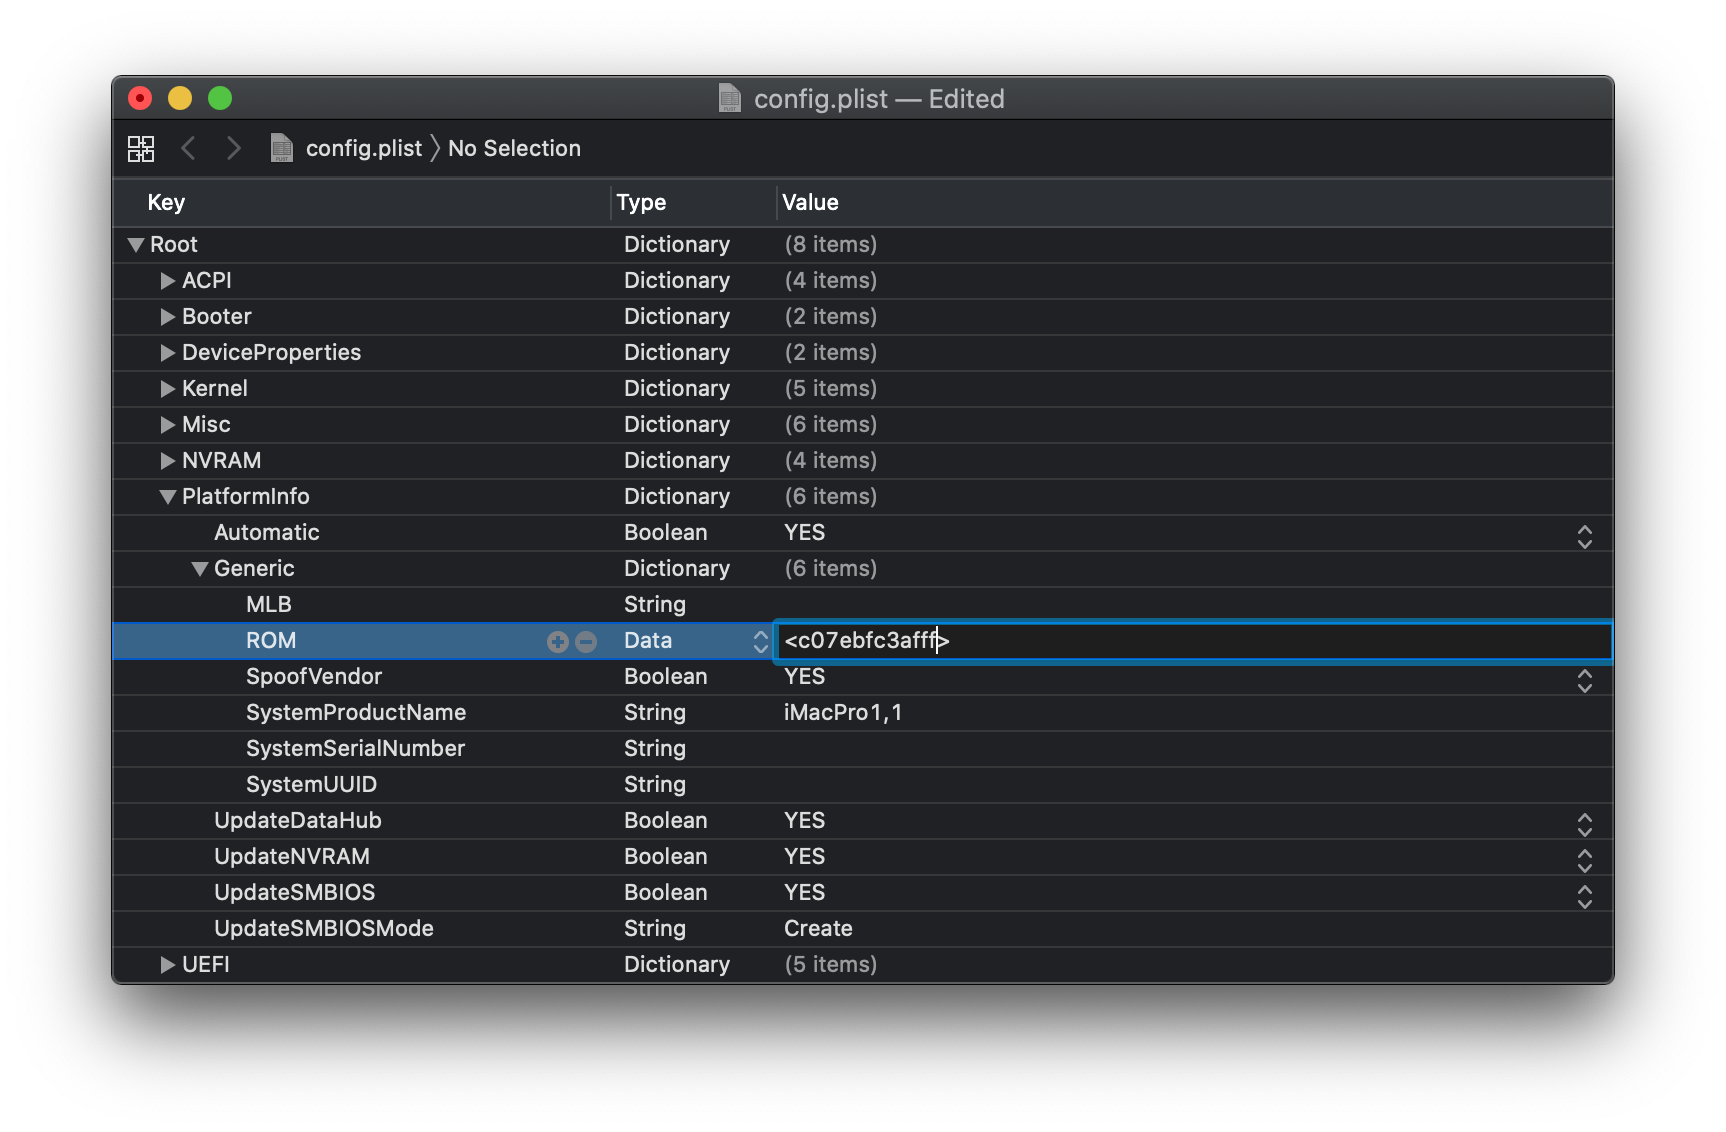
It should look something like this:
    <key>MLB</key>
    <string>C02733401J9JG36A8</string>
    <key>ROM</key>
    <data>0016cb001122</data>
    <key>SpoofVendor</key>
    <true/>
    <key>SystemProductName</key>
    <string>iMacPro1,1</string>
    <key>SystemSerialNumber</key>
    <string>C02V7UYGHX87</string>
    <key>SystemUUID</key>
    <string>976AA603-75FC-456B-BC6D-9011BFB4968E</string>
NOTE: If you have trouble using the App Store, you may need to fix En0, depending on your hardware setup.
Brand new Apple ID's will almost certainly not work. Having other real devices in your account almost always works.
If you see a support warning, see below.
# Serial Number Validity
Now enter the serial into the Apple Check Coverage page (opens new window), you will get 1 of 3 responses:
| We're sorry, we're unable to check coverage for this serial number. | Valid Purchase Date | Purchase Date not Validated |
|---|---|---|
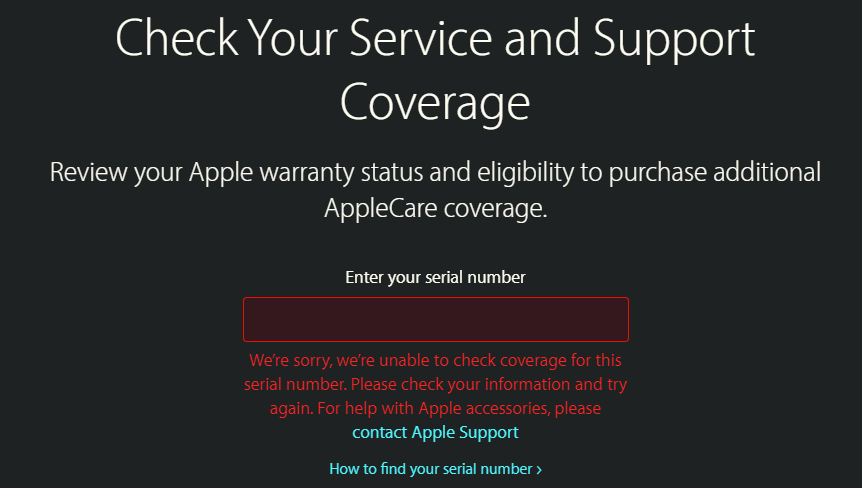 | 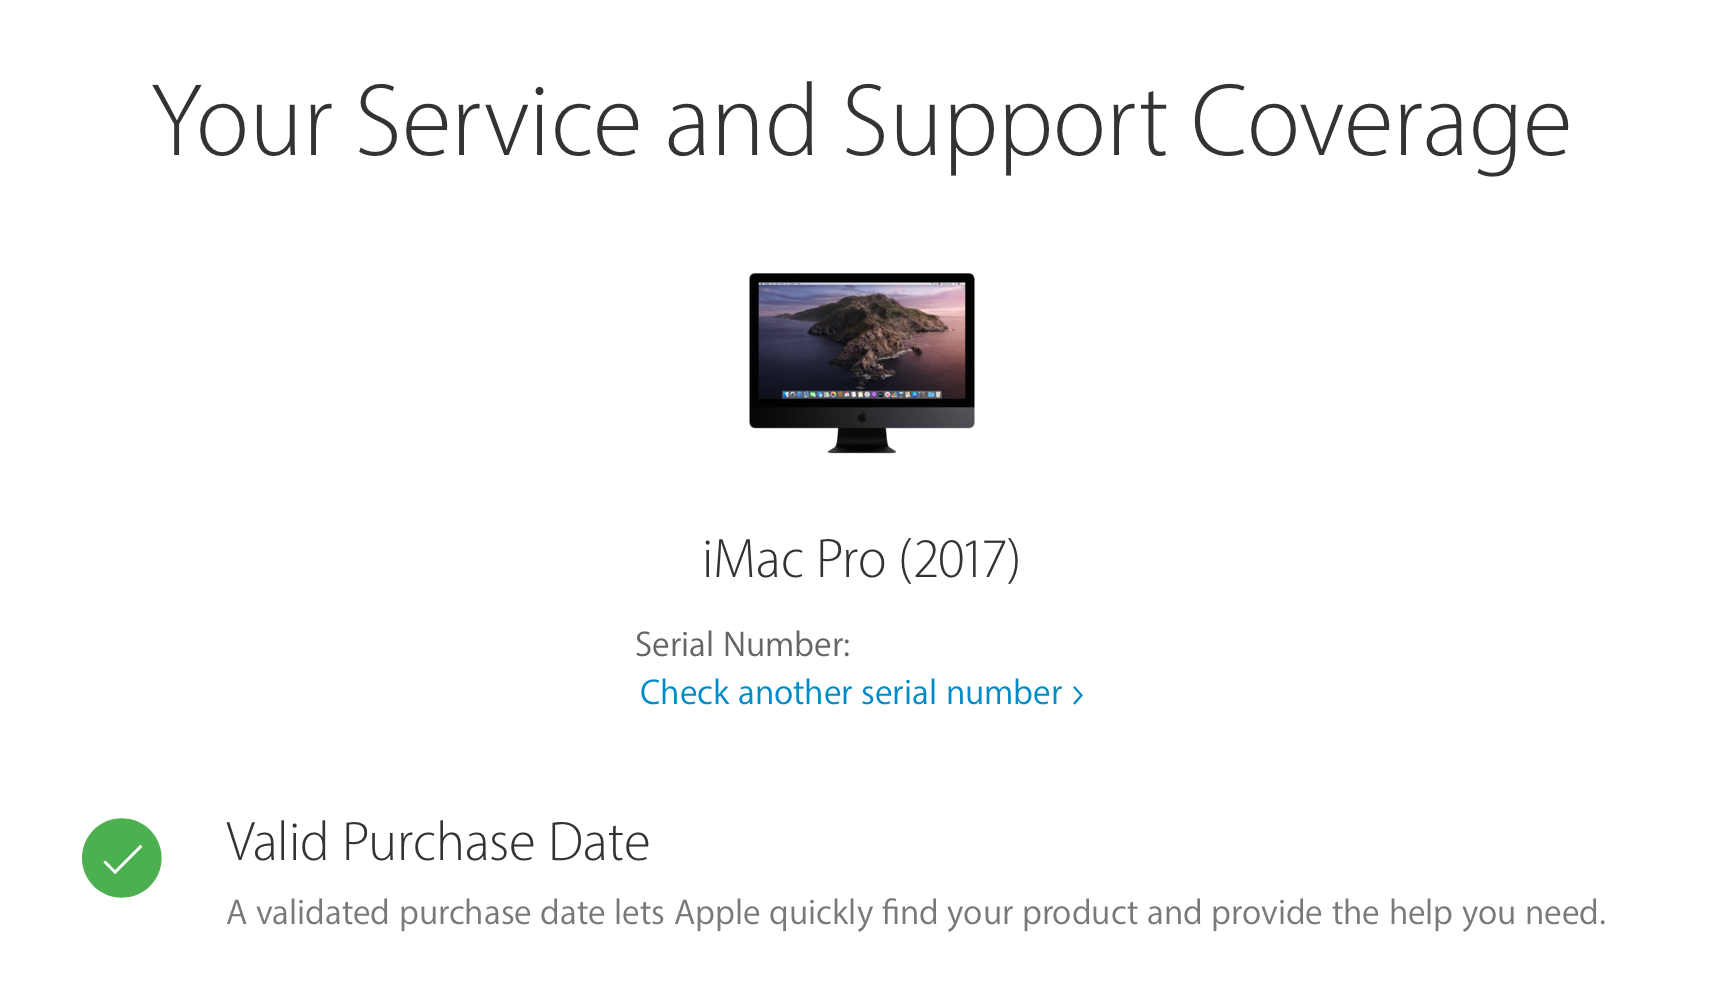 | 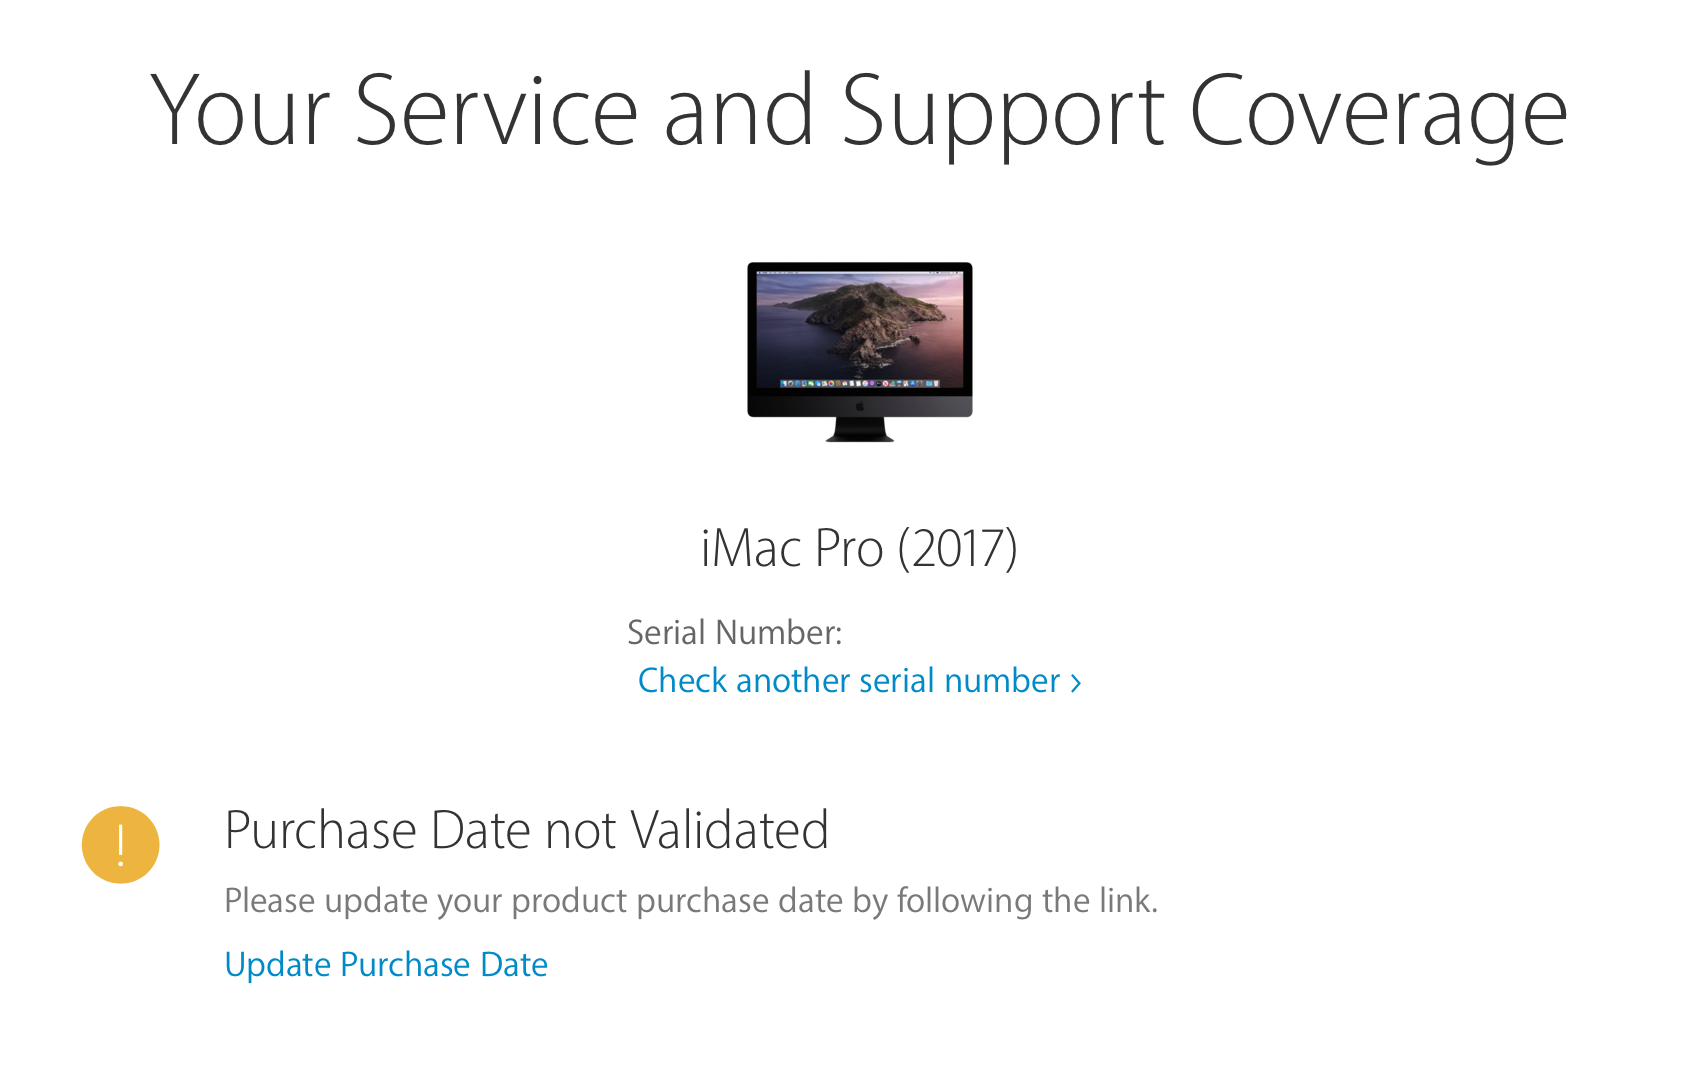 |
TIP
Copy and paste the serial number, as invalidly formatted serials will also return the "We're sorry, we're unable to check coverage for this serial number."
This first one is what we're after (you can also use the third one, but it is not recommended as there may be a chance of a conflict with an actual Mac). Now we can translate the rest of the values into our config.plist -> PlatformInfo -> Generic:
- Type = SystemProductName
- Serial = SystemSerialNumber
- Board Serial = MLB
- SmUUID = SystemUUID
NOTE
Although the first option works for most, do note though if you've had a bad track record with Apple/iServices you many need one that's "Purchase Date not Validated". Otherwise there may be suspicion
WARNING
Using a "Purchase Date not Validated:" serial can cause issues down the line if another machine of the same serial ever gets activated. For initial setup it can help alleviate issues with your account but in the long run an invalid serial can be a safer choice.
TIP
Checking too many serials may result in you becoming ratelimited. To bypass this limitation you can try clearing your cookies or changing your IP.
# Fixing en0
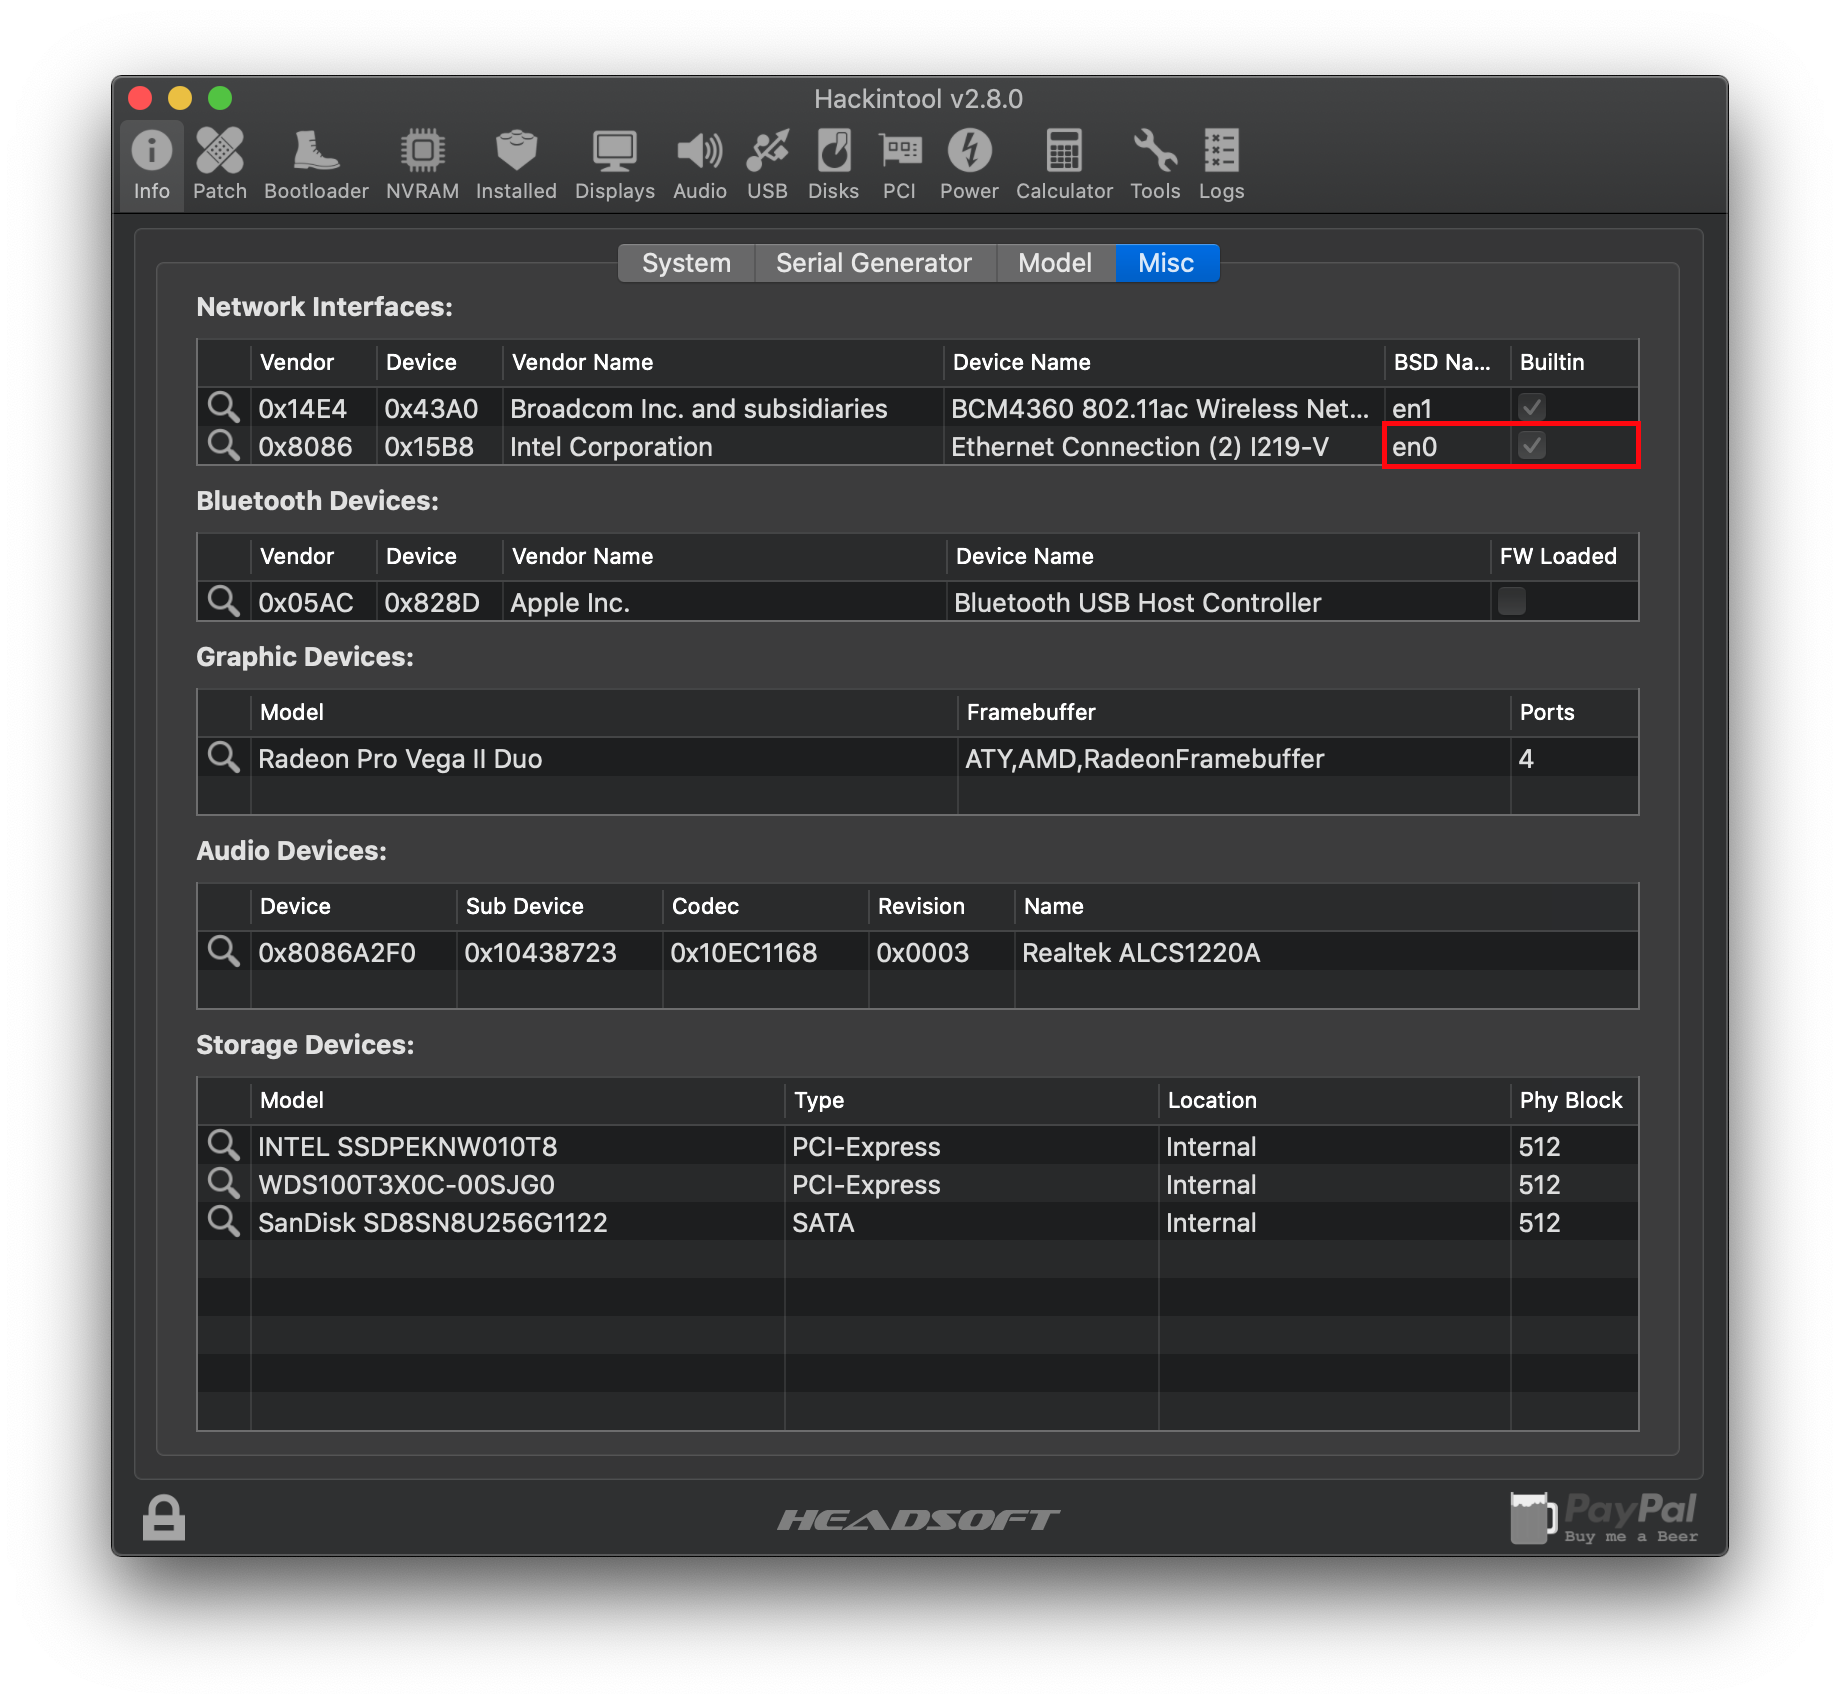
To start, grab Hackintool (opens new window) and head to System -> Peripherals (Info -> Misc on older versions of Hackintool)
Here under Network Interfaces (network card icon), look for en0 under BSD and check whether the device has a check mark under built-in. If there is a check mark, skip to the Fixing ROM section otherwise continue reading.
- Note:
en0can be either Wifi, ethernet or even Thunderbolt. The type doesn't matter, just that it's present and marked as built-in.
# What if I don't have En0 at all?!?
Well, we'll want to reset the macOS networking settings so it can build the interfaces fresh; open Terminal and run the following:
sudo rm /Library/Preferences/SystemConfiguration/NetworkInterfaces.plist
sudo rm /Library/Preferences/SystemConfiguration/preferences.plist
Once done reboot and check again.
If this doesn't work, add NullEthernet.kext (opens new window) and ssdt-rmne.aml (opens new window) to your EFI and config.plist under Kernel -> Add and ACPI -> Add respectively. The SSDT is precompiled so no extra work needed, reminder compiled files have a .aml extension and .dsl can be seen as source code.
# Making en0 show as built-in
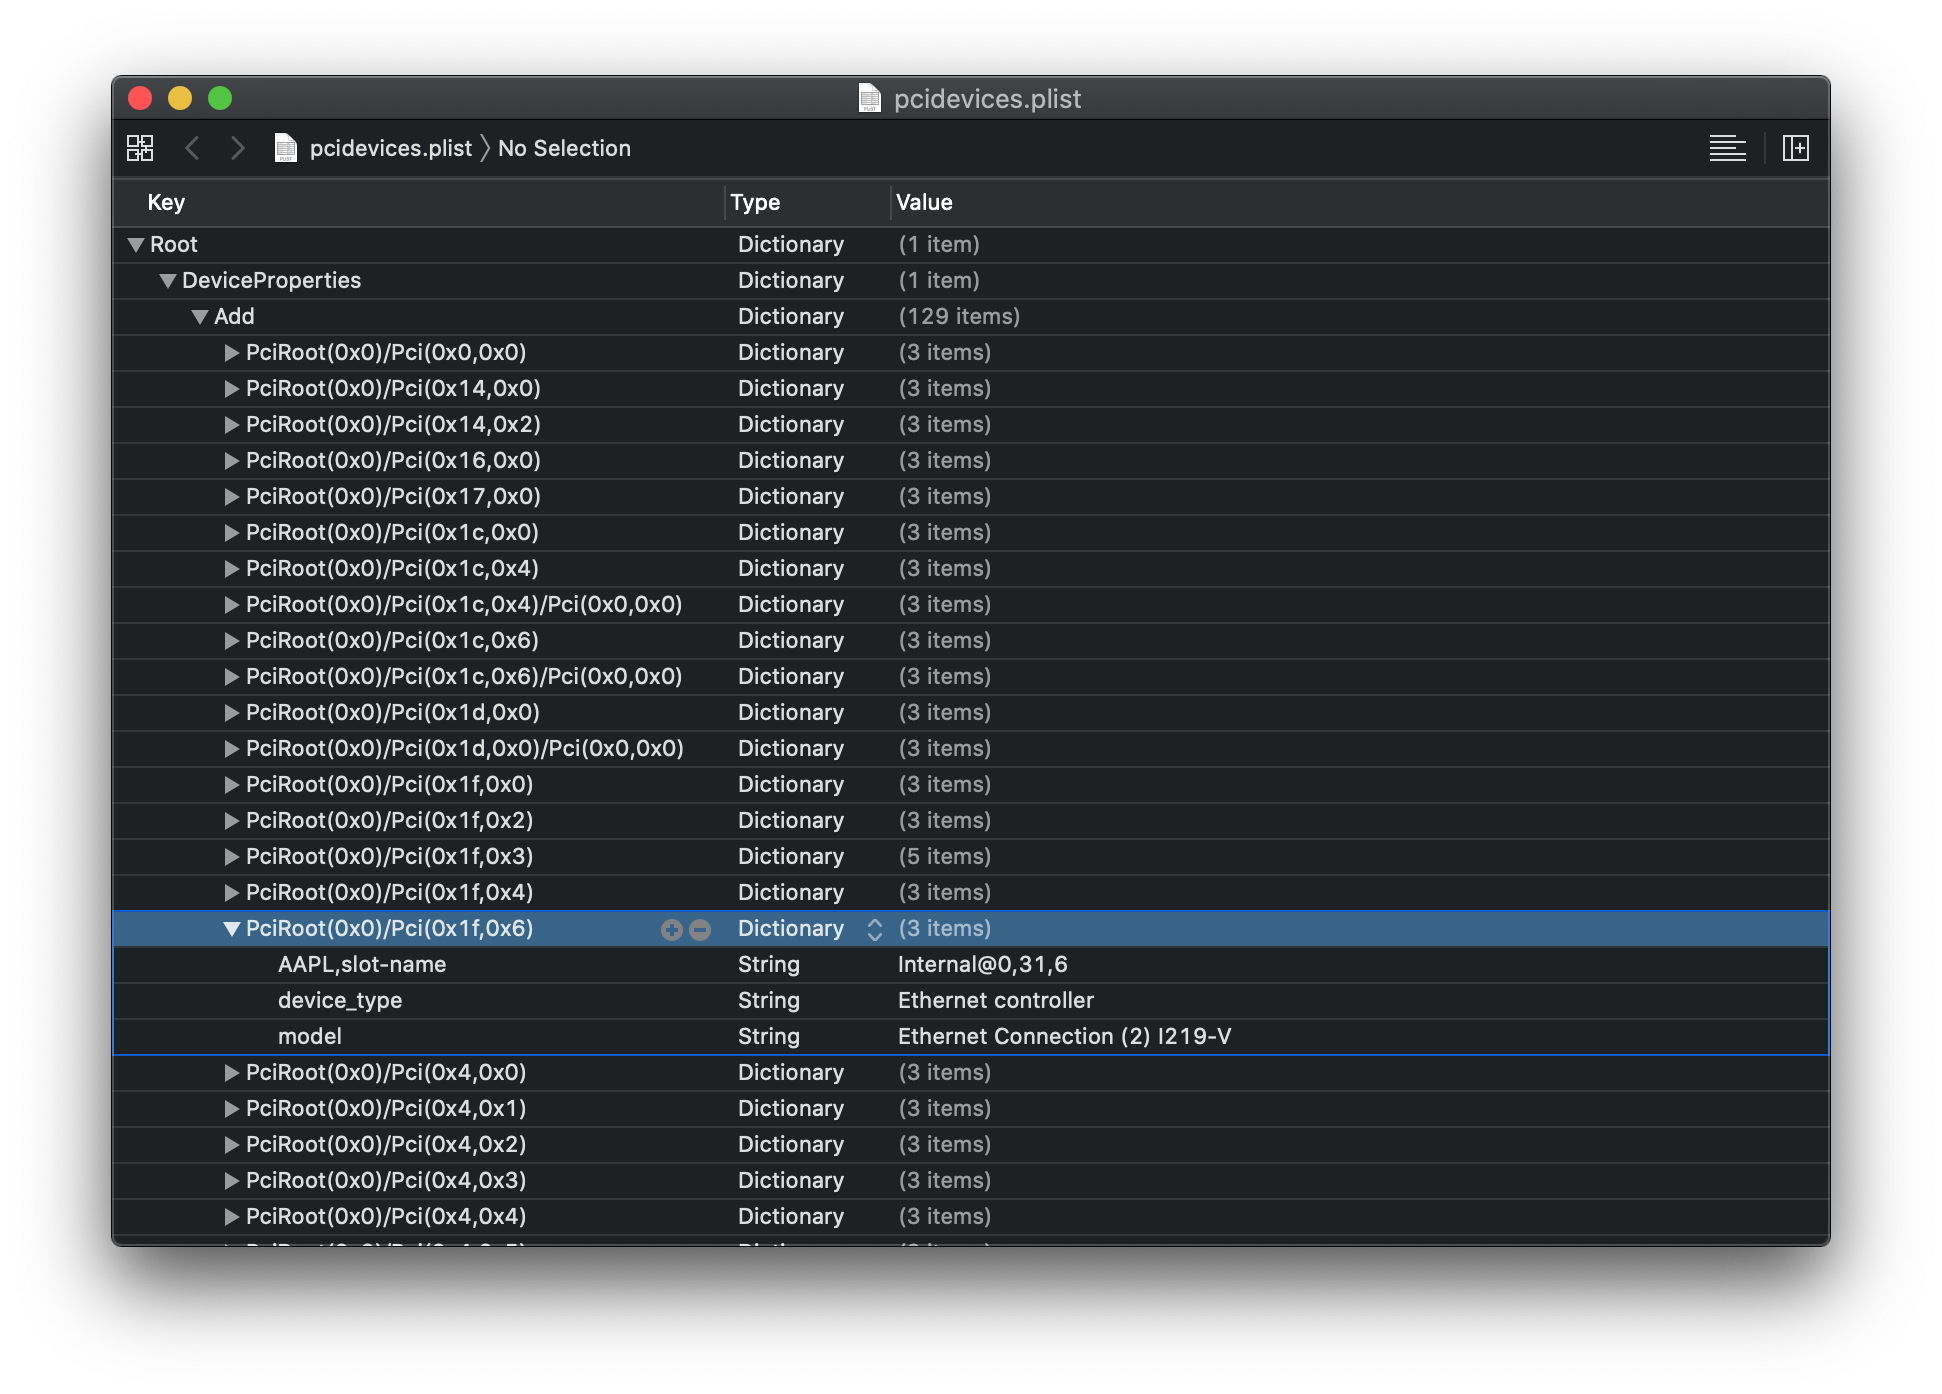
Now head under the PCI tab of Hackintool and export your PCI DeviceProperties, this will create a pcidevices.plist on your desktop
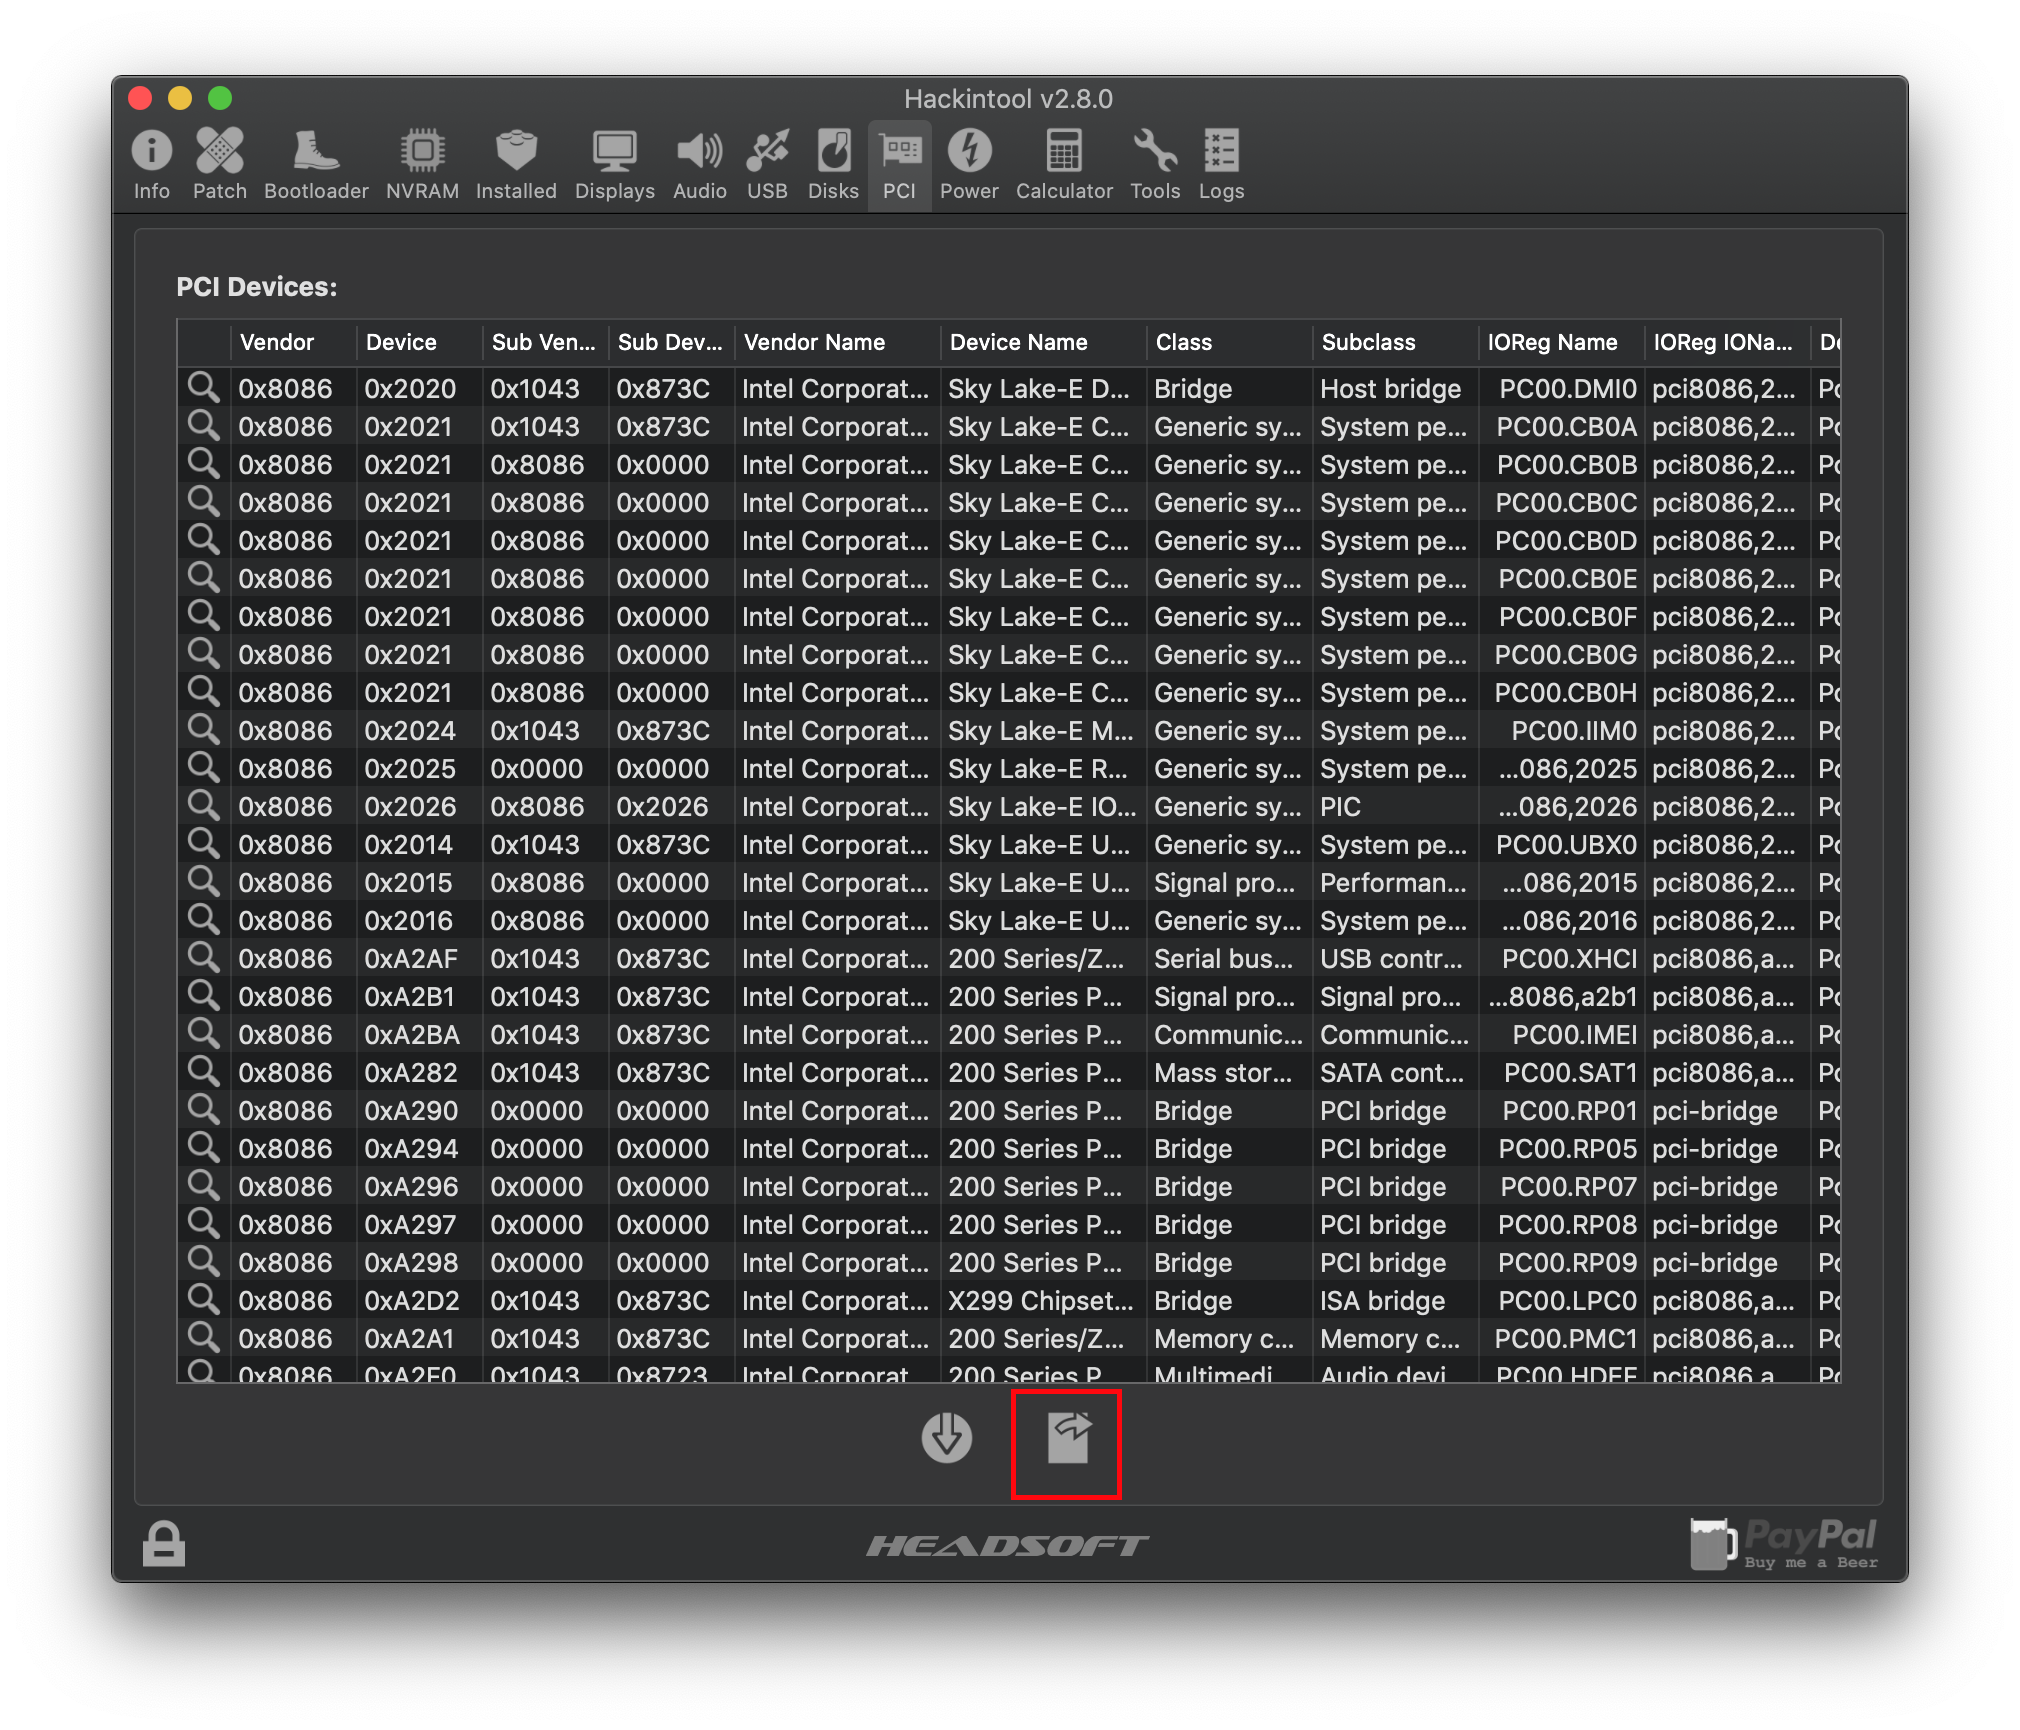
Now search through the pcidevices.plist and find the PciRoot of your ethernet controller. For us, this would be PciRoot(0x0)/Pci(0x1f,0x6)
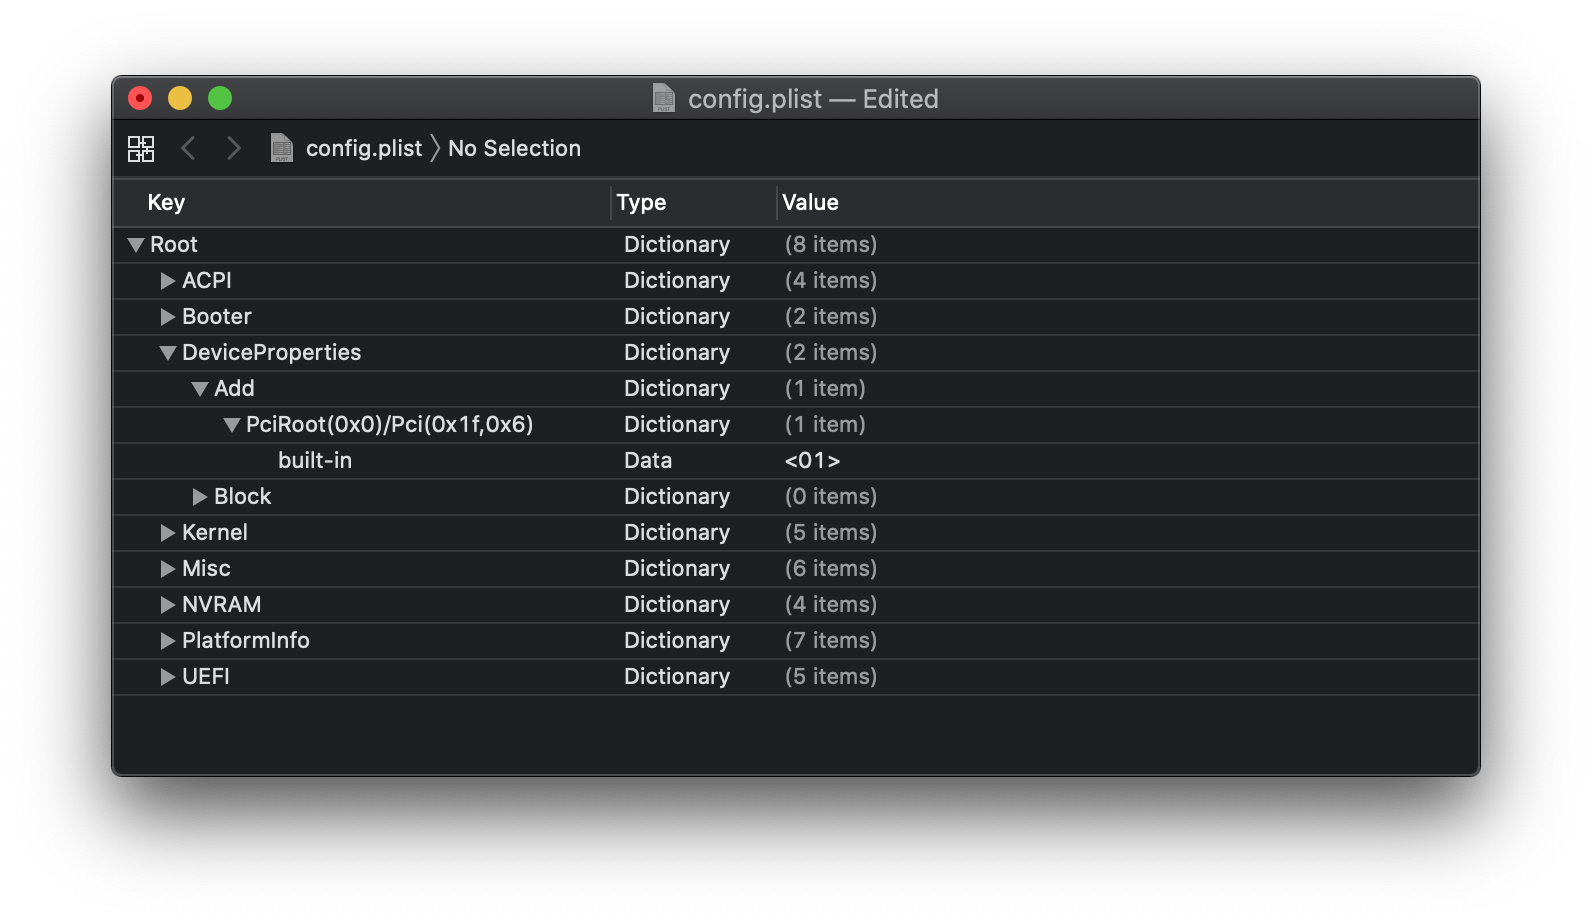
Now with the PciRoot, go into your config.plist -> DeviceProperties -> Add and apply the property of built-in with type Data and value 01
# Fixing ROM
This is a section many may have forgotten about but this is found in your config.plist under PlatformInfo -> Generic -> ROM
To find your actual MAC Address/ROM value, you can find in a couple places:
BIOS
macOS: System Preferences -> Network -> Ethernet -> Advanced -> Hardware -> MAC Address
Windows: Settings -> Network & Internet -> Ethernet -> Ethernet -> Physical MAC Address
Note: en0 can be either Wifi, ethernet or even Thunderbolt, adapt the above example to your situation.
Some users have even gone as far as using real Apple MAC Address dumps for their config, for this guide we'll be using our real MAC Address but note that this is another option.
When adding this to your config, c0:7e:bf:c3:af:ff should be converted to c07ebfc3afff as the Data type cannot accept colons (:).
# Verifying NVRAM
Something that many forget about iServices is that NVRAM is crucial to getting it working correctly, the reason being is that iMessage keys and such are stored in NVRAM. Without NVRAM, iMessage can neither see nor store keys.
So we'll need to verify NVRAM works, regardless if "it should work" as some firmwares can be more of a pain than others.
Please refer to the Emulated NVRAM section of the OpenCore Guide for both testing if you have working NVRAM and emulating it if you don't.
# Clean out old attempts
This is important for those who've tried setting up iMessage but failed, to start make sure your NVRAM has been cleared. You can enable the option in the boot picker in your config under config.plist -> Misc -> Security -> AllowNvramReset.
Next open terminal and run the following:
bash
sudo rm -rf ~/Library/Caches/com.apple.iCloudHelper*
sudo rm -rf ~/Library/Caches/com.apple.Messages*
sudo rm -rf ~/Library/Caches/com.apple.imfoundation.IMRemoteURLConnectionAgent*
sudo rm -rf ~/Library/Preferences/com.apple.iChat*
sudo rm -rf ~/Library/Preferences/com.apple.icloud*
sudo rm -rf ~/Library/Preferences/com.apple.imagent*
sudo rm -rf ~/Library/Preferences/com.apple.imessage*
sudo rm -rf ~/Library/Preferences/com.apple.imservice*
sudo rm -rf ~/Library/Preferences/com.apple.ids.service*
sudo rm -rf ~/Library/Preferences/com.apple.madrid.plist*
sudo rm -rf ~/Library/Preferences/com.apple.imessage.bag.plist*
sudo rm -rf ~/Library/Preferences/com.apple.identityserviced*
sudo rm -rf ~/Library/Preferences/com.apple.ids.service*
sudo rm -rf ~/Library/Preferences/com.apple.security*
sudo rm -rf ~/Library/Messages
# Verifying your work one last time
Grab macserial from the latest OpenCore release (opens new window) and run the following:
path/to/macserial -s
This will provide us with a full rundown of our system, verify that what is presented matches up with your work.
# Cleaning up your AppleID
- Remove all devices from your AppleID: Manage your devices (opens new window)
- Enable 2 Factor-Auth
- Remove all iServices from Keychain, some examples:
ids: identity-rsa-key-pair-signature-v1
ids: identity-rsa-private-key
ids: identity-rsa-public-key
ids: message-protection-key
ids: message-protection-public-data-registered
ids: personal-public-key-cache
iMessage Encryption Key
iMessage Signing Key
com.apple.facetime: registrationV1
etc ...
And a final layer of precaution is to make a new AppleID to play with, this makes sure that if you do end up blacklisting your account that it's not your main.
TIP
Adding a payment card to the account and having a decent amount of purchases can also help. While not concrete, you can think of an AppleID as a credit score where the better an Apple customer you are the more likely they won't have activation issues or get an easier pass with Apple Support
::
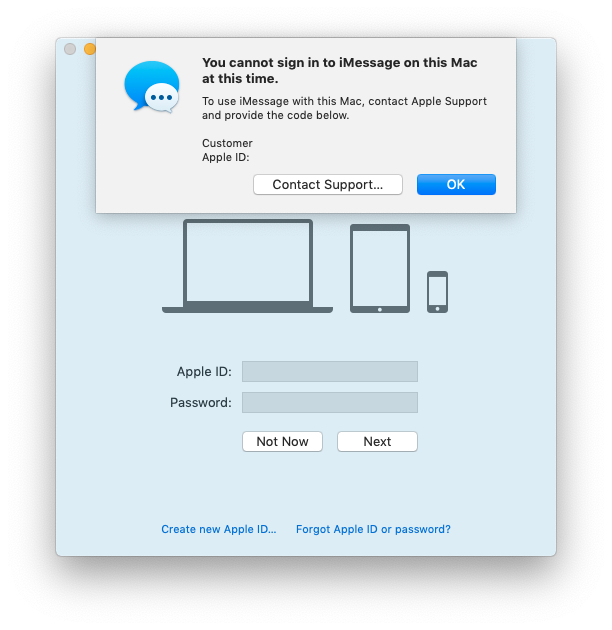
# Customer Code error
Well mate, you've done it. You blacklisted your AppleID. The fix is simple but not pretty, you MUST call Apple (opens new window). Otherwise, there is no proceeding besides using a new account. Adding a payment card before calling can help legitimize the account so it doesn't seem as much like a bot.
- For Apple contacting, there are 2 methods
- Apple calls you: Apple Support (opens new window). You must click on Apple ID and then select the iCloud, Facetime & Messages. Now, you should click on Talk to Apple Support Now and type your phone number
- You can contact Apple for support and service as well, look for your country in the list and then make a phone call: Apple Support Phone Numbers (opens new window)