# Finding your hardware
This section is mostly a mini-guide on how to find what hardware you're currently running; this is mainly relevant for laptop and prebuilt users as hardware specs are a bit more difficult to obtain. You can skip this page and head to Creating the USB if you already know what hardware you have.
For this, we'll assume you have Windows or Linux installed:
# Finding Hardware using Windows
For this we mainly have 2 options:
- Windows' built-in Device Manager
- AIDA64 (opens new window)
Due to the easier to use GUI, we recommend downloading AIDA64 and running this as it's much easier to grab specs. However we'll show you both methods for obtaining hardware specs.
# CPU Model
| AIDA64 | Device Manager |
|---|---|
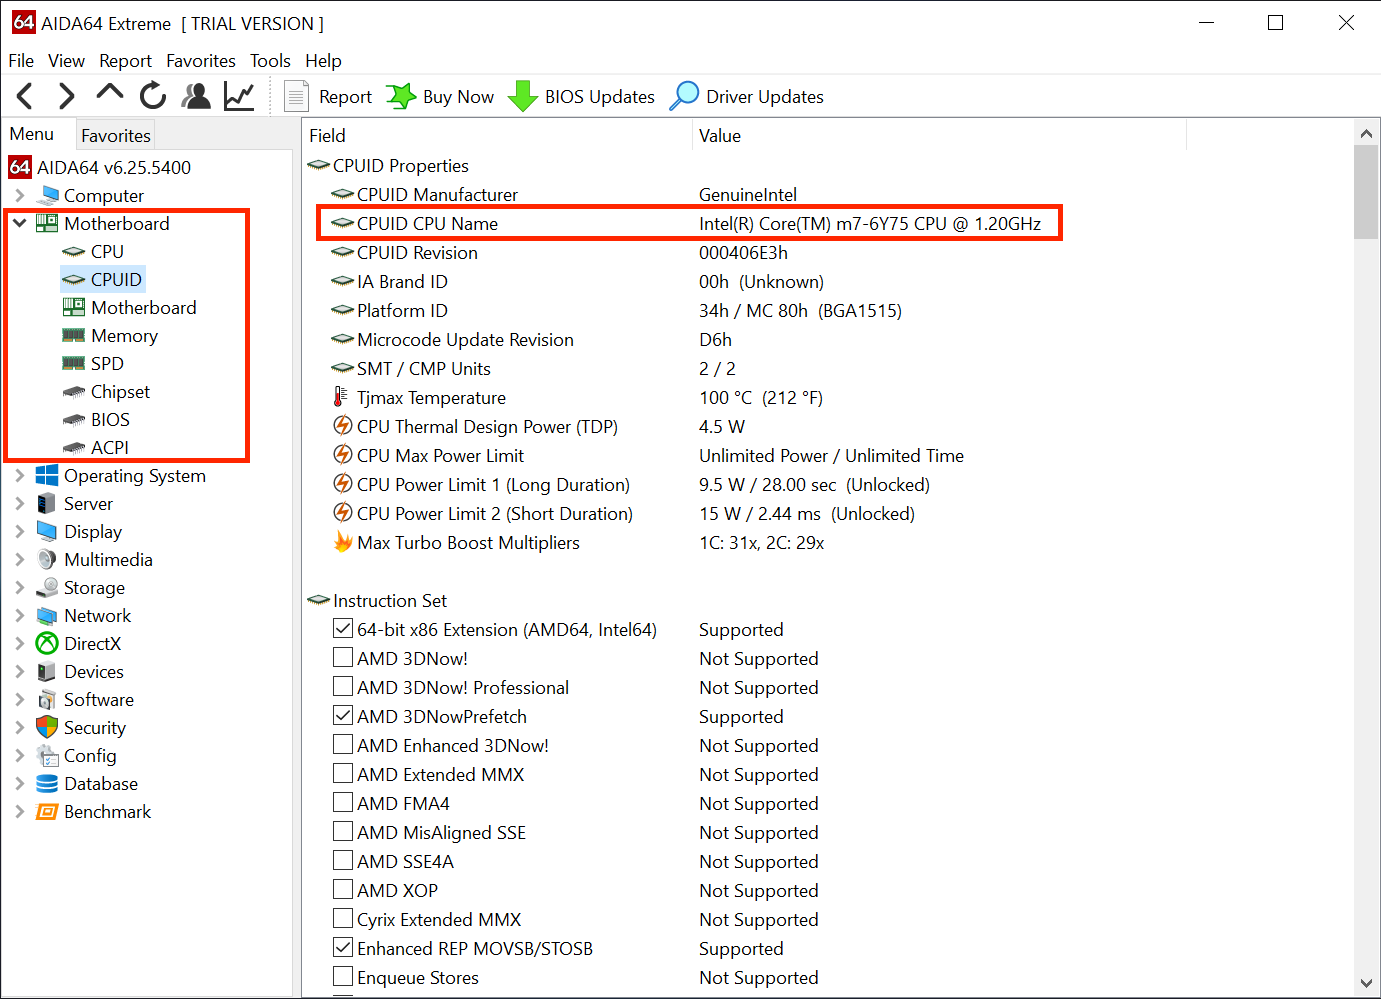 | 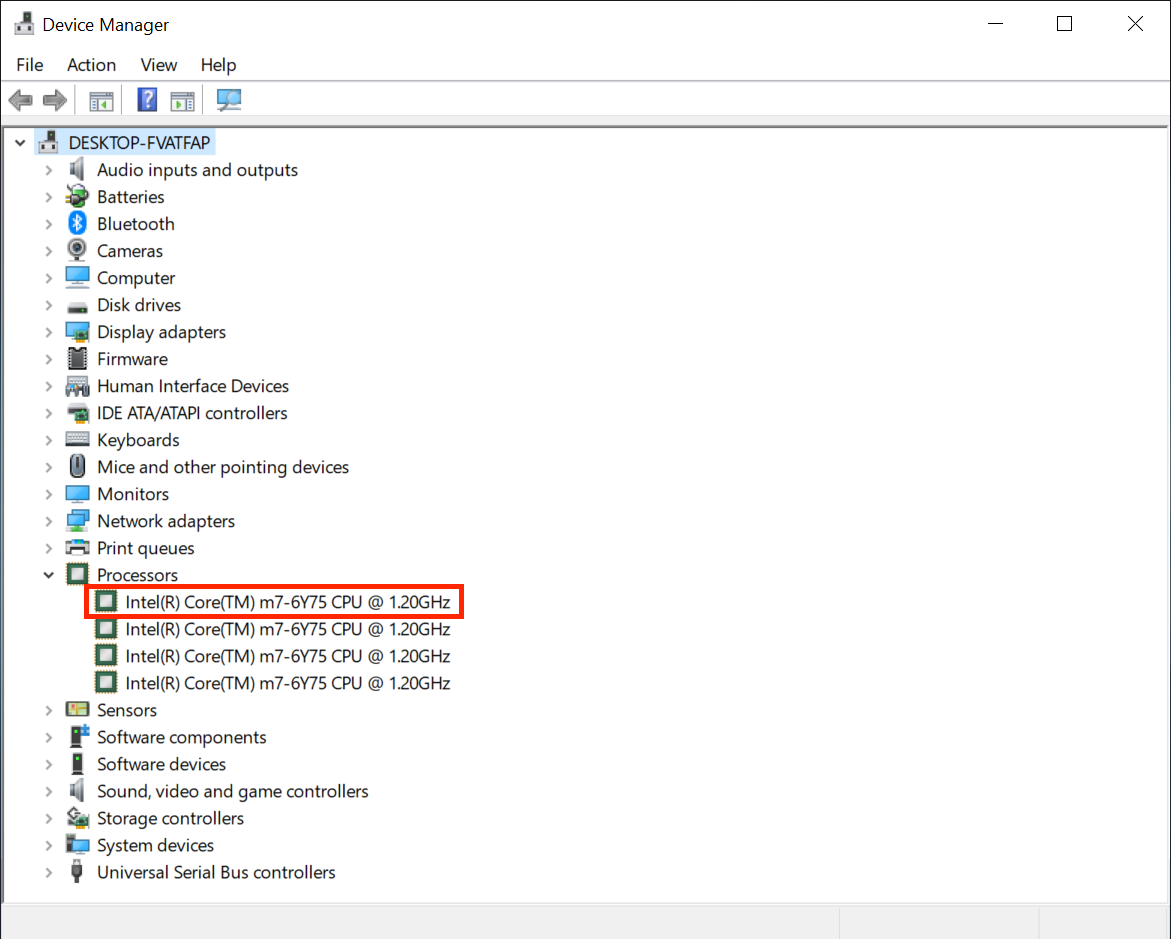 |
# GPU Model
| AIDA64 | DeviceManager |
|---|---|
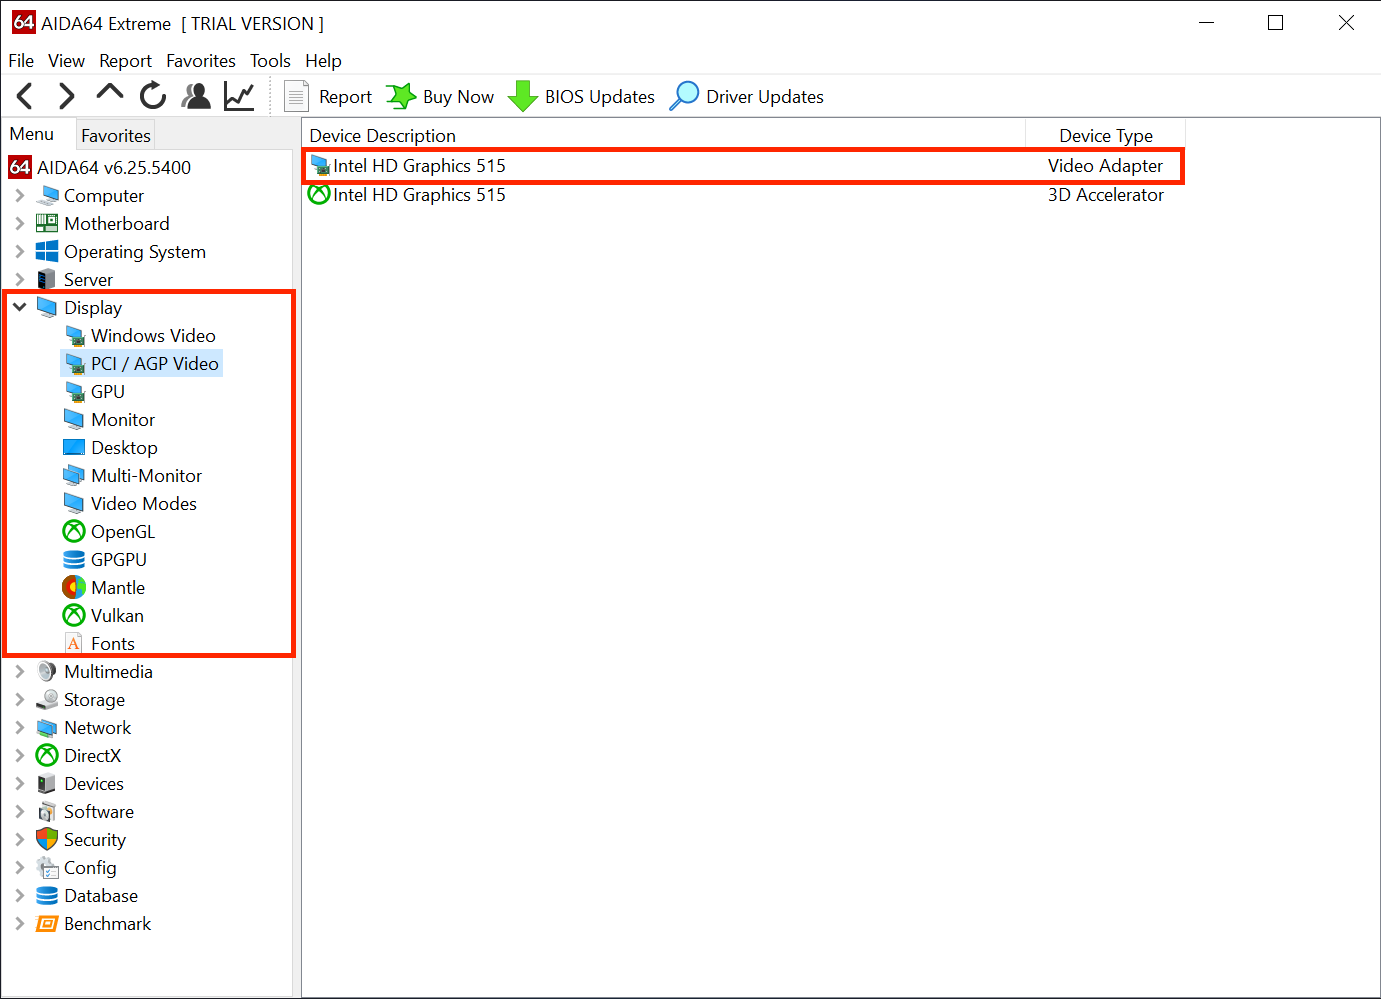 | 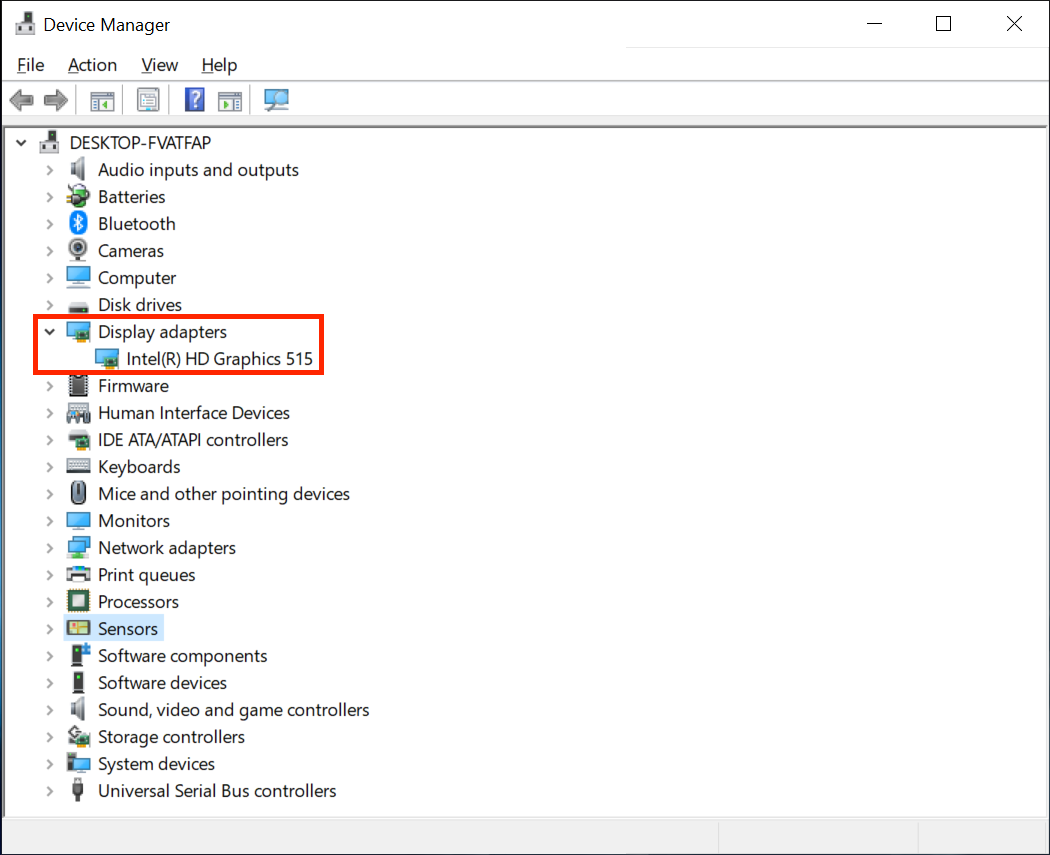 |
# Chipset Model
| AIDA64 | DeviceManager |
|---|---|
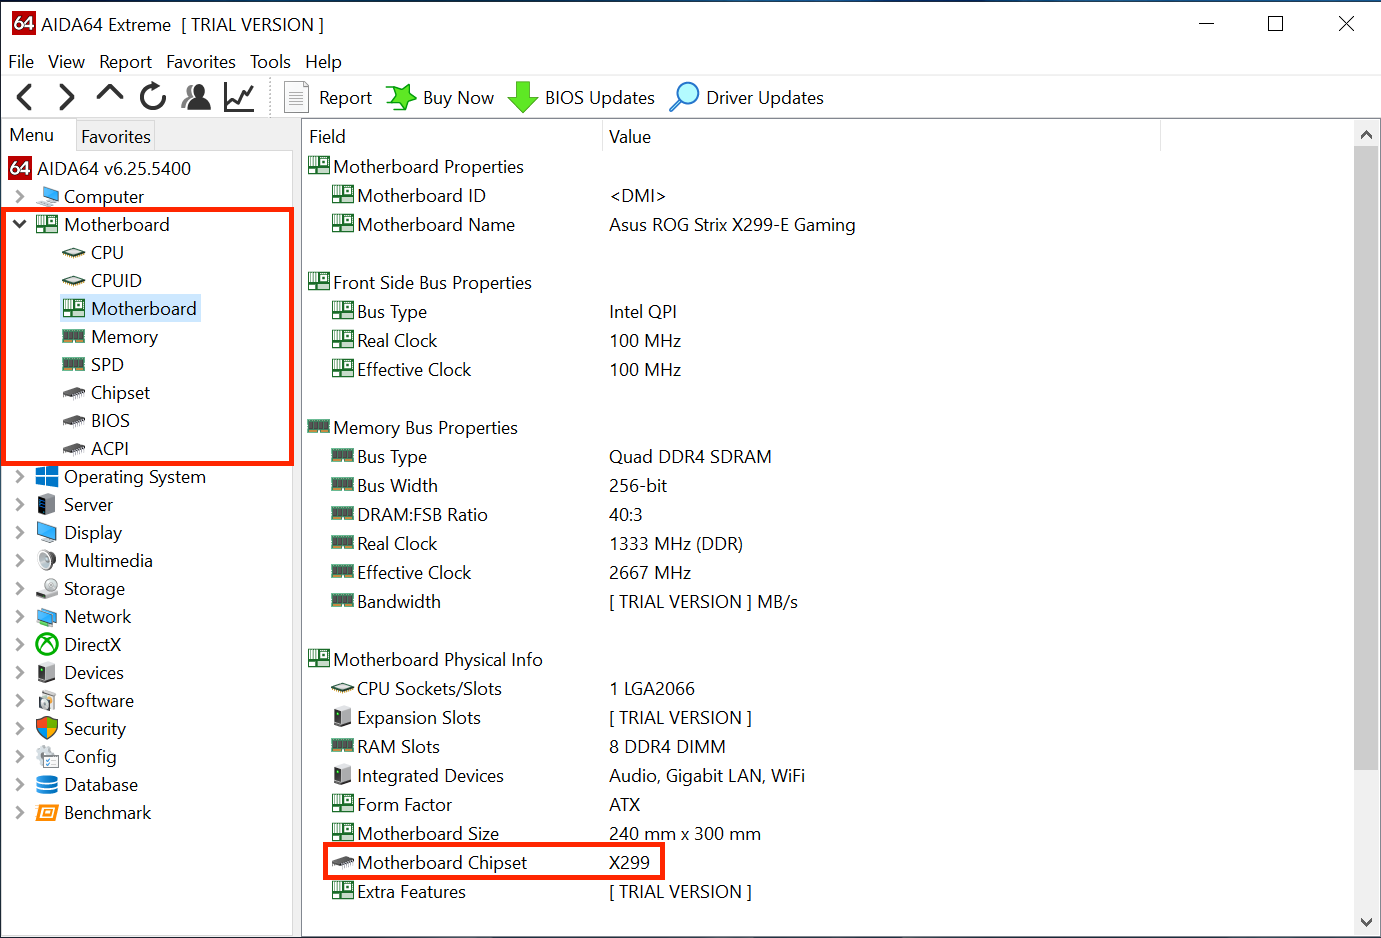 | 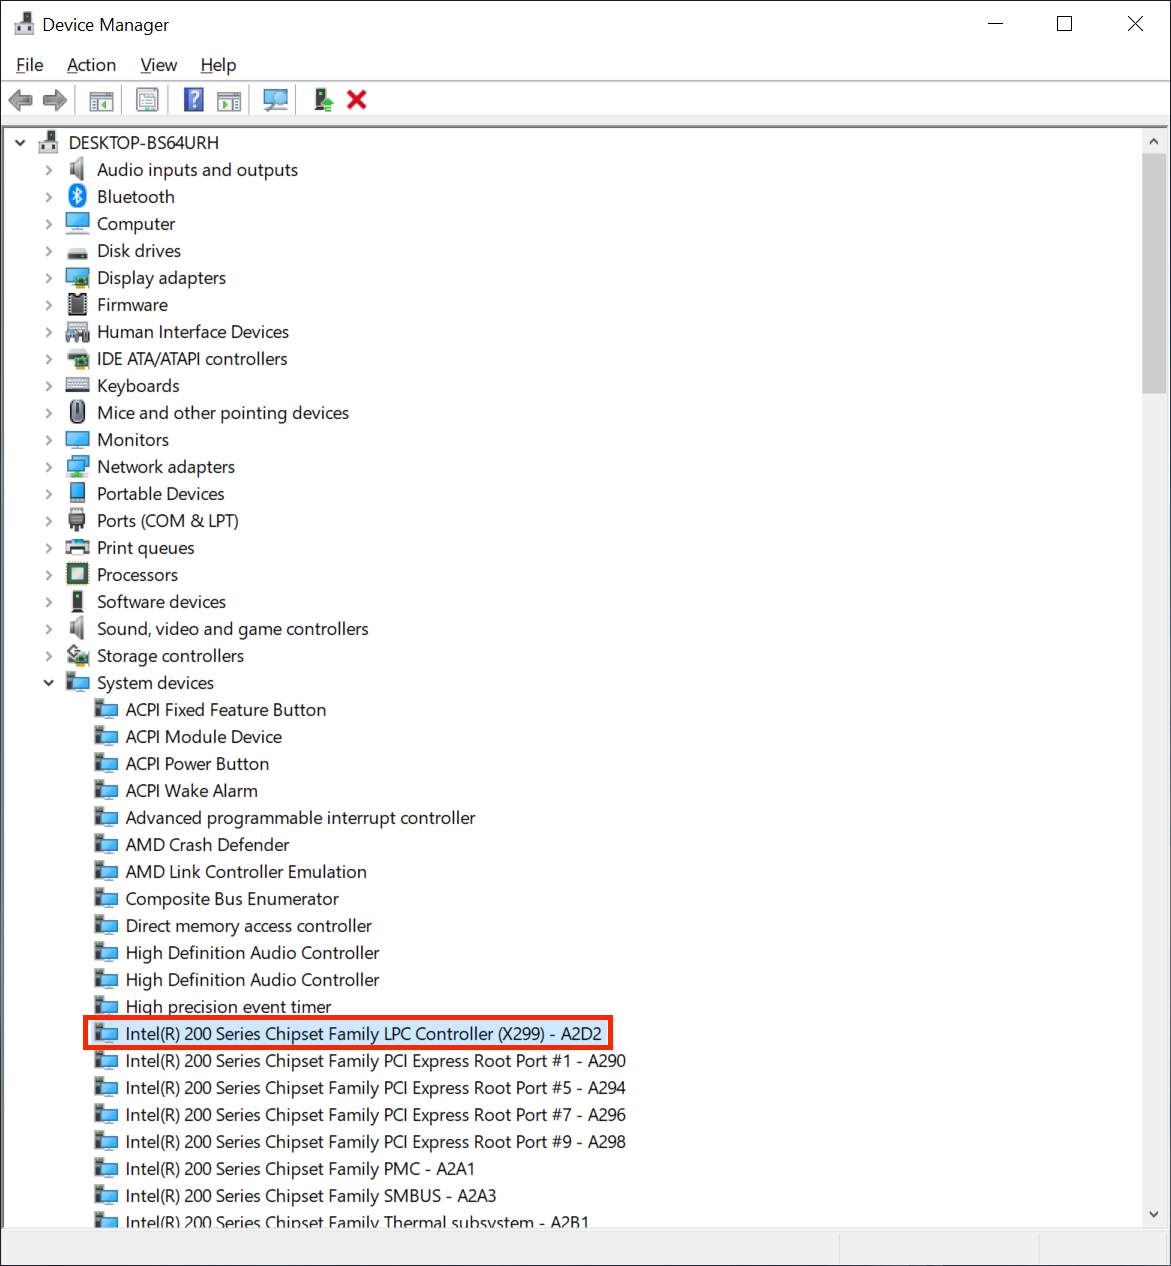 |
- Note: Intel SOC based CPUs will have the chipset and other features already on the same die instead of being dedicated chips. This means trying to detect the exact chipset is a bit more difficult
# Keyboard, Trackpad and Touchscreen Connection Type
| DeviceManager |
|---|
 |
AIDA64 unfortunately doesn't provide any useful info regarding pointer devices, so we recommend using DeviceManager for this.
You can find these devices under the following:
Human Interface DevicesKeyboardsMice and other Pointer Devices
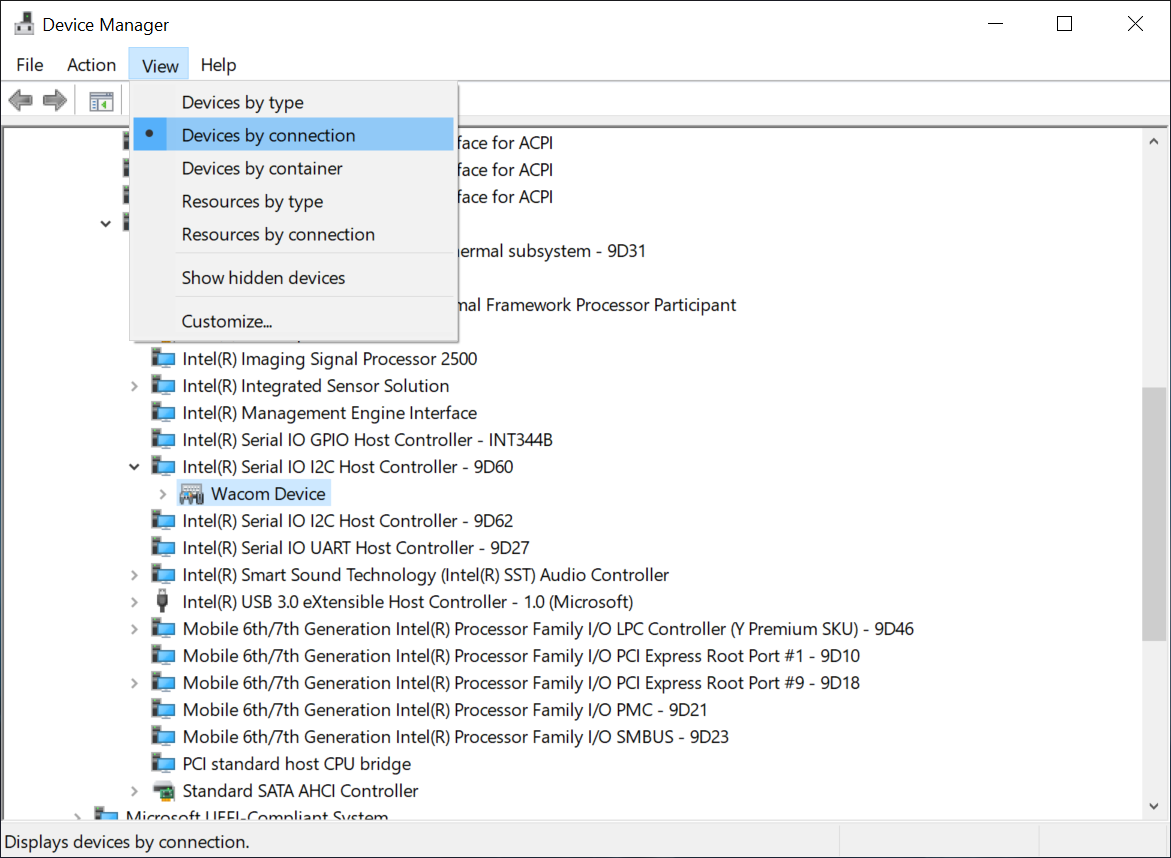
To view the exact connection type of the device, select the pointer device then enter
View -> Device by Connection. This will clarify whether it's over PS2, I2C, SMBus, USB, etc
Depending on the device, it may show up under multiple names and connections. The main ones to keep an eye on:
SMBus
These will show up as a straight PCI device such as Synaptics SMBus Driver or ELAN SMBus Driver
- Synaptics devices will show up under both PS2 under
Synaptics PS2 device/Synaptics Pointing Deviceand PCI asSynaptics SMBus Driver
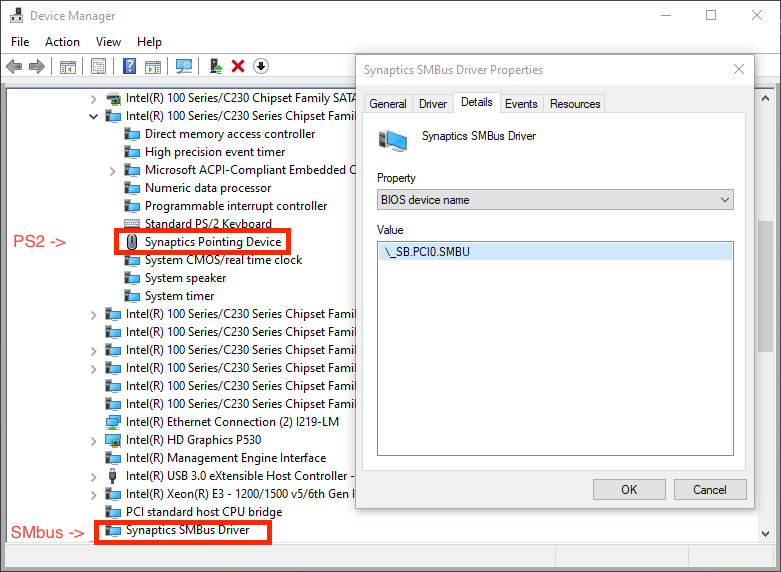
As you can see, we get 2 Synaptics devices in the left image, however if we take a closer look we'll see the top device is PS2, while the bottom one is SMBus. While you can use the trackpad in either mode, SMBus generally provides better gesture support and accuracy.
USB
| Device by Type | Device by Connection |
|---|---|
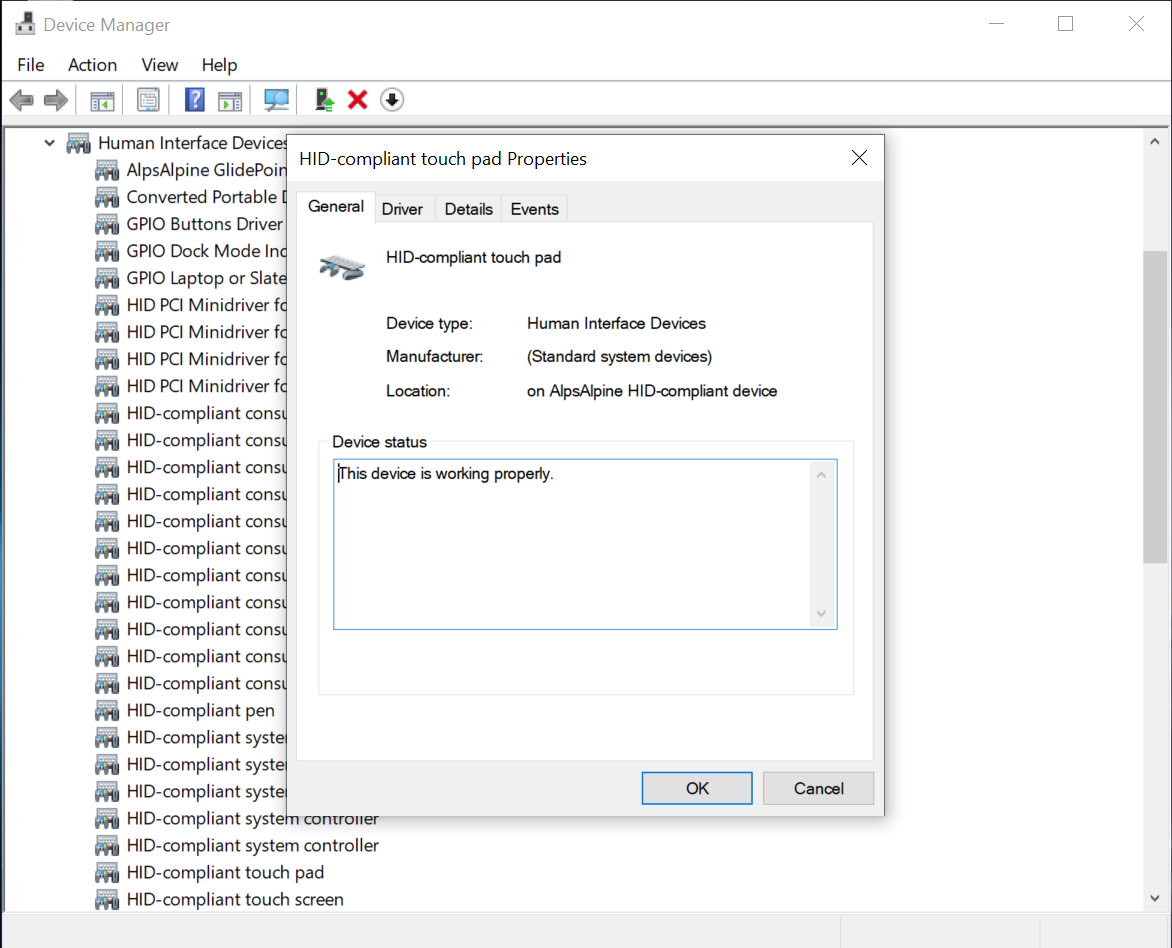 | 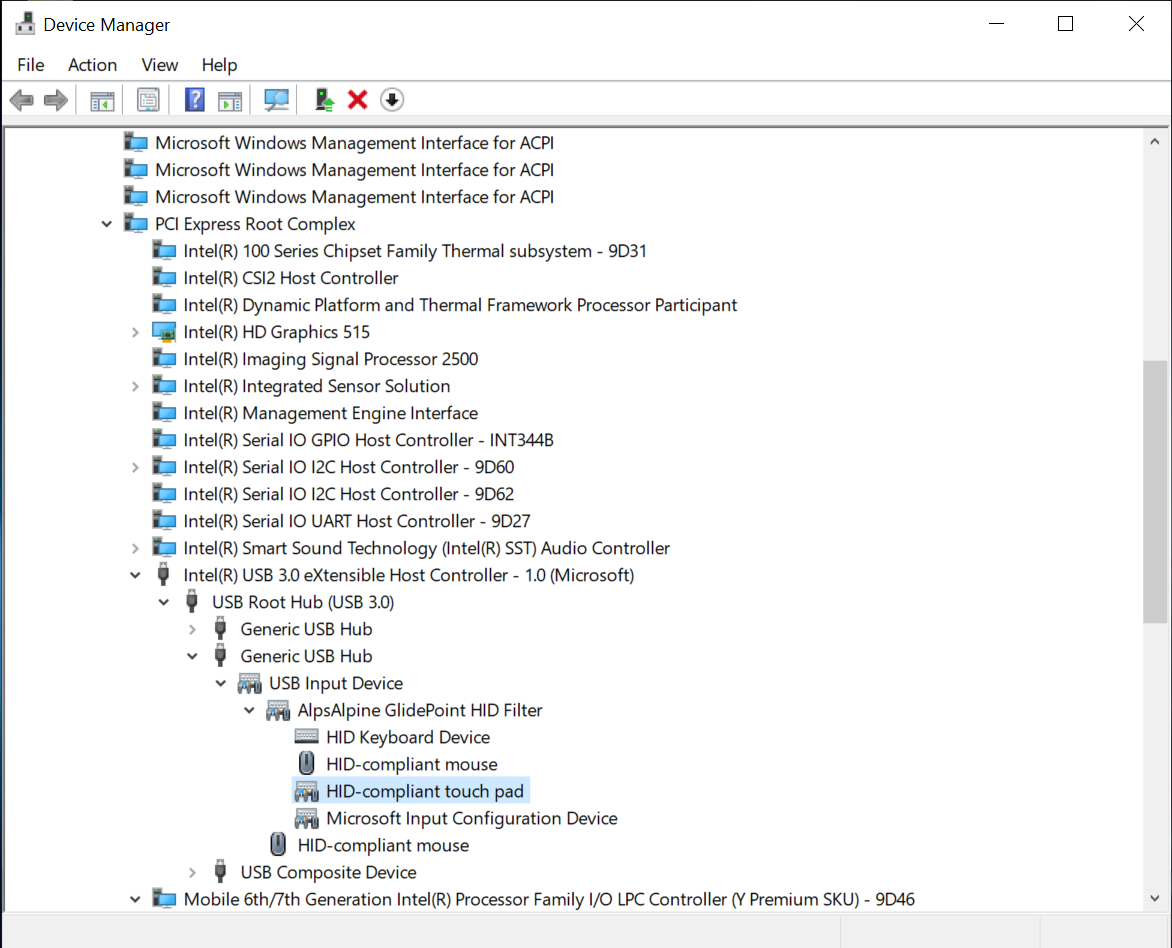 |
These will show up as a PS2 Compliant Trackpad, as well under USB when we switch our connection view to Device by Connection
I2C
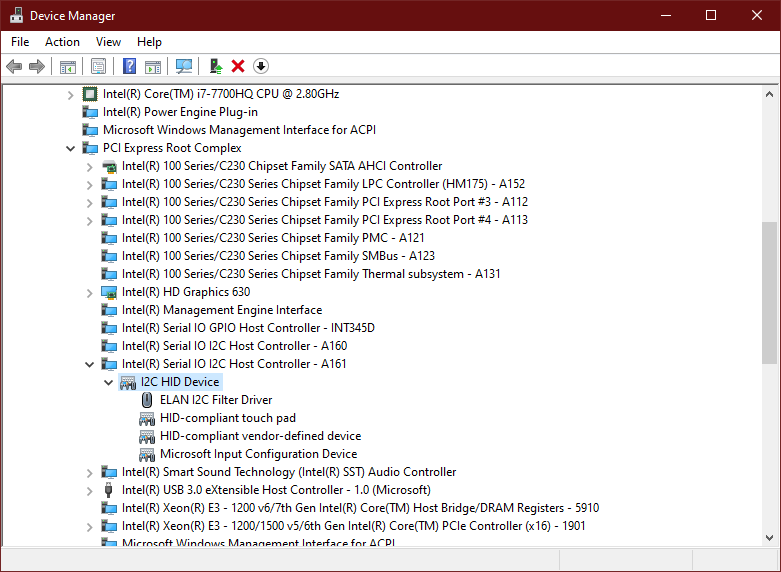 These will almost always show up as a Microsoft HID device, though can appear as other trackpads as well. They will always show up under I2C though.
# Audio Codec
| AIDA64 | DeviceManager |
|---|---|
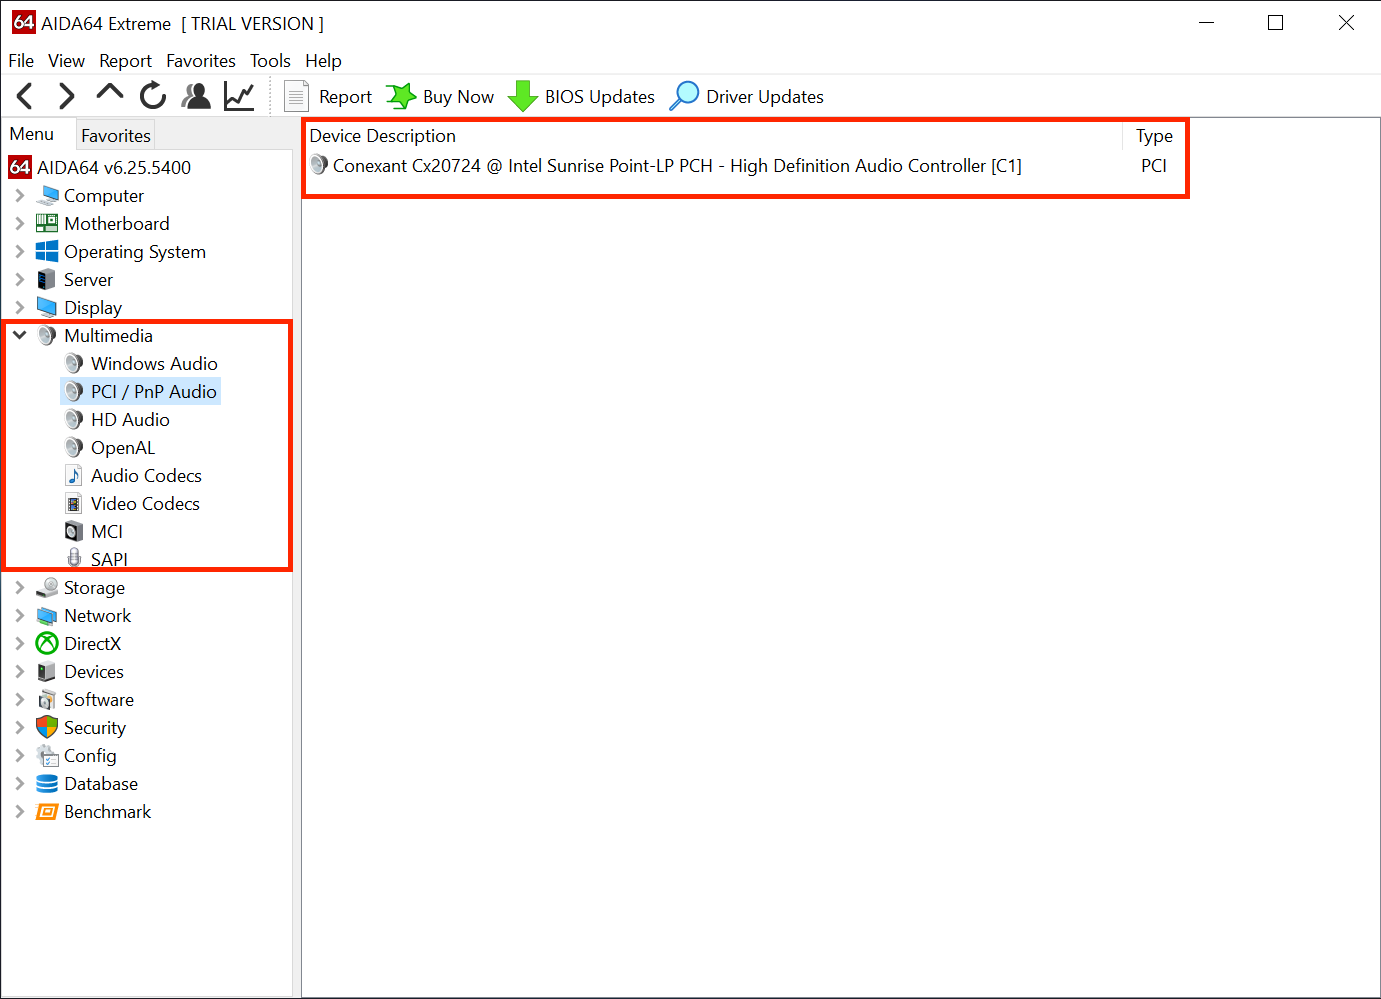 | 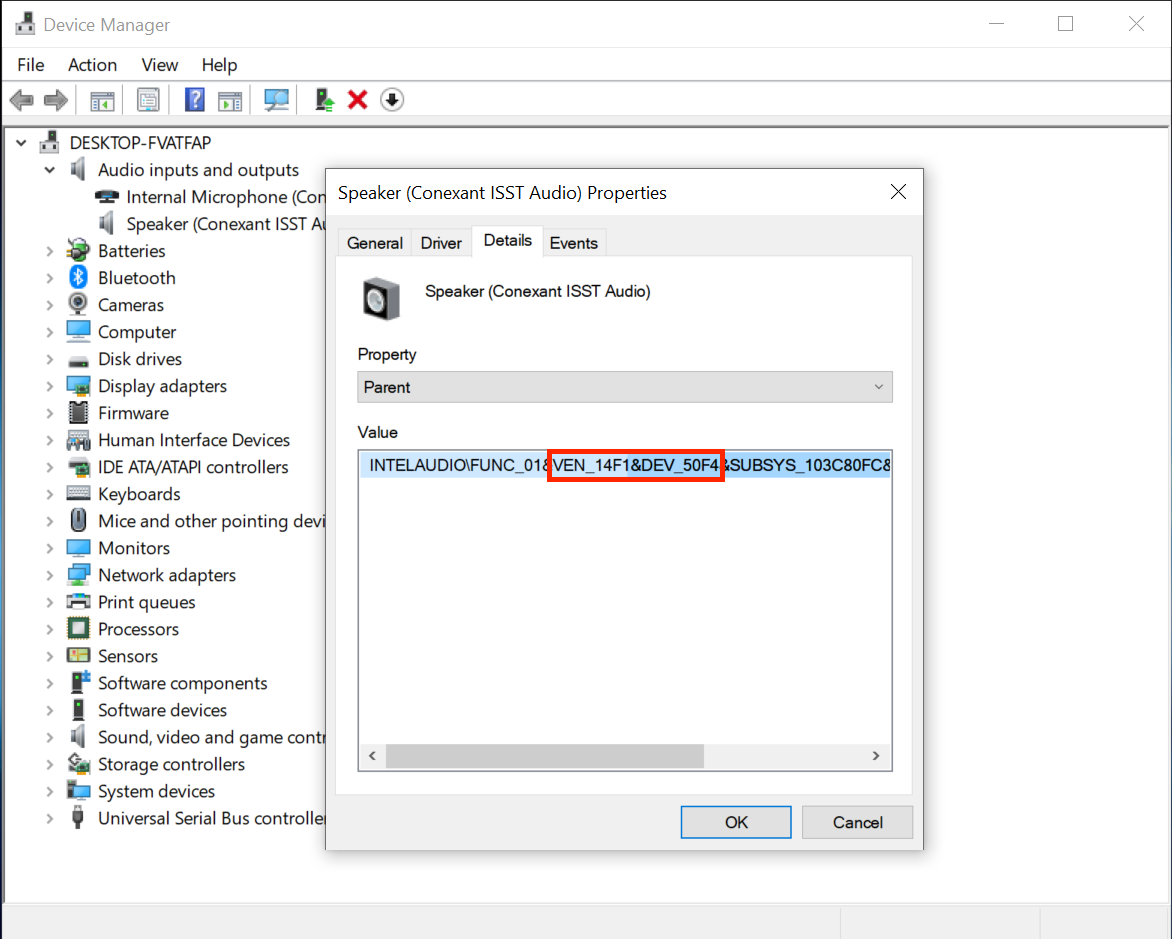 |
Due to how certain OEMs present device names, the most accurate info you can get with DeviceManager is via the PCI ID(ie. pci 14F1,50F4). This means you'll need to google the ID and figure out the exact device ID, however AIDA64 can present the name properly which is quite a bit easier on the end user.
# Network Controller models
| AIDA64 | Device Manager |
|---|---|
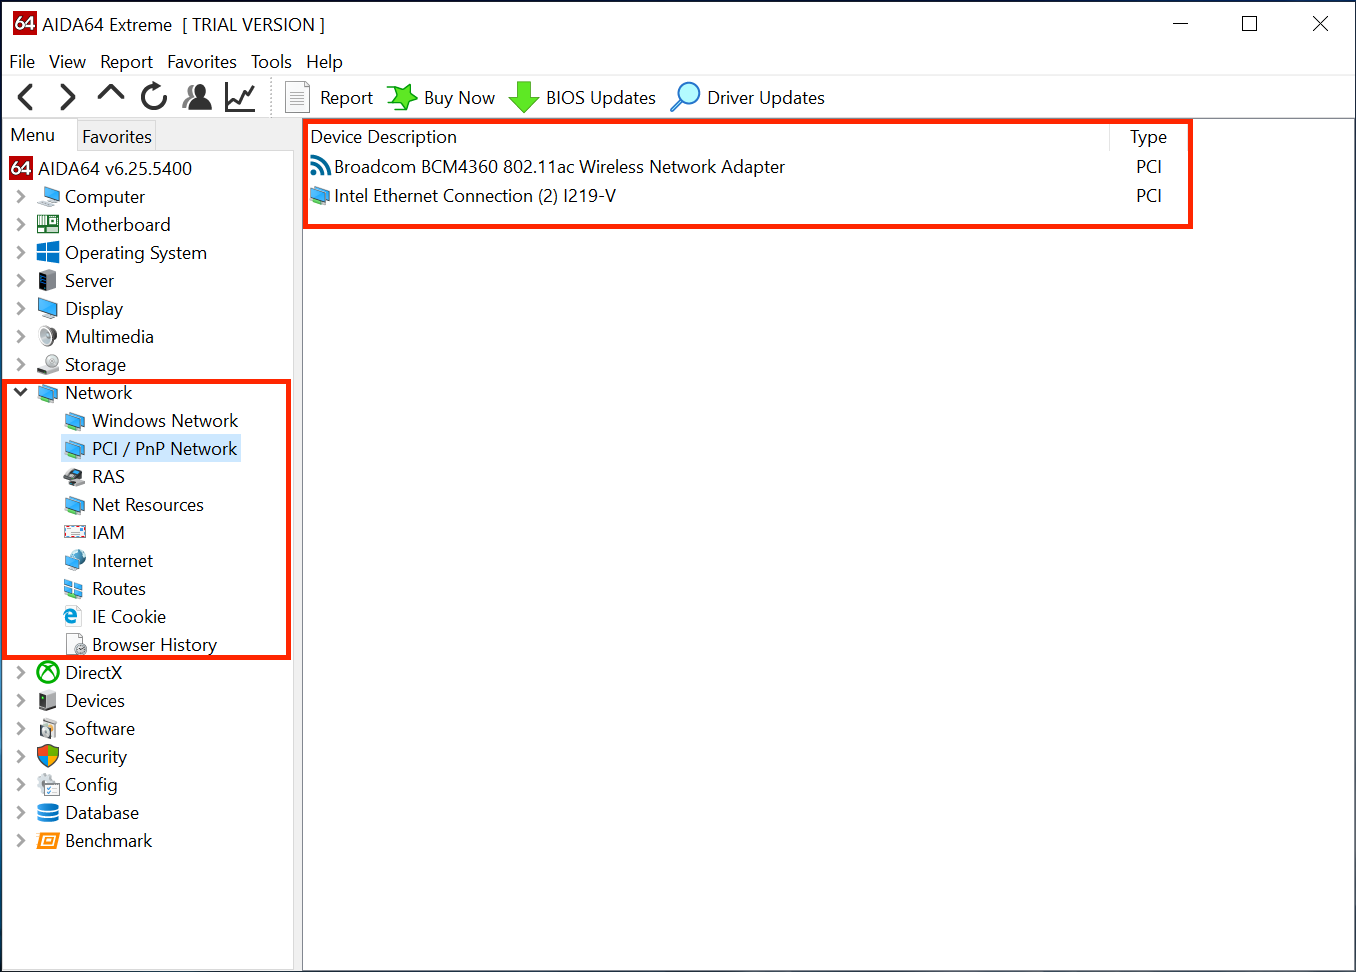 | 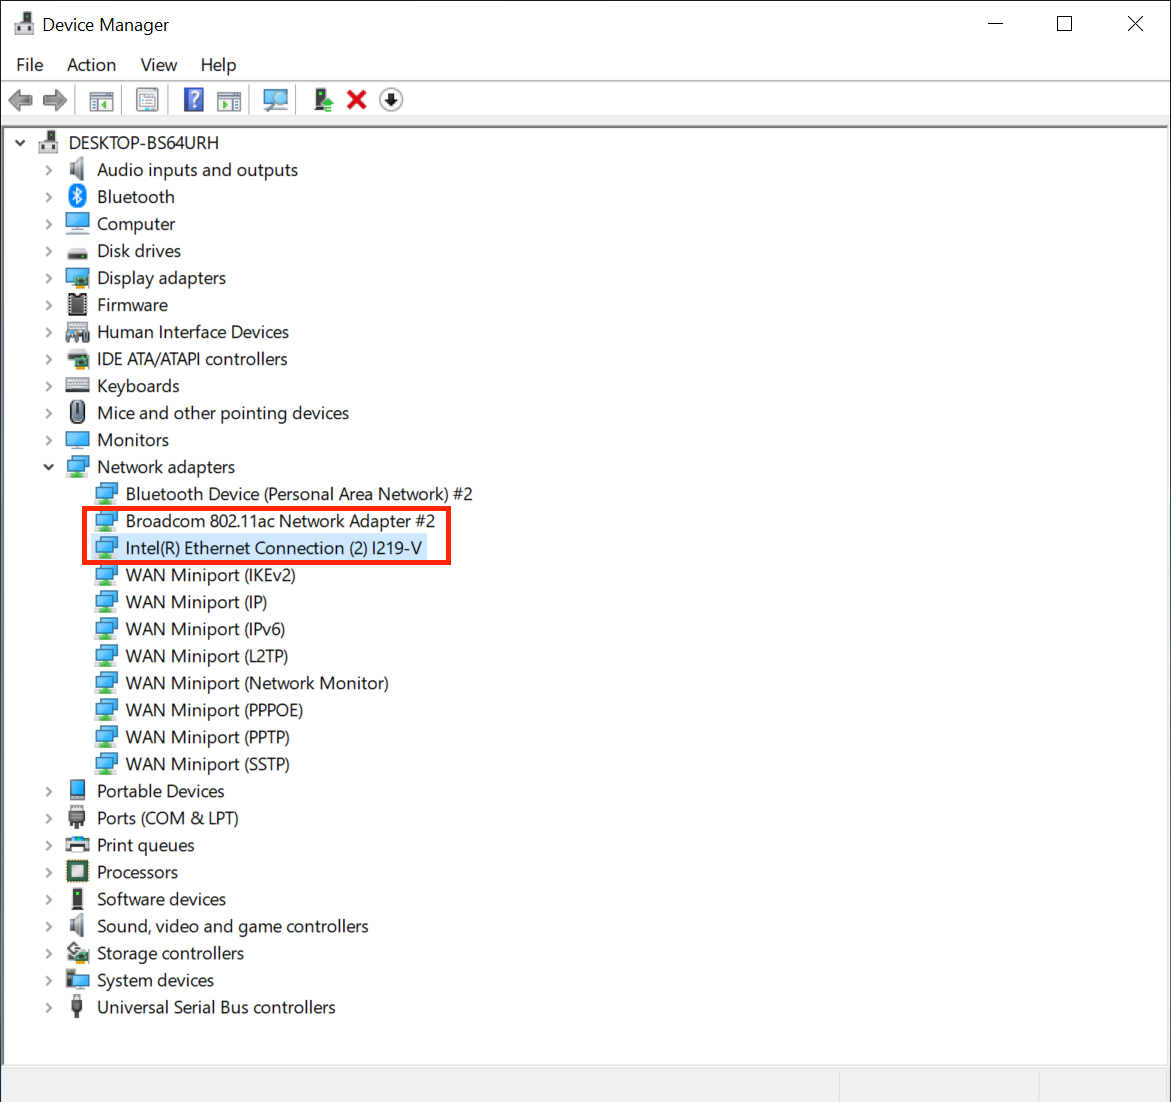 |
Due to how certain OEMs present device names, the most accurate info you can get with Device Manager is via the PCI ID (ie. PCI\VEN_14E4&DEV_43A0 corresponds to a vendor ID of 14E4 and a device ID of 43A0). This means you'll need to Google the ID and figure out the exact device ID; however, AIDA64 can present the name properly which can be quite a bit easier.
# Drive Model
| AIDA64 | Device Manager |
|---|---|
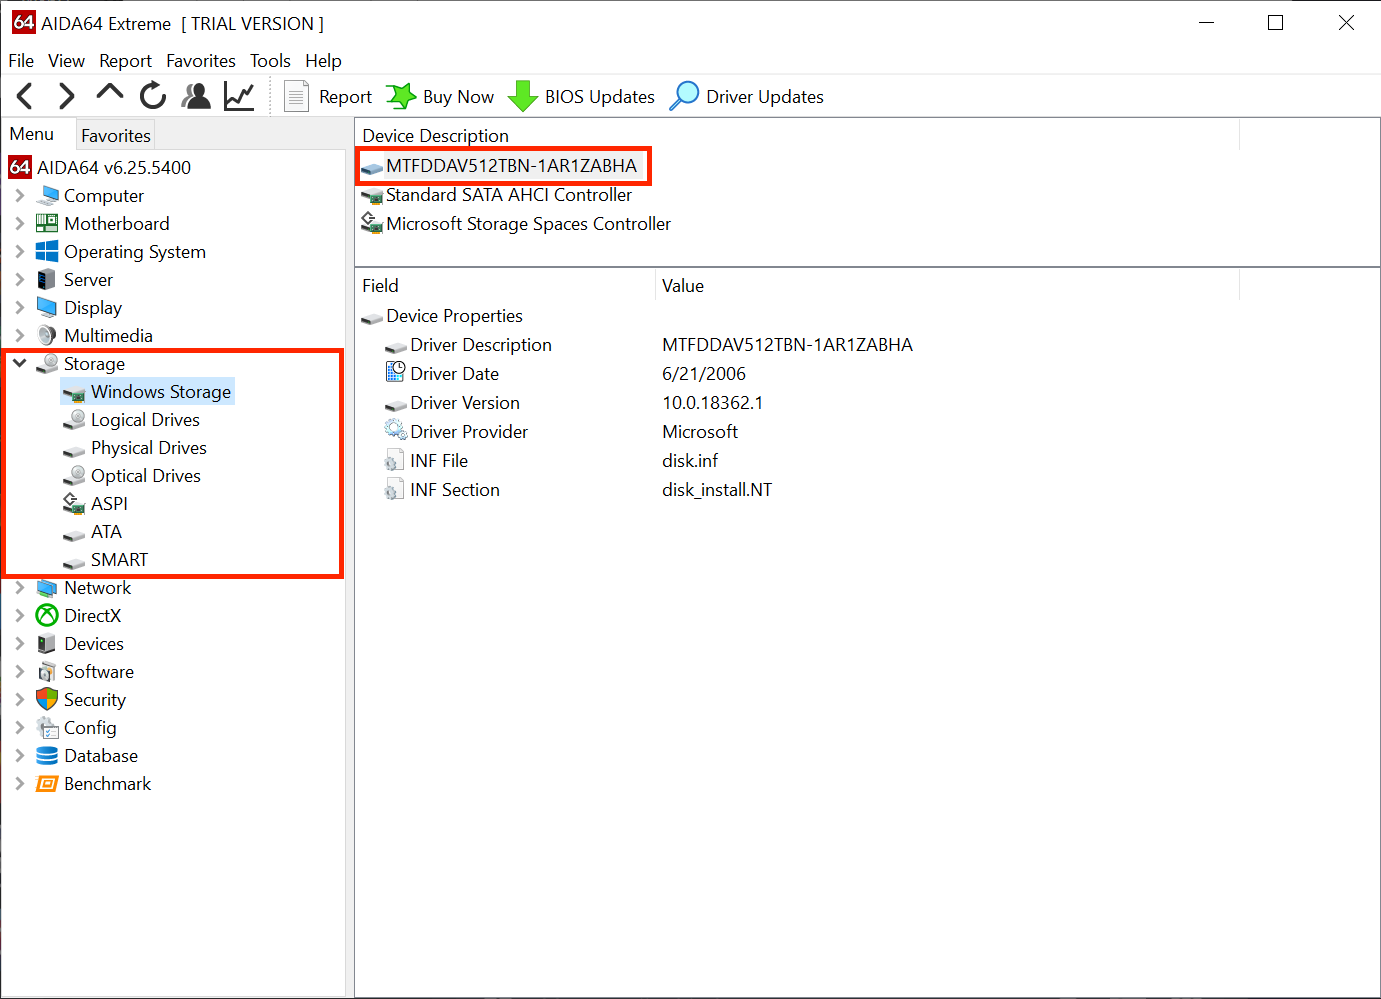 | 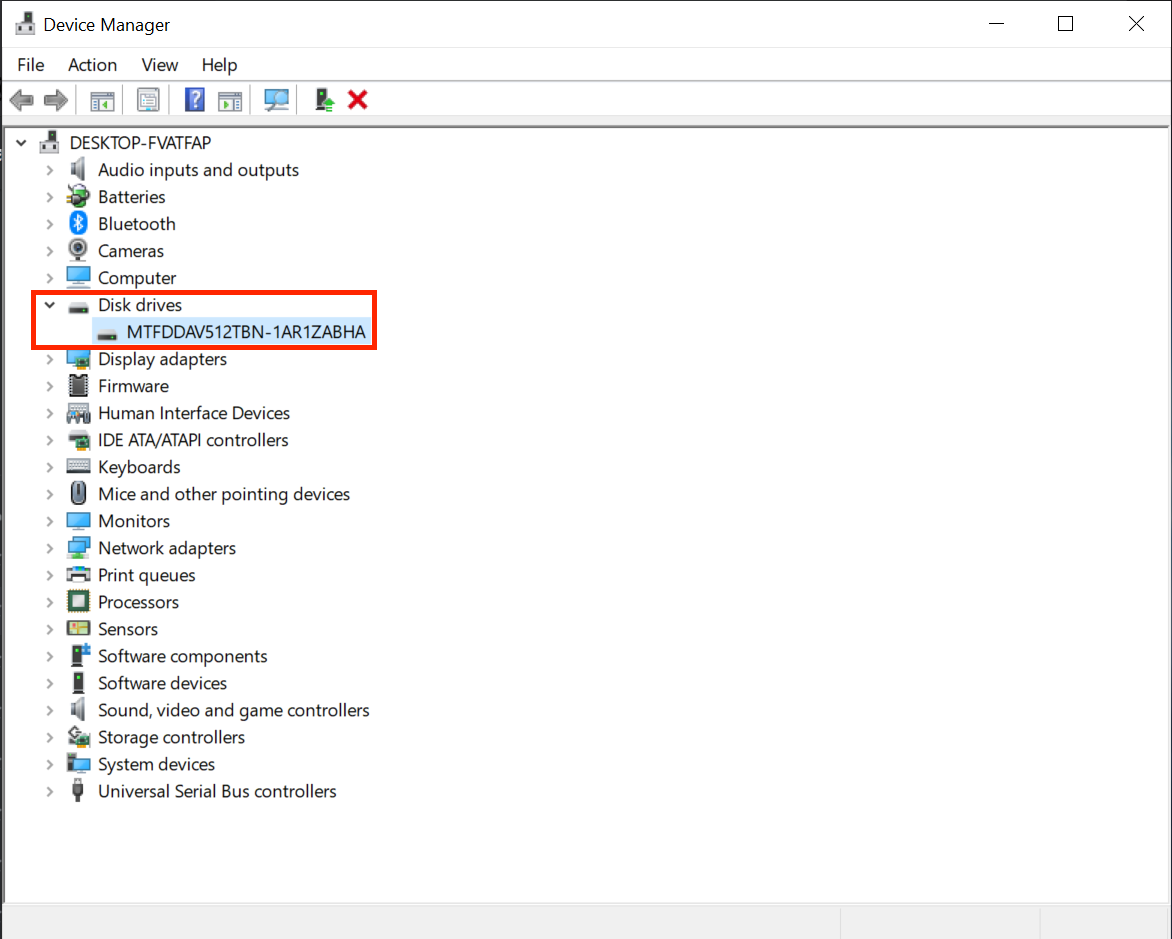 |
Due to OEMs not providing much details about the drive, you'll need to Google a bit which drive matches up with the displayed name.
# Finding Hardware using Linux
For finding hardware using Linux, we'll be using a few tools:
pciutilsdmidecode
Below you'll find a list of commands to run in the terminal, thankfully most Linux distros will come with these tools already installed. If not, you will likely find them in your distro's package manager.
# CPU Model
grep -i "model name" /proc/cpuinfo
# GPU Model
lspci | grep -i --color "vga\|3d\|2d"
# Chipset Model
dmidecode -t baseboard
# Keyboard, Trackpad and Touchscreen Connection Type
dmesg | grep -i input
# Audio Codec
aplay -l
# Network Controller models
Basic info:
lspci | grep -i network
More in-depth info:
lshw -class network
# Drive Model
lshw -class disk -class storage
# Finding Hardware using OCSysInfo
There are 2 methods of obtaining and running OCSysInfo:
- Precompiled binaries (opens new window)
- Manually cloning the repository (opens new window)
TIP
We recommend you download the binaries (opens new window), as it is the simplest and easiest method.
If you want to learn more about manually cloning the repository, you can check out the OCSysInfo mini-guide (opens new window).
# Discovering hardware
WARNING
Laptop users: before we start, we advise you to disconnect any external USB devices, as this may lead to ambiguous or unnecessary information collected which may confuse you.
After you've successfully installed and ran the application, you should be greeted with the following screen:
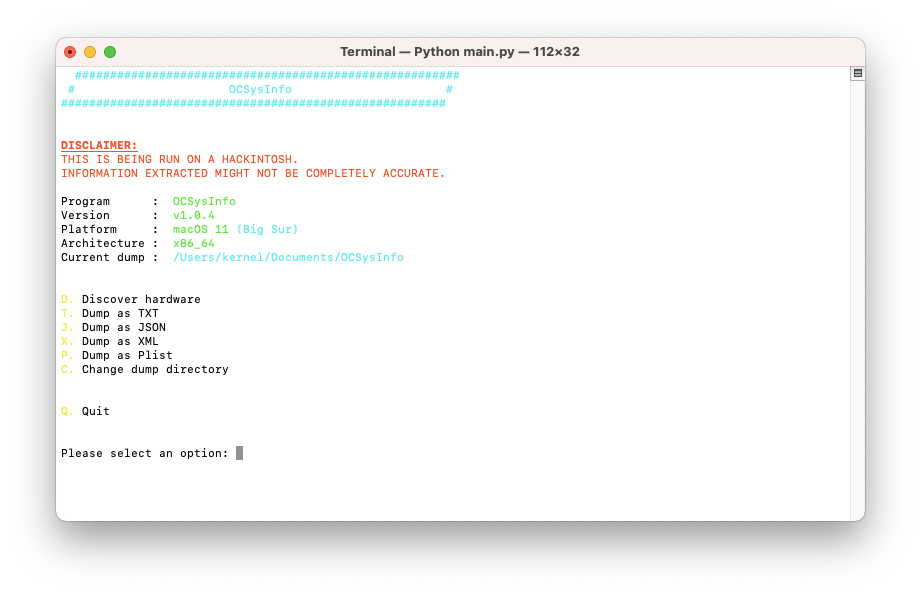
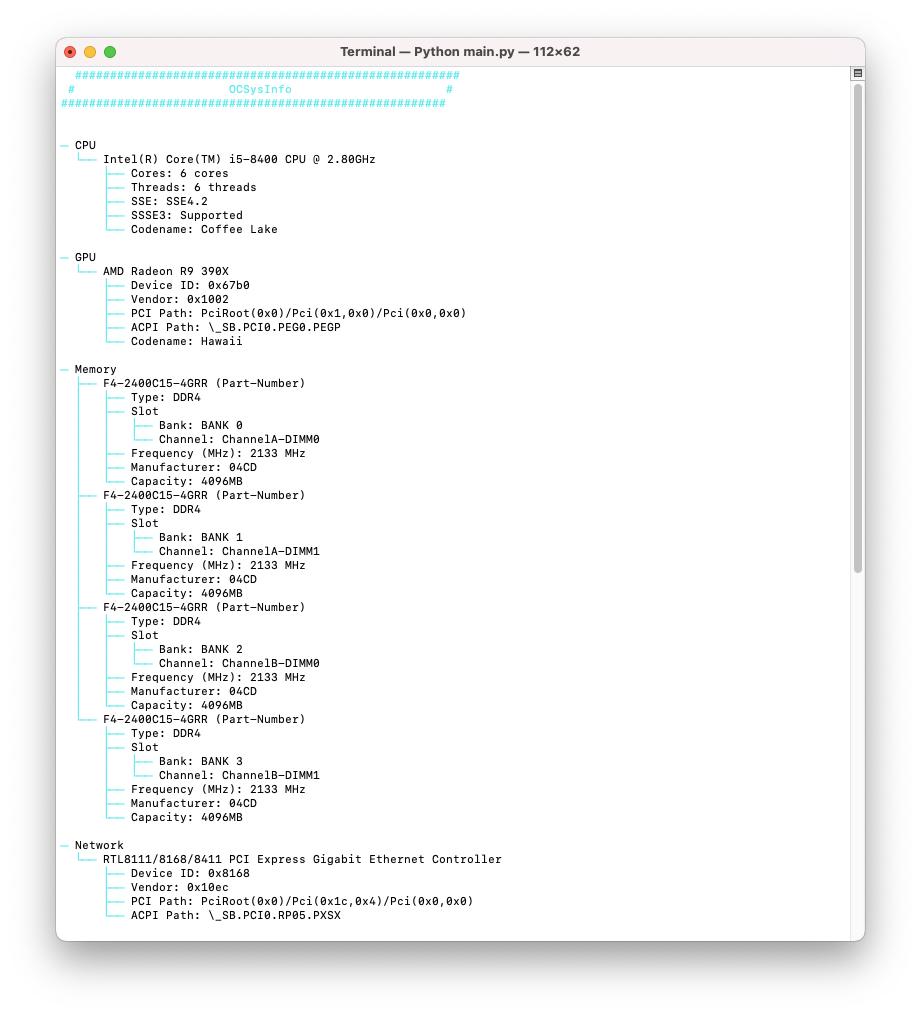
From here, you can type in d and press ENTER/RETURN, after, you should be greeted with a similar-looking screen:
# CPU Model
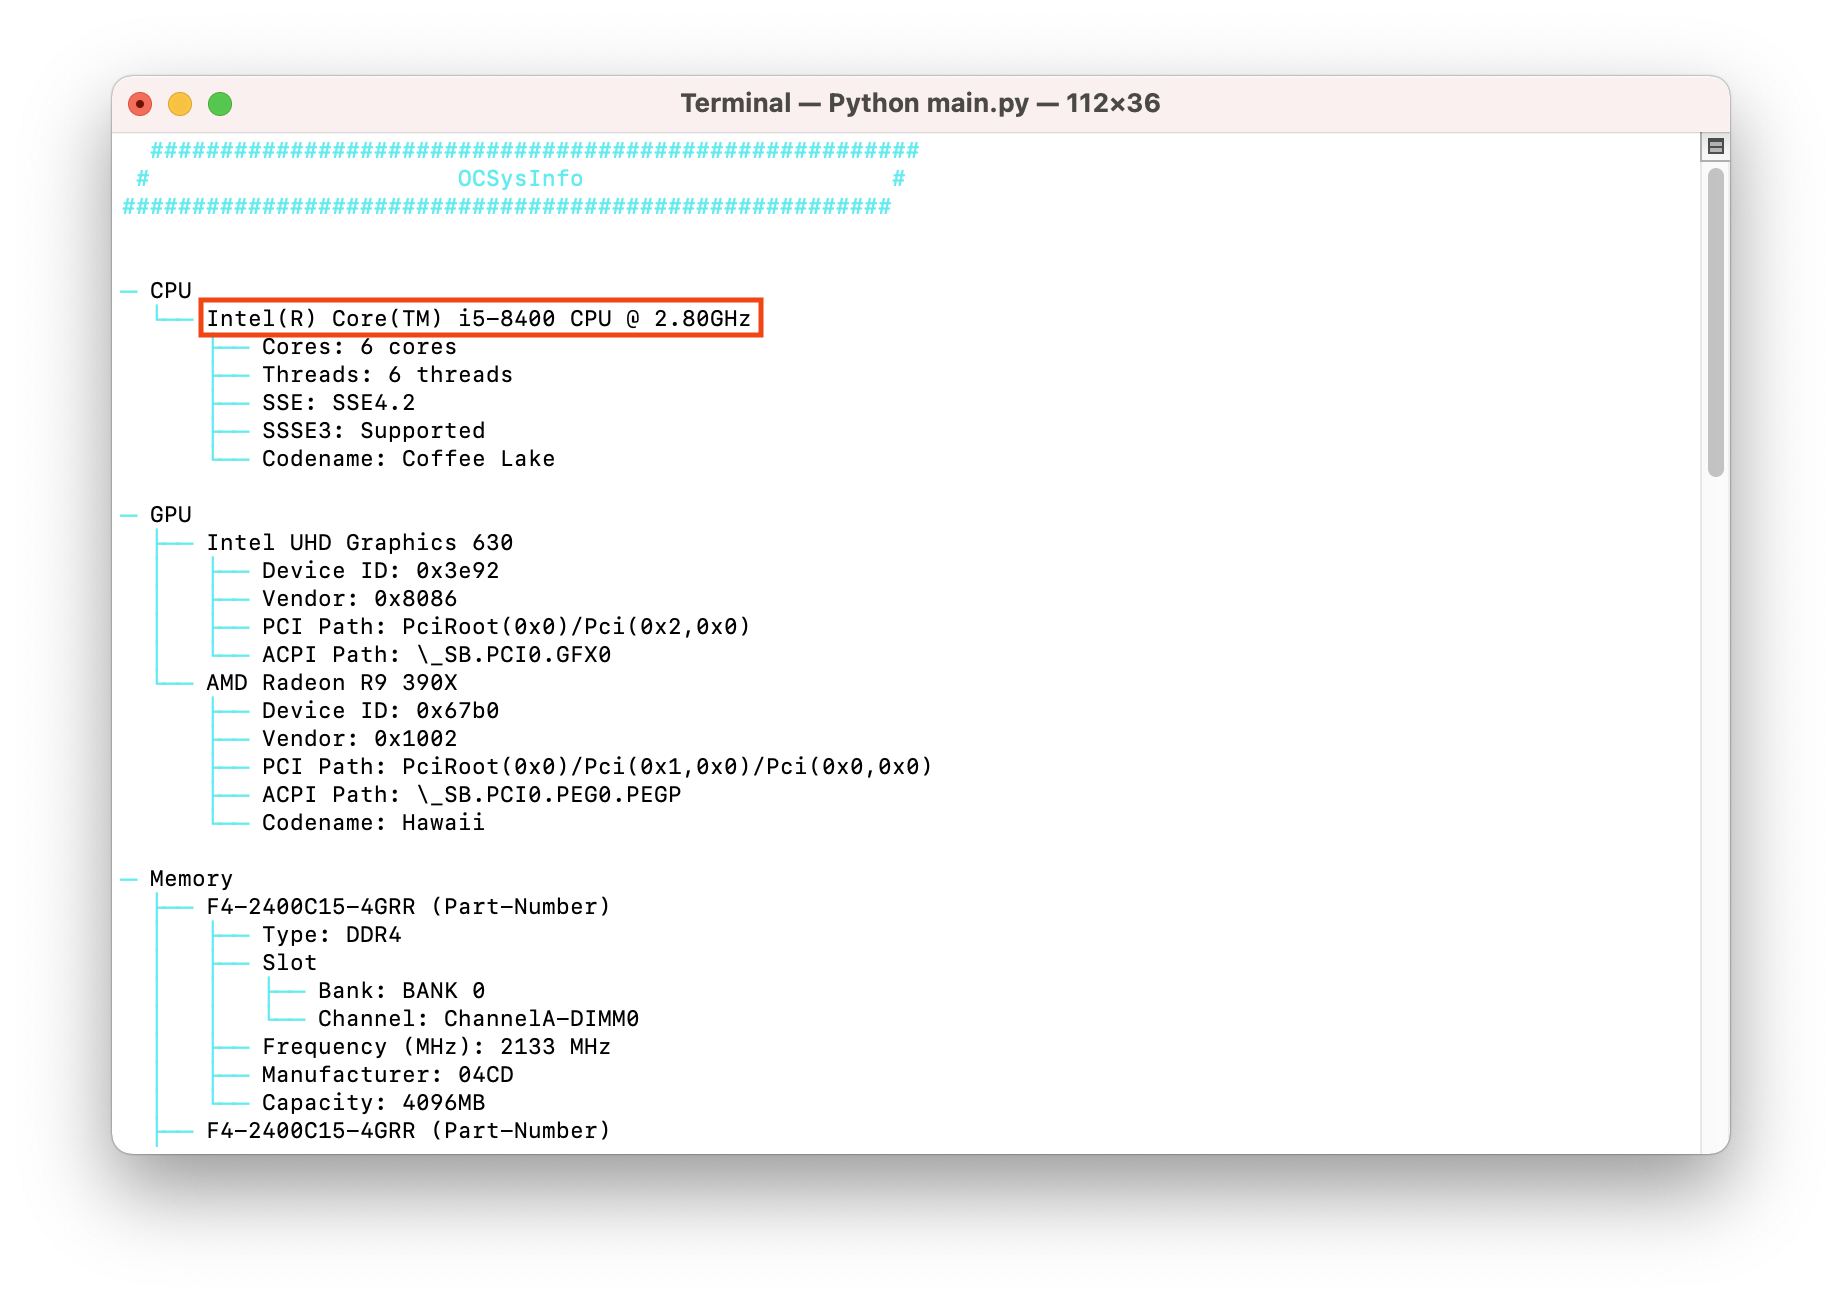
Besides the CPU model, it also lists the CPU's codename, highest SSE version supported and SSSE3 availability.
# GPU Model
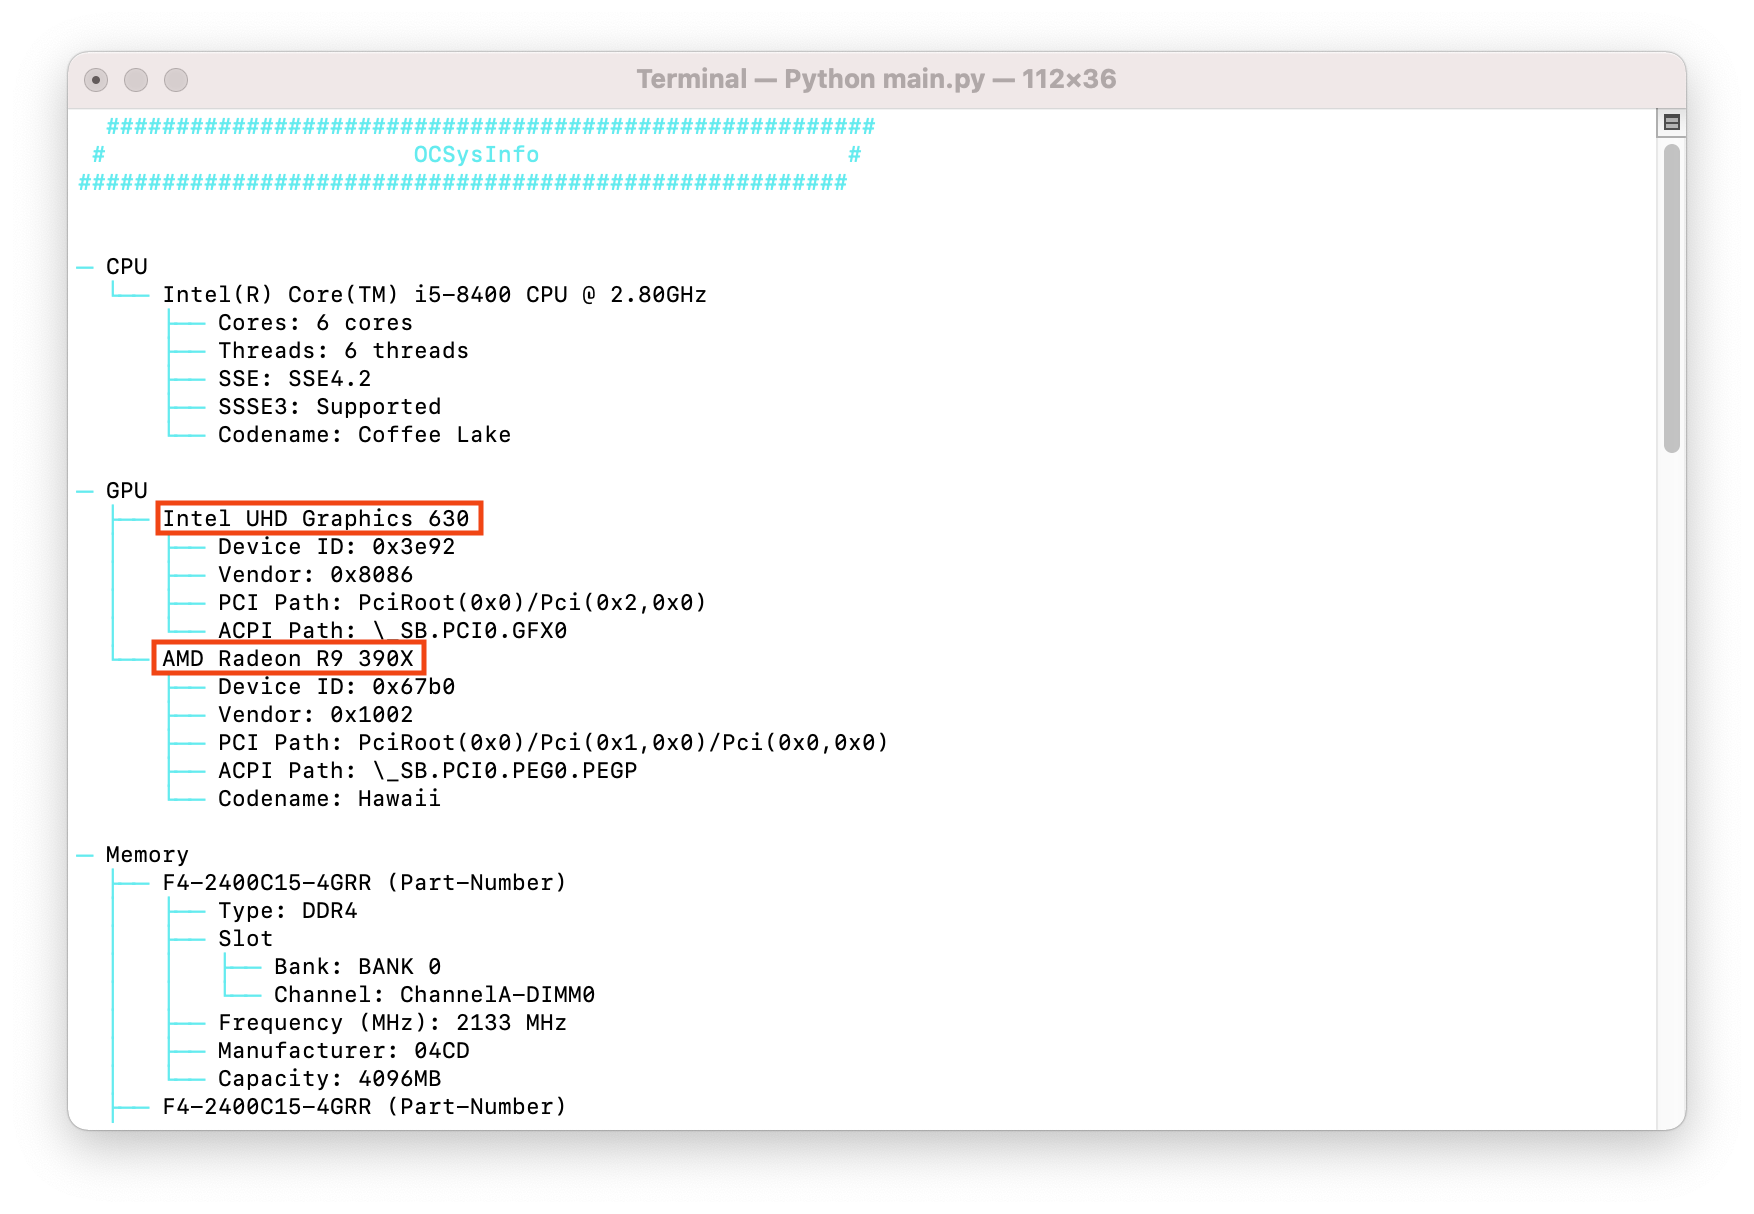
In this case, the machine has two GPUs:
- iGPU (Intel UHD Graphics 630)
- dGPU (AMD Radeon R9 390X)
Besides the model names, it also lists the GPUs' codename, ACPI & PCI path, which you may soon find useful as you progress in your hackintosh journey.
# Keyboard and Trackpad Connection Type
SMBus Trackpad
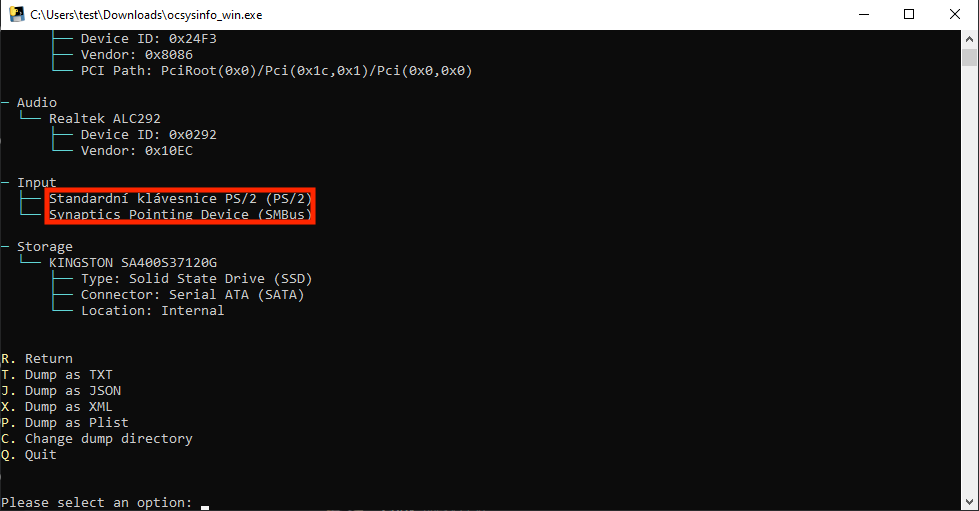 Trackpad:
 SMBus
Keyboard: PS/2
Credit for providing image: ThatCopy (opens new window)
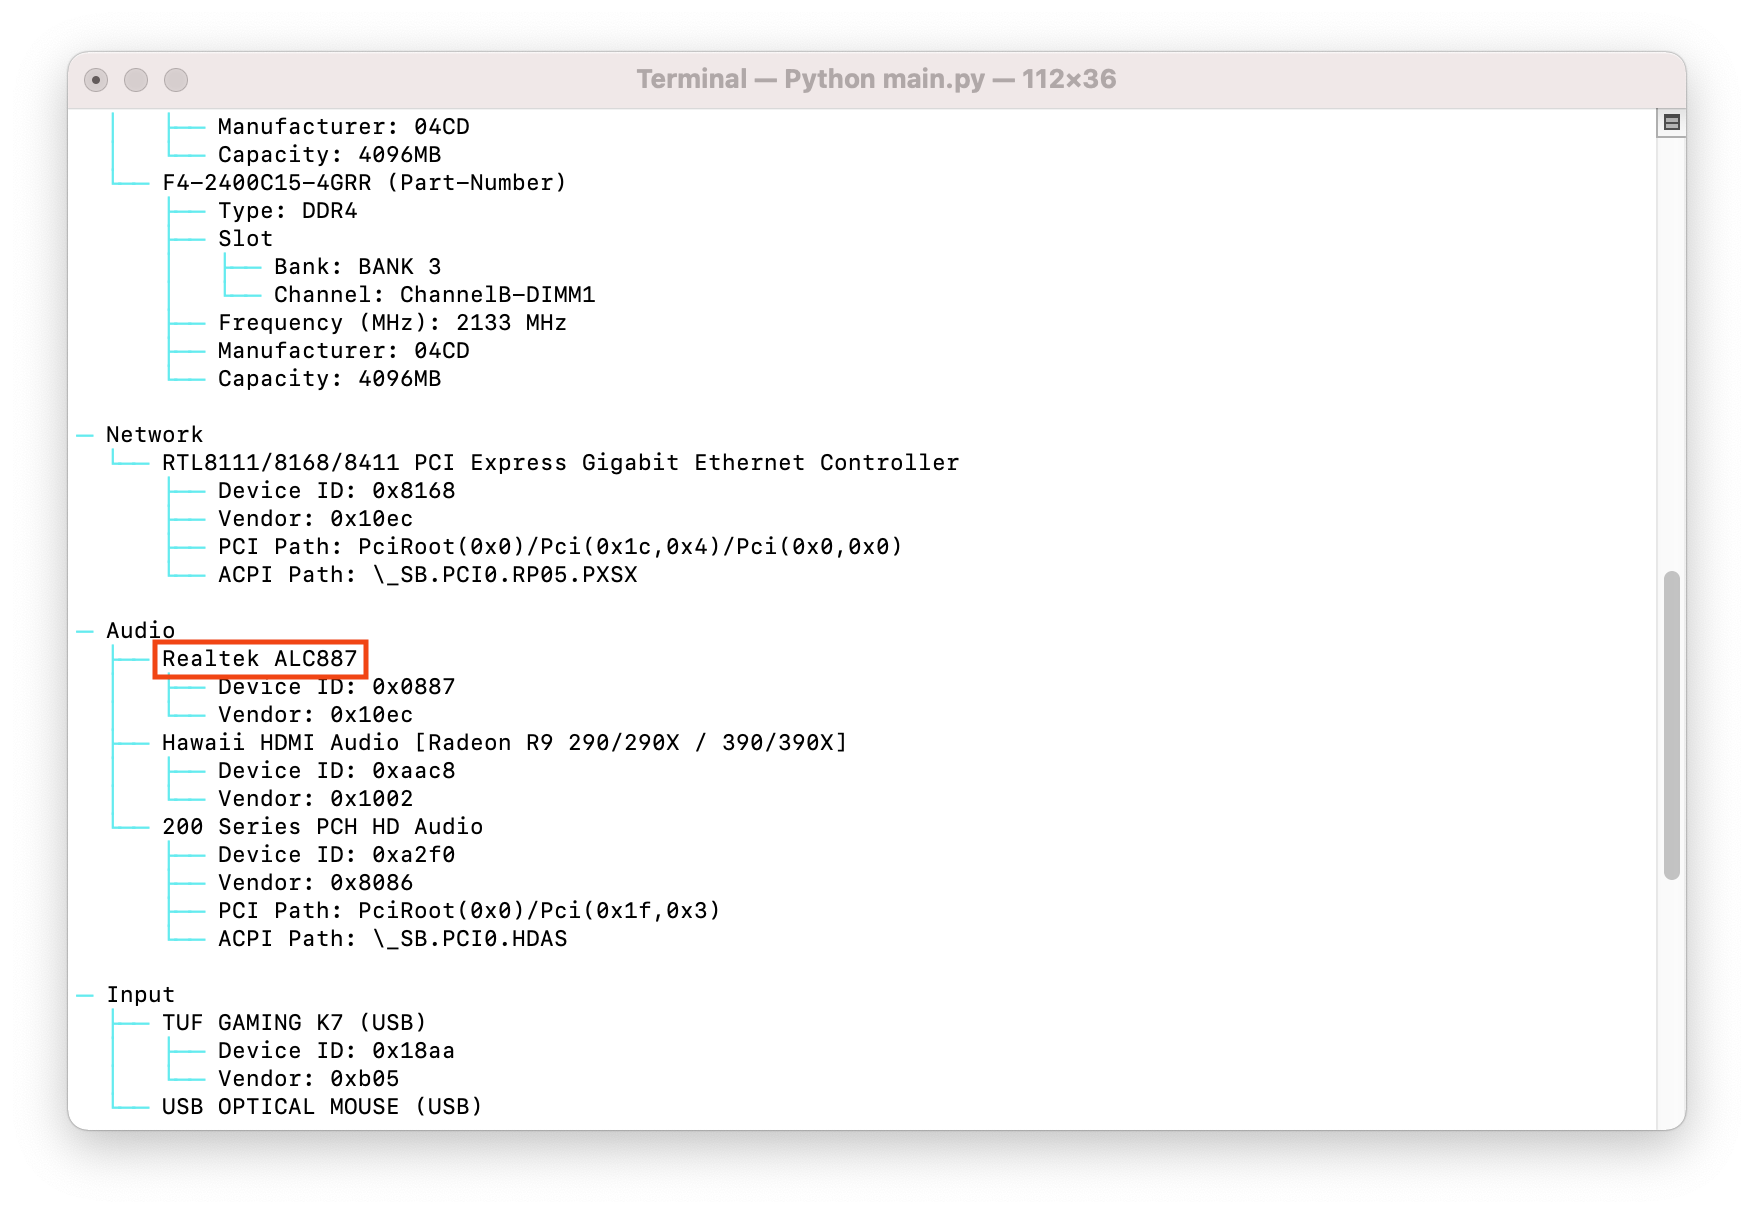
# Audio codec
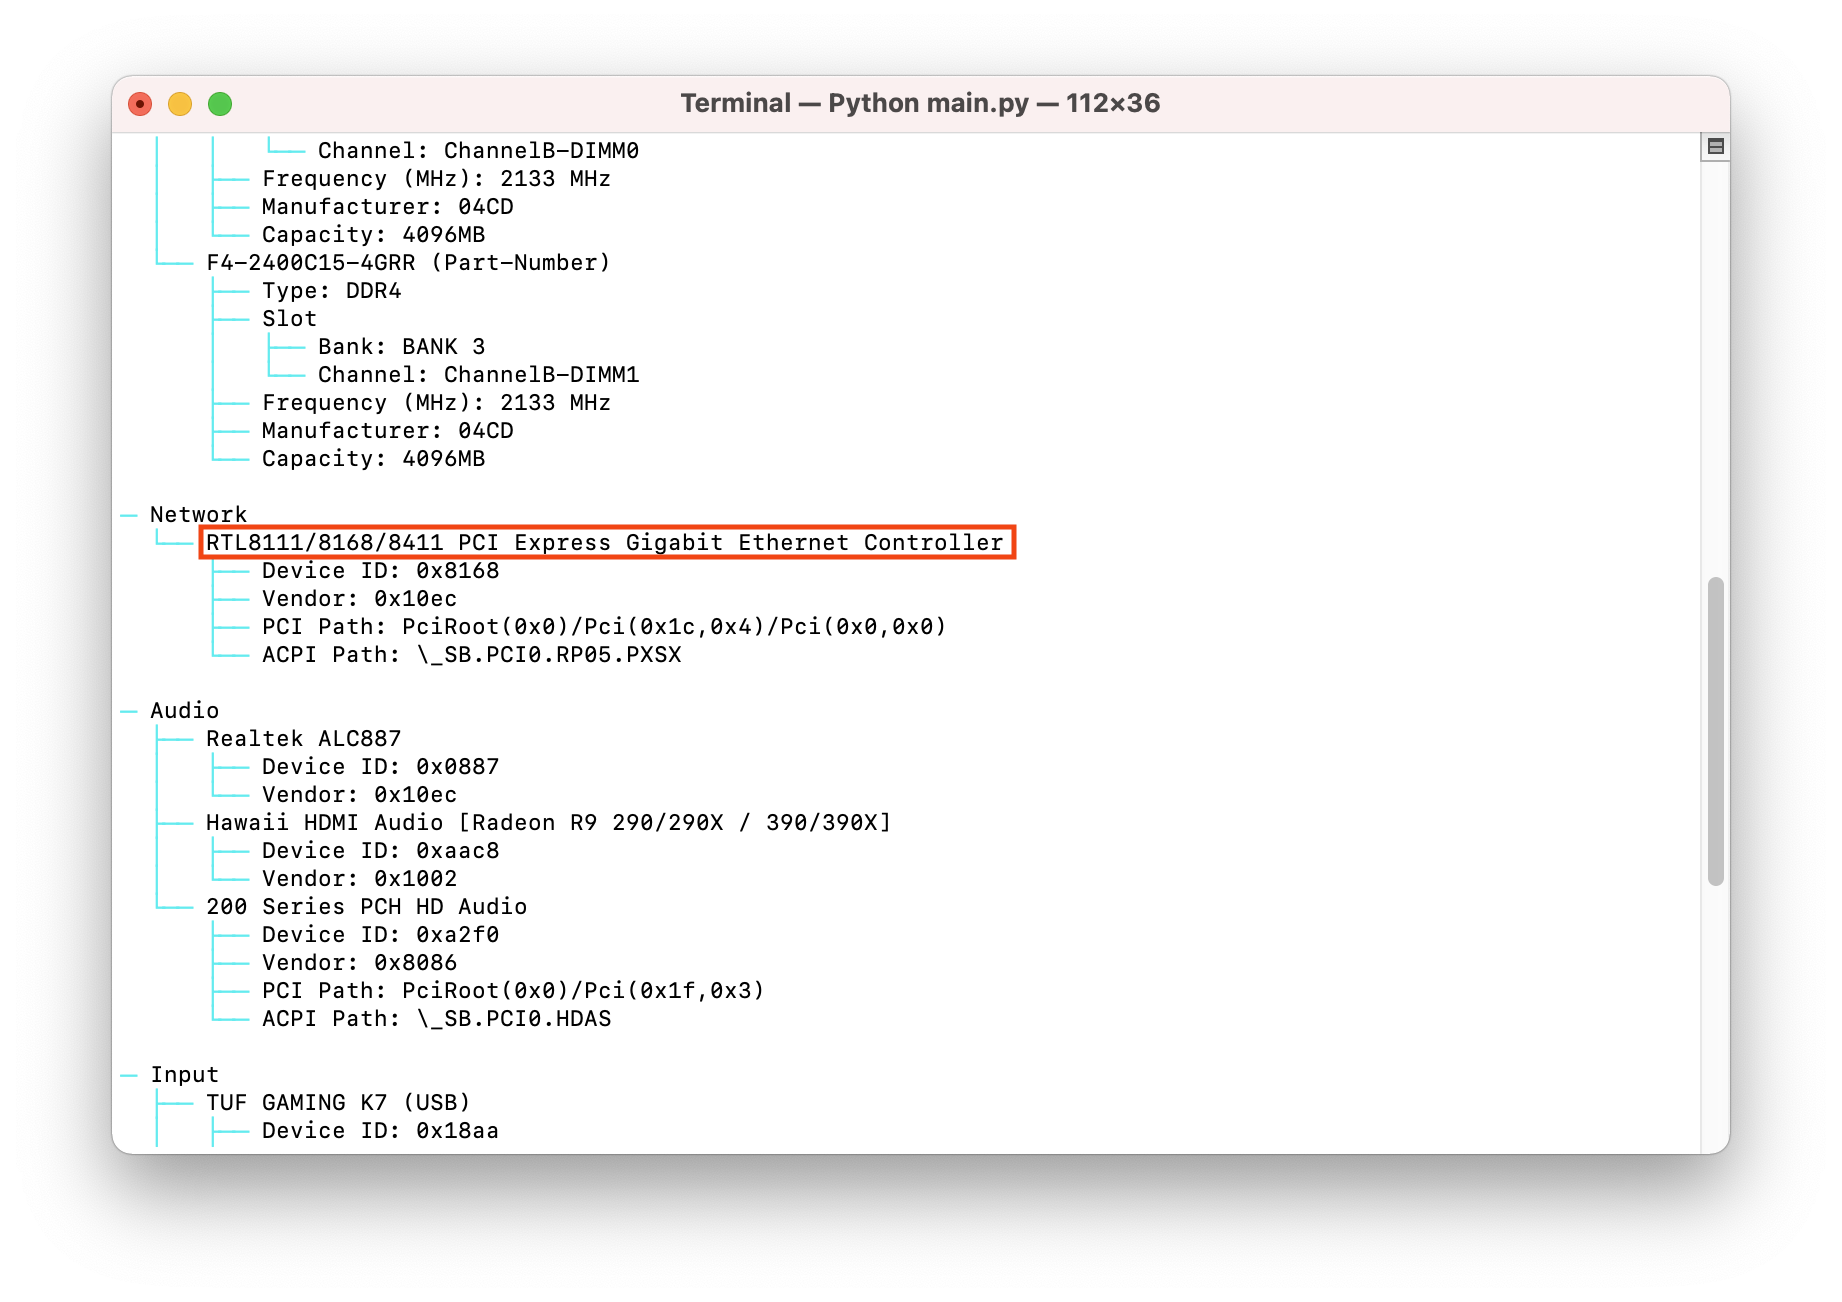
# Network models
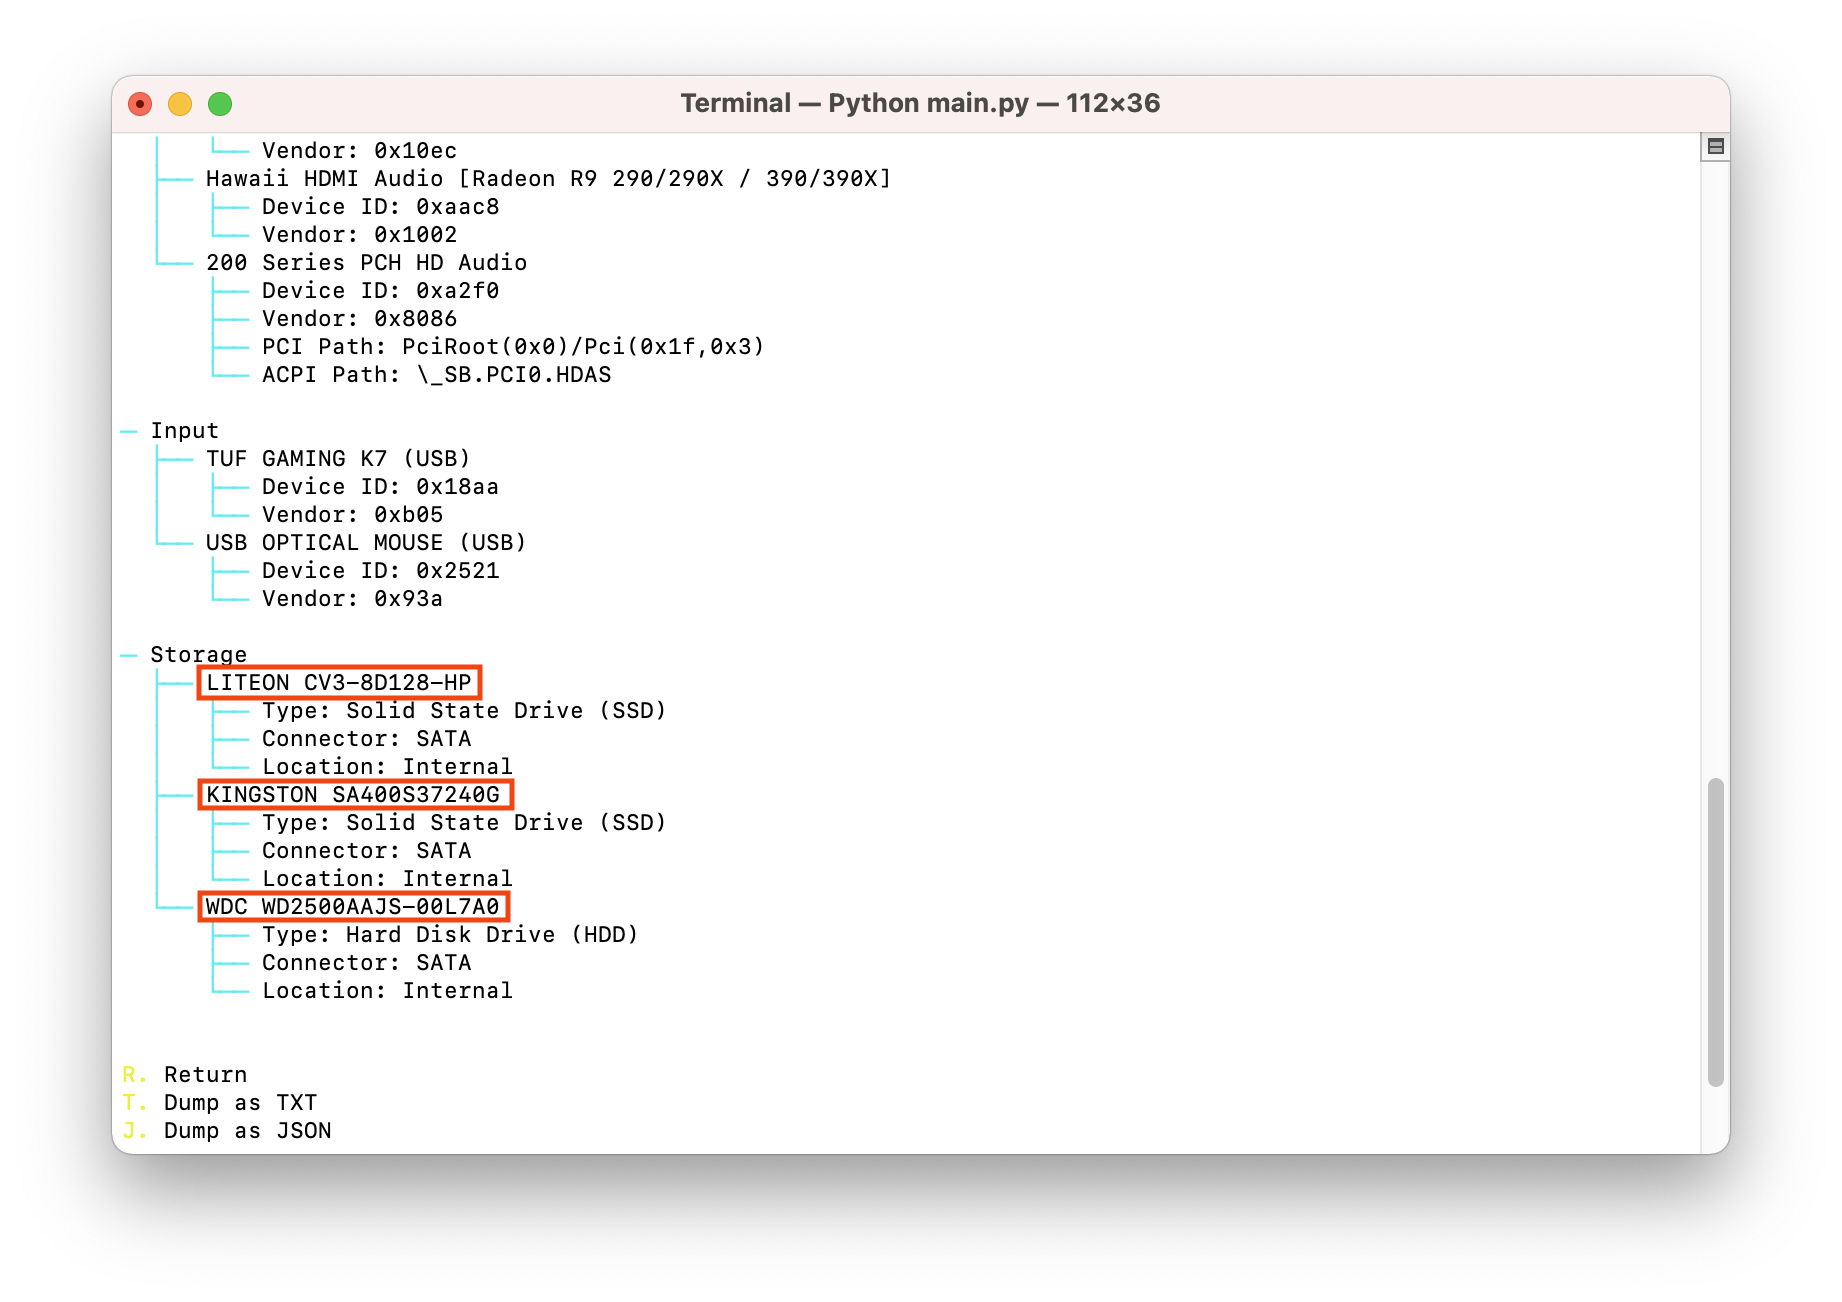
# Drive model

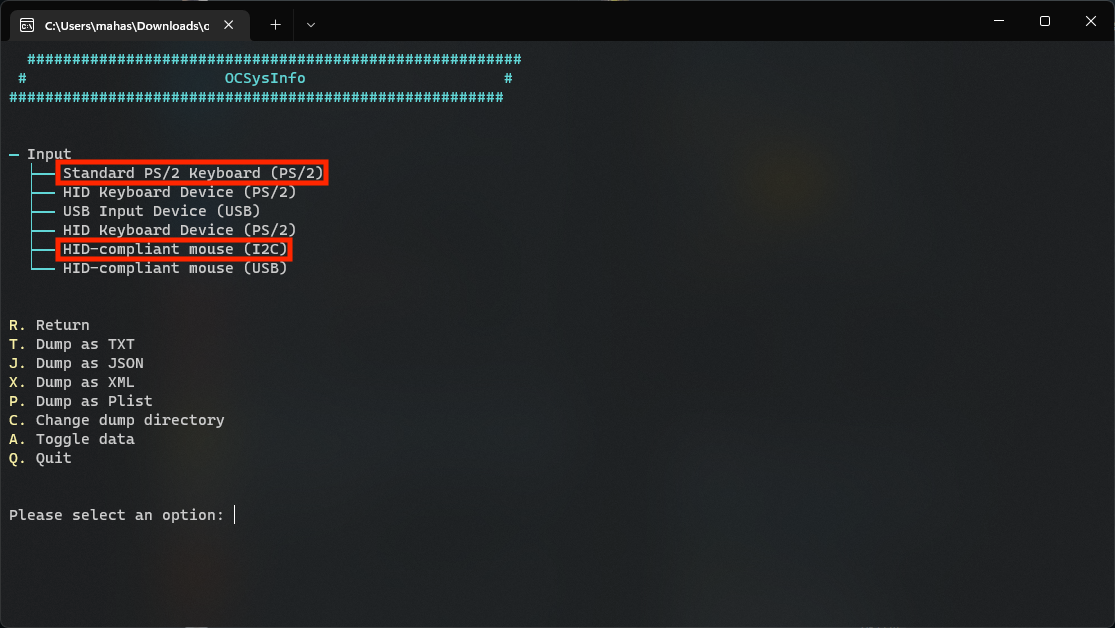 Trackpad:
 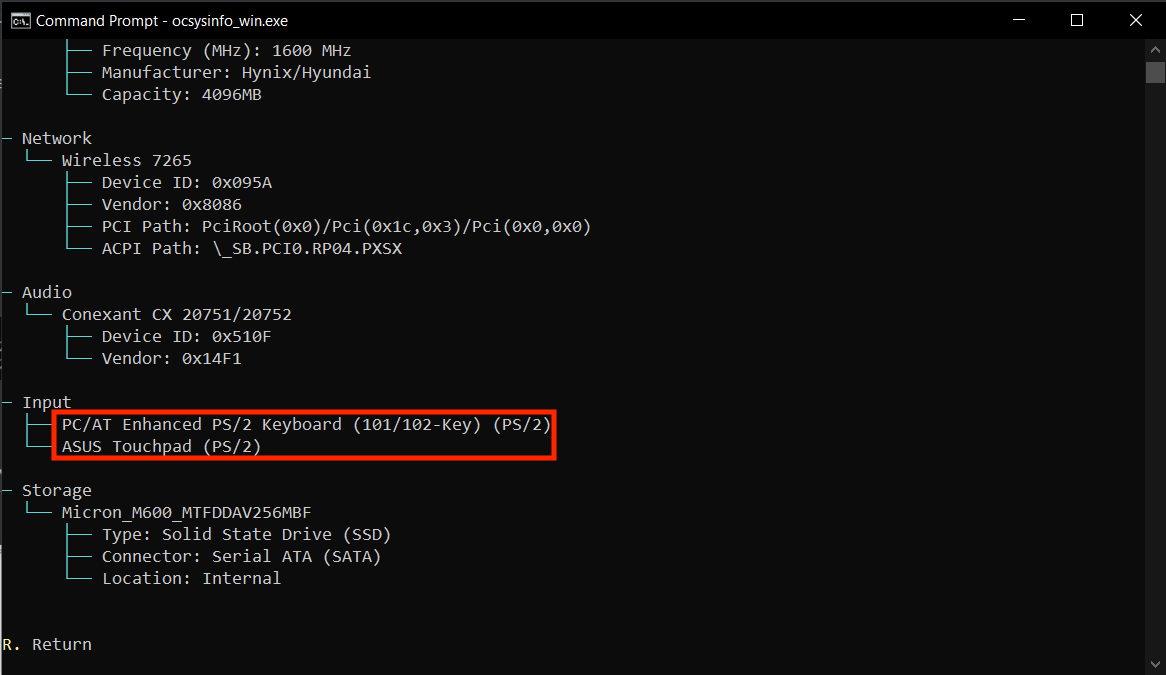 Trackpad: