# Making the installer in Linux
While you don't need a fresh install of macOS to use OpenCore, some users prefer having a fresh slate with their boot manager upgrades.
To start you'll need the following:
- 4GB USB Stick
- macrecovery.py (opens new window)
# Downloading macOS
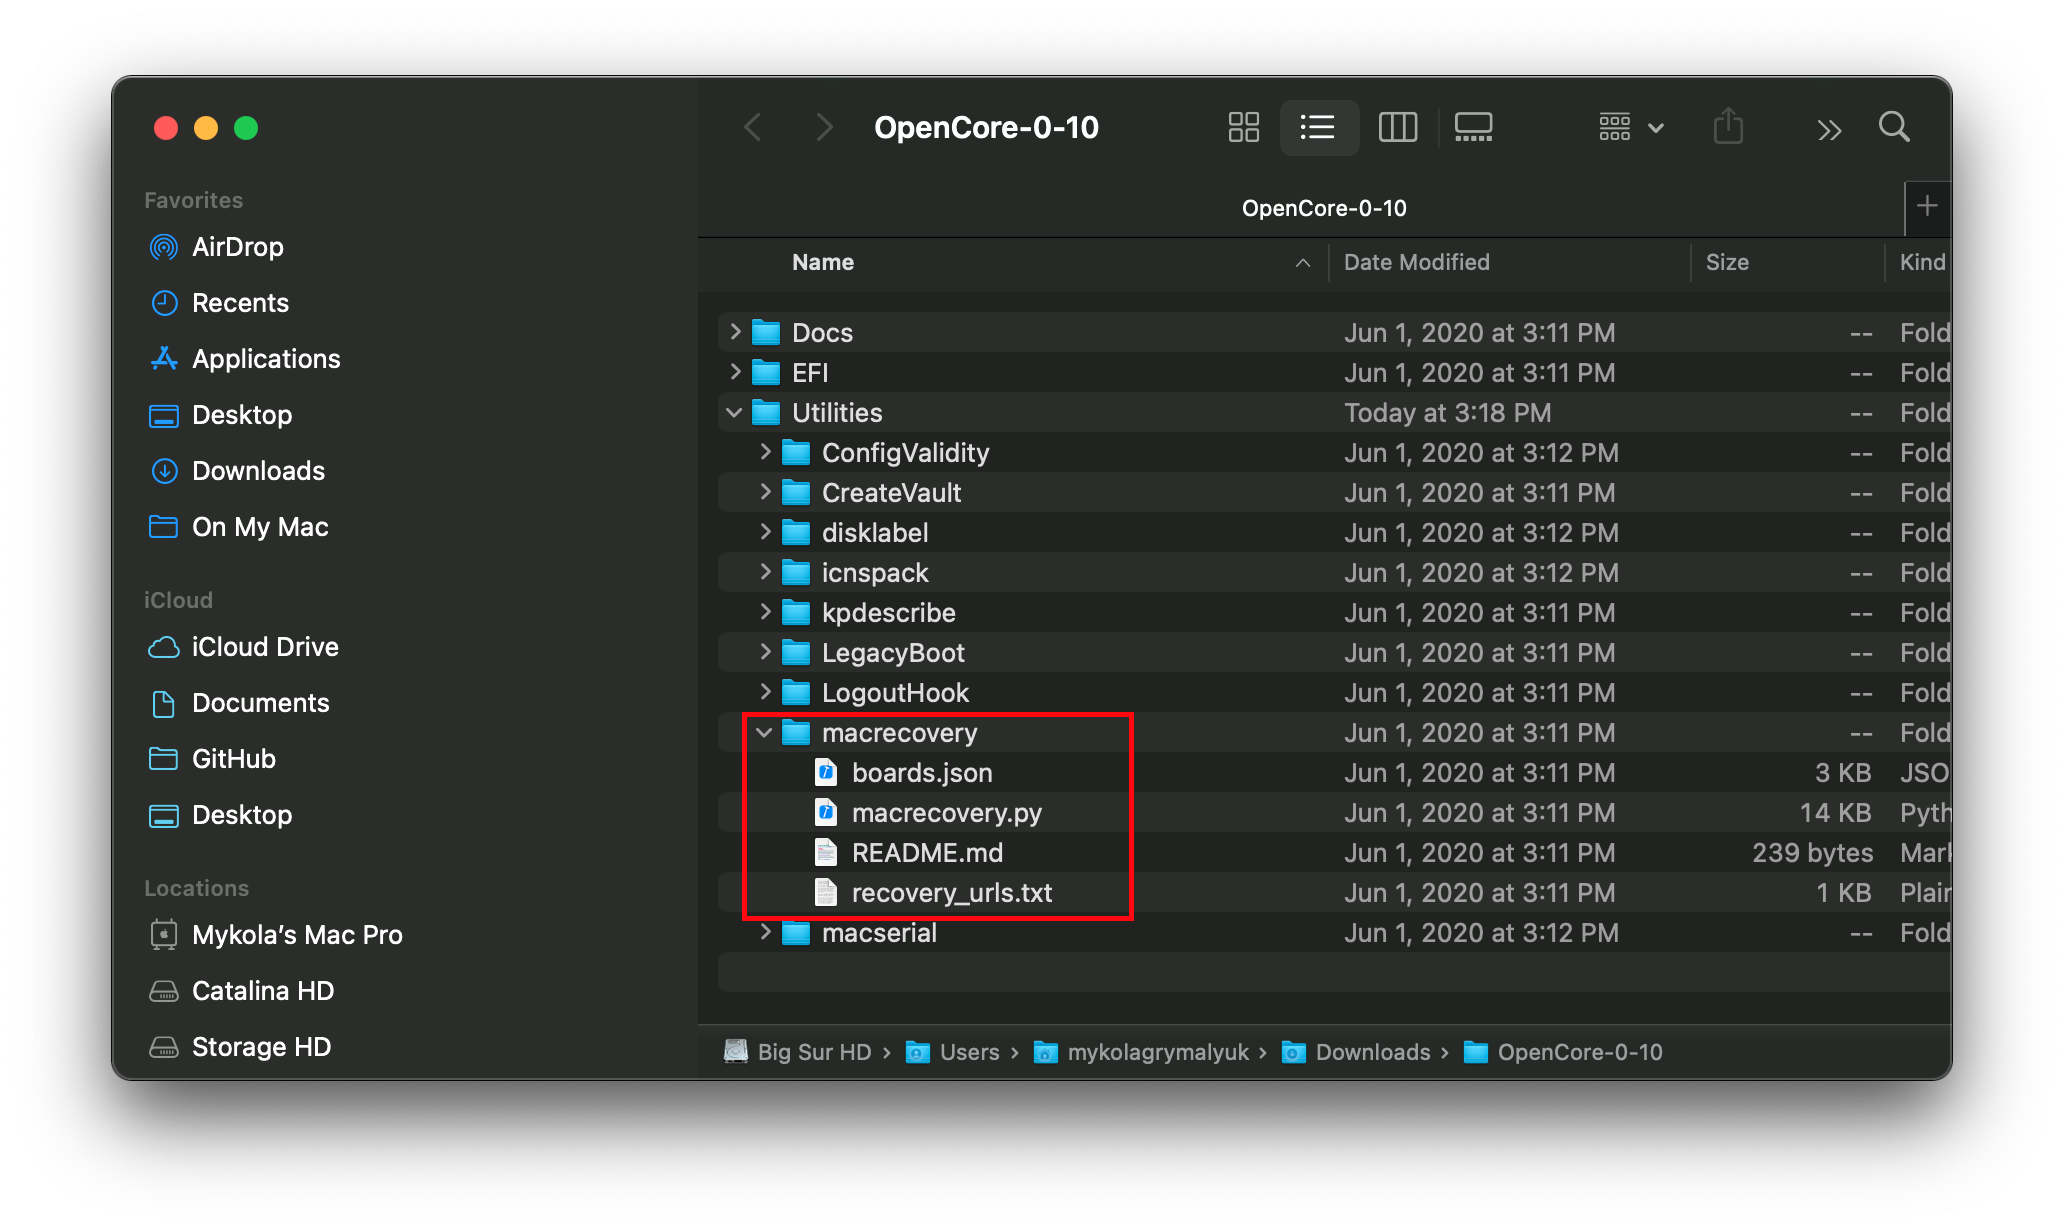
Now to start, first cd into macrecovery's folder (opens new window) and run one of the following commands:
# Adjust below command to the correct folder
cd ~/Downloads/OpenCore-0/Utilities/macrecovery/
Next, run one of the following commands depending on the OS you'd like to boot:
# Lion (10.7):
python3 ./macrecovery.py -b Mac-2E6FAB96566FE58C -m 00000000000F25Y00 download
python3 ./macrecovery.py -b Mac-C3EC7CD22292981F -m 00000000000F0HM00 download

# Mountain Lion (10.8):
python3 ./macrecovery.py -b Mac-7DF2A3B5E5D671ED -m 00000000000F65100 download

# Mavericks (10.9):
python3 ./macrecovery.py -b Mac-F60DEB81FF30ACF6 -m 00000000000FNN100 download

# Yosemite (10.10):
python3 ./macrecovery.py -b Mac-E43C1C25D4880AD6 -m 00000000000GDVW00 download

# El Capitan (10.11):
python3 ./macrecovery.py -b Mac-FFE5EF870D7BA81A -m 00000000000GQRX00 download

# Sierra (10.12):
python3 ./macrecovery.py -b Mac-77F17D7DA9285301 -m 00000000000J0DX00 download

# High Sierra (10.13)
python3 ./macrecovery.py -b Mac-7BA5B2D9E42DDD94 -m 00000000000J80300 download
python3 ./macrecovery.py -b Mac-BE088AF8C5EB4FA2 -m 00000000000J80300 download

# Mojave (10.14)
python3 ./macrecovery.py -b Mac-7BA5B2DFE22DDD8C -m 00000000000KXPG00 download

# Catalina (10.15)
python3 ./macrecovery.py -b Mac-CFF7D910A743CAAF -m 00000000000PHCD00 download
python3 ./macrecovery.py -b Mac-00BE6ED71E35EB86 -m 00000000000000000 download

# Big Sur (11)
python3 ./macrecovery.py -b Mac-2BD1B31983FE1663 -m 00000000000000000 download

# Monterey (12)
python3 ./macrecovery.py -b Mac-E43C1C25D4880AD6 -m 00000000000000000 download

# Ventura (13)
python3 ./macrecovery.py -b Mac-B4831CEBD52A0C4C -m 00000000000000000 download

# Sonoma (14)
python3 ./macrecovery.py -b Mac-827FAC58A8FDFA22 -m 00000000000000000 download

# Sequoia (15)
python3 ./macrecovery.py -b Mac-7BA5B2D9E42DDD94 -m 00000000000000000 download

# Latest (Tahoe, 26)
python3 ./macrecovery.py -b Mac-CFF7D910A743CAAF -m 00000000000000000 -os latest download
From here, run one of those commands in terminal and once finished you'll get an output similar to this:
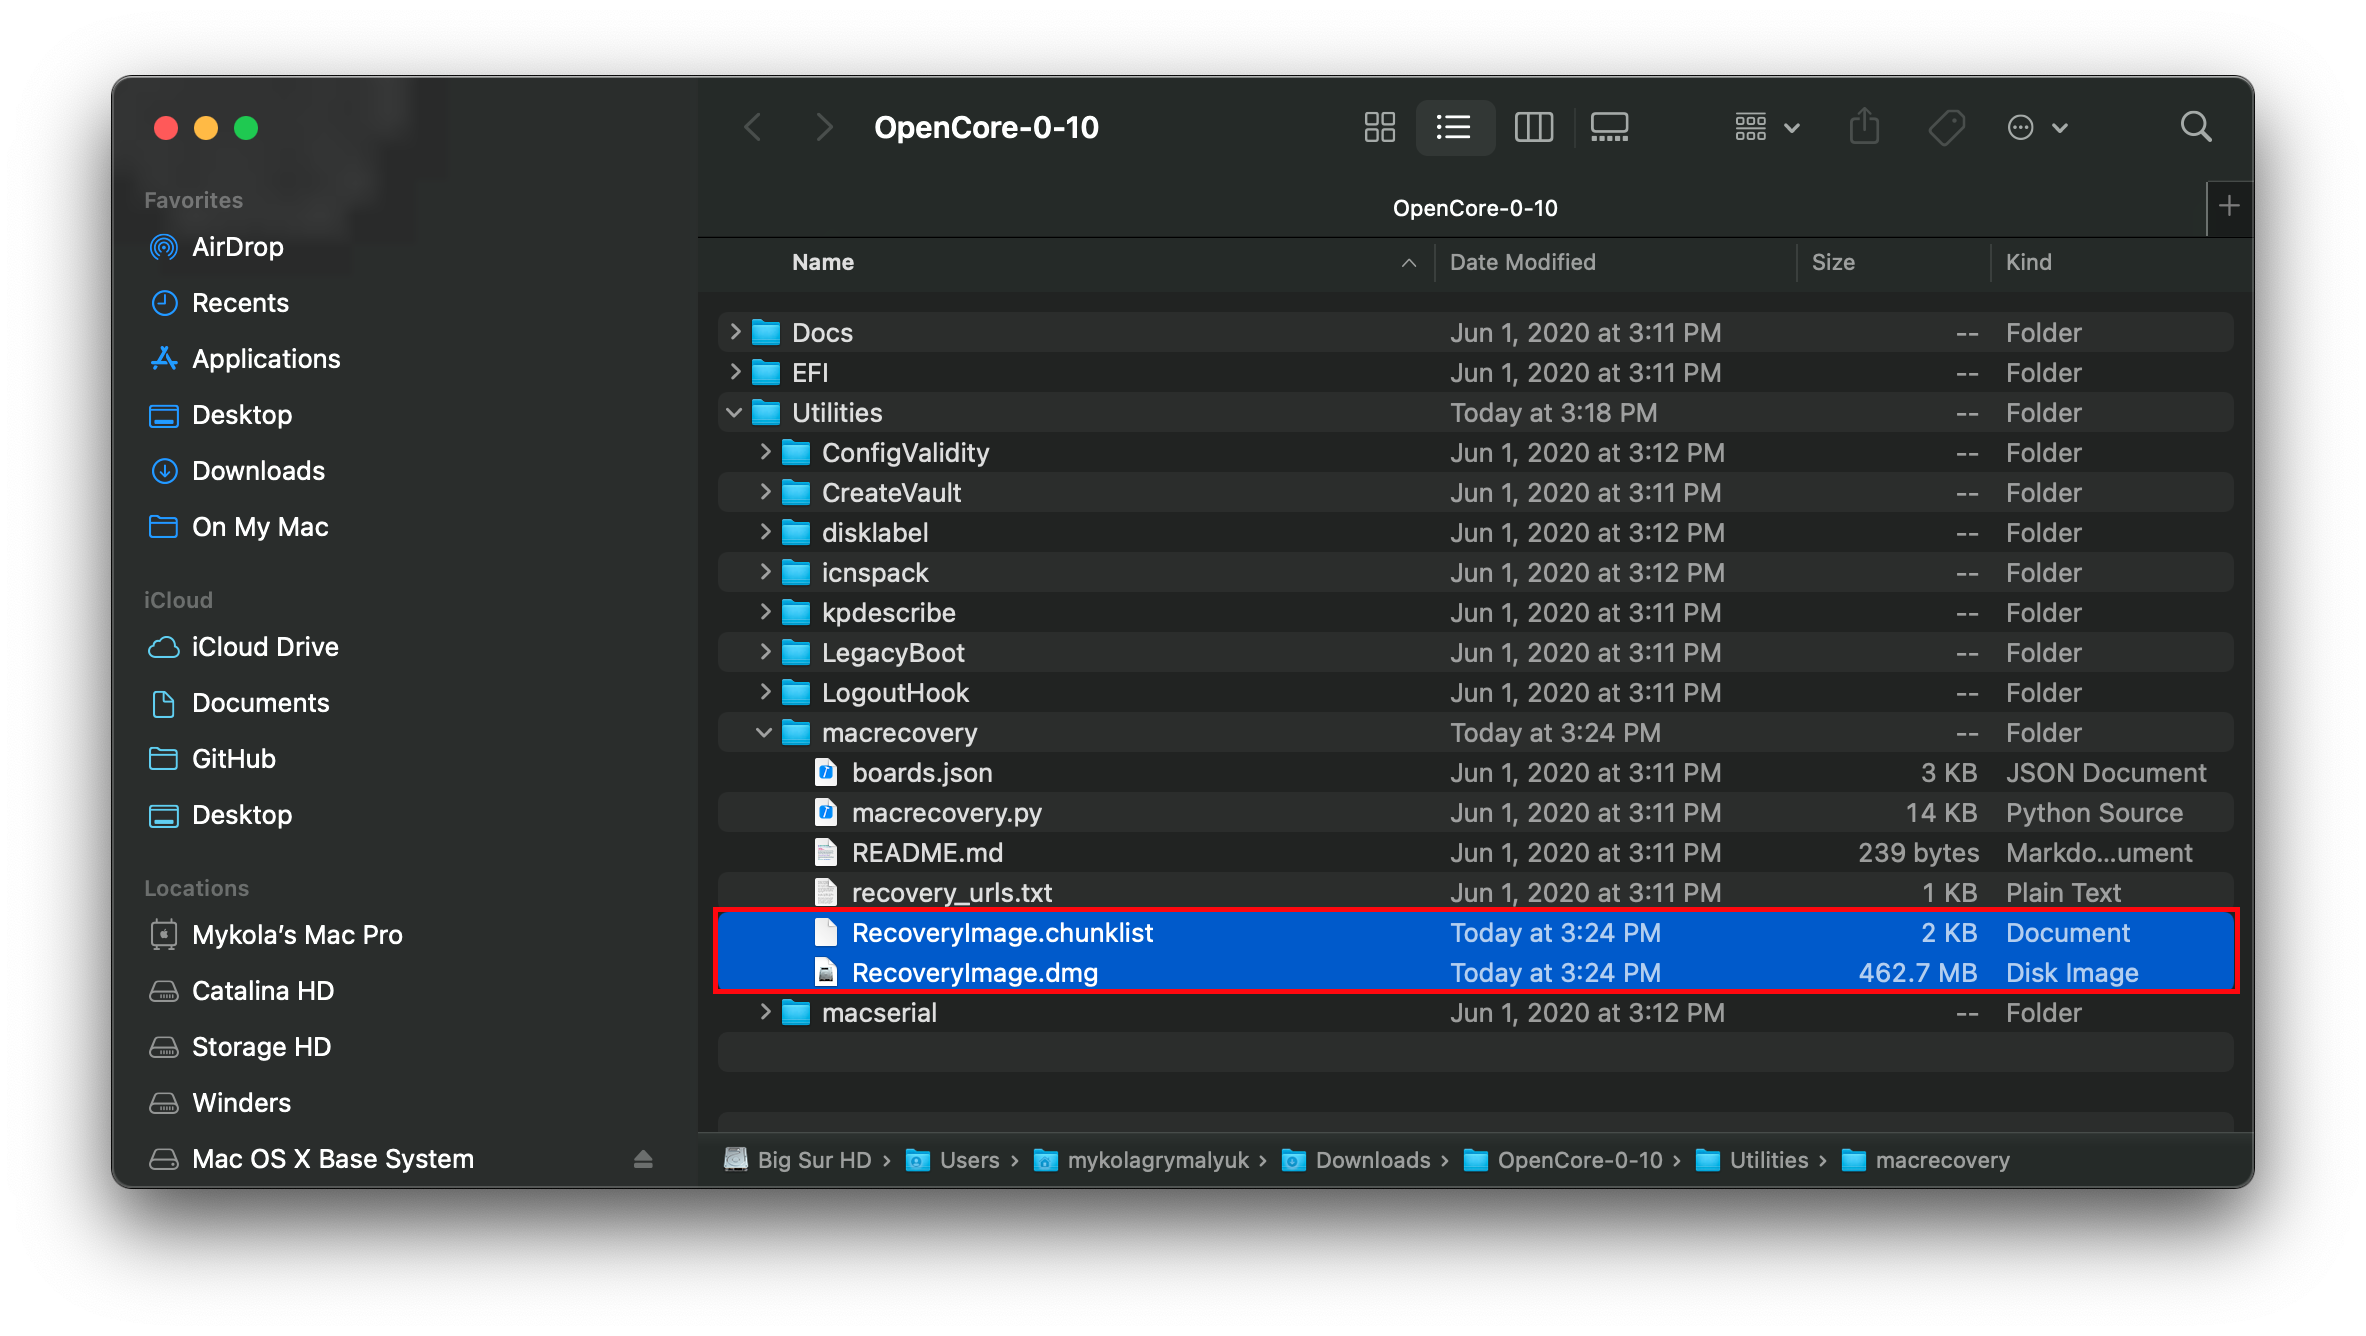
Note: Depending on the OS, you'll either get BaseSystem or RecoveryImage files. They both act in the same manner so when we reference BaseSystem the same info applies to RecoveryImage
macOS 12 and above note: As recent macOS versions introduce changes to the USB stack, it is highly advisable that you map your USB ports (with USBToolBox) before installing macOS.
- CAUTION: With macOS 11.3 and newer, XhciPortLimit is broken resulting in boot loops (opens new window).
- If you've already mapped your USB ports (opens new window) and disabled
XhciPortLimit, you can boot macOS 11.3+ without issues.
- If you've already mapped your USB ports (opens new window) and disabled
- CAUTION: With macOS 11.3 and newer, XhciPortLimit is broken resulting in boot loops (opens new window).
# Making the installer
This section will target making the necessary partitions in the USB device. You can use your favorite program be it gdisk fdisk parted gparted or gnome-disks. This guide will focus on gdisk as it's nice and can change the partition type later on, as we need it so that macOS Recovery HD can boot. (the distro used here is Ubuntu 18.04, other versions or distros may work)
Credit to midi1996 (opens new window) for his work on the Internet Install Guide (opens new window) guide which this is based off of.
# Method 1
In terminal:
- run
lsblkand determine your USB device block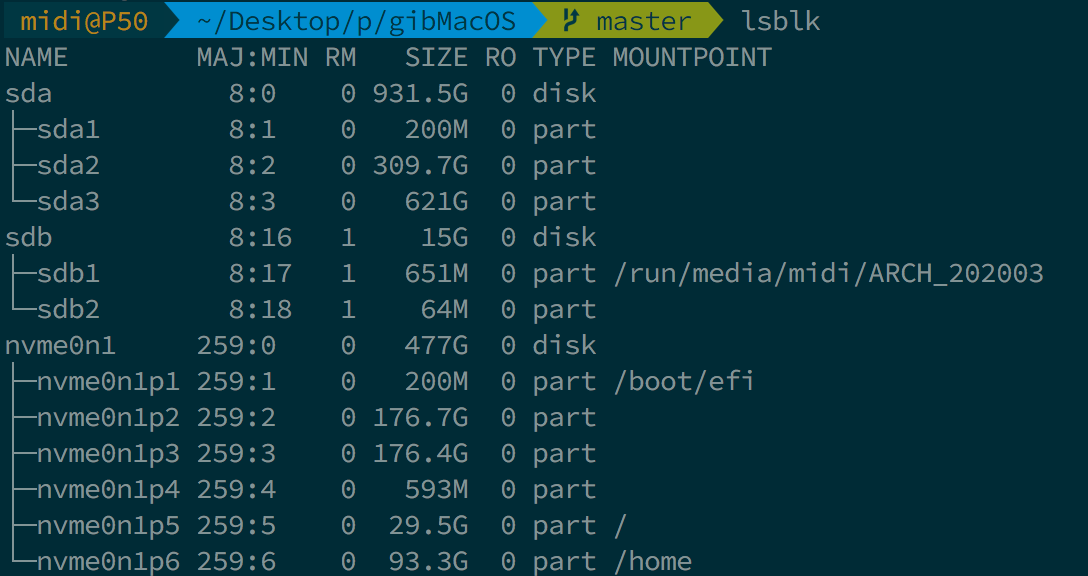
- run
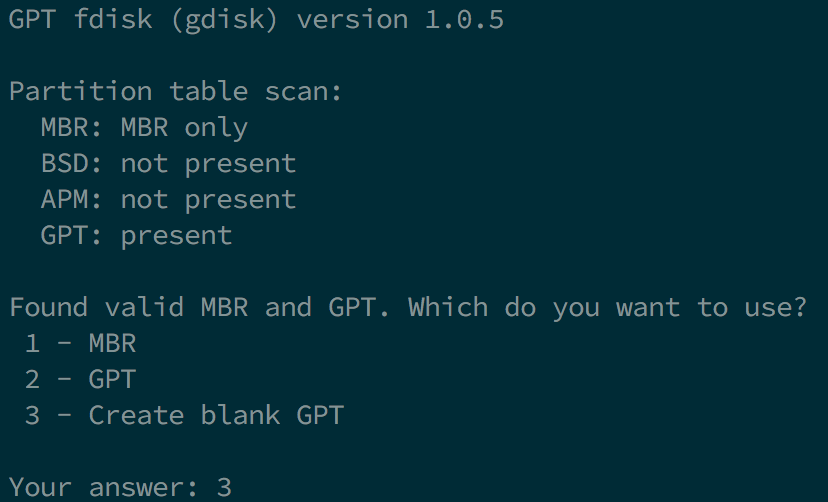
sudo gdisk /dev/<your USB block>- if you're asked what partition table to use, select GPT.
- send
pto print your block's partitions (and verify it's the one needed)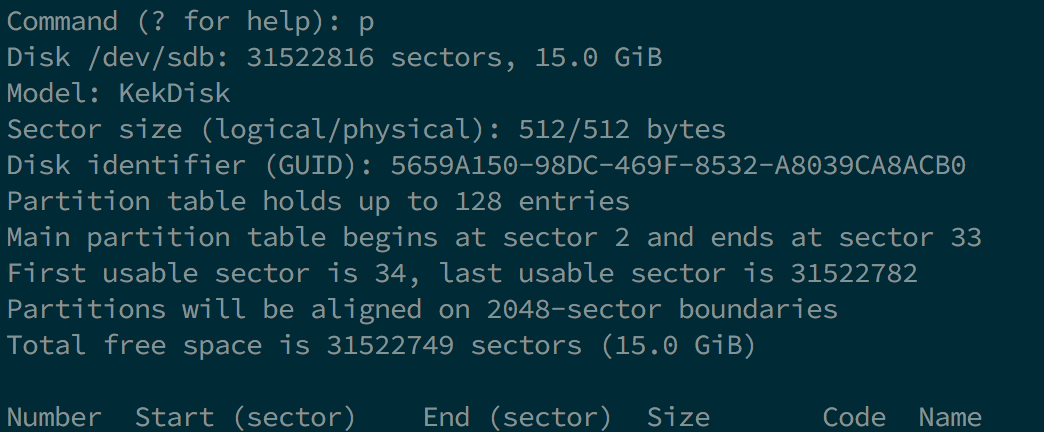
- send
oto clear the partition table and make a new GPT one (if not empty)- confirm with
y
- confirm with
- send
npartition number: keep blank for defaultfirst sector: keep blank for defaultlast sector: keep blank for whole diskHex code or GUID:0700for Microsoft basic data partition type
- send
w- Confirm with
y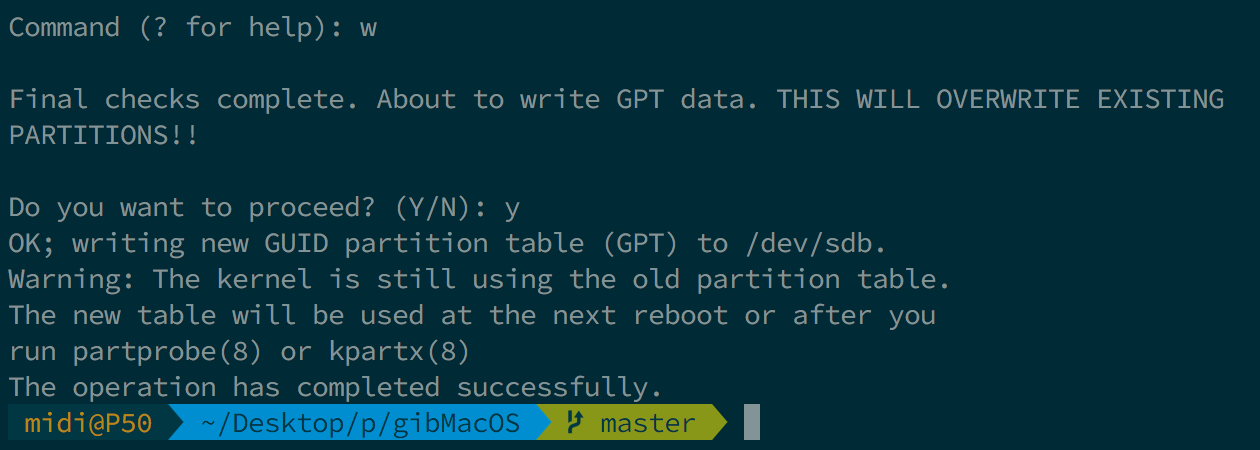
- In some cases a reboot is needed, but rarely, if you want to be sure, reboot your computer. You can also try re-plugging your USB key.
- Confirm with
- Close
gdiskby sendingq(normally it should quit on its own)
- if you're asked what partition table to use, select GPT.
- Use
lsblkto determine your partition's identifiers - run
sudo mkfs.vfat -F 32 -n "OPENCORE" /dev/<your USB partition block>to format your USB to FAT32 and named OPENCORE - then
cdto/OpenCore/Utilities/macrecovery/and you should get to a.dmgand.chunklistfiles- mount your USB partition with
udisksctl(udisksctl mount -b /dev/<your USB partition block>, no sudo required in most cases) or withmount(sudo mount /dev/<your USB partition block> /where/your/mount/stuff, sudo is required) cdto your USB drive andmkdir com.apple.recovery.bootin the root of your FAT32 USB partition- now
cporrsyncbothBaseSystem.dmgandBaseSystem.chunklistintocom.apple.recovery.bootfolder.
- mount your USB partition with
# Method 2 (in case 1 didn't work)
In terminal:
- run
lsblkand determine your USB device block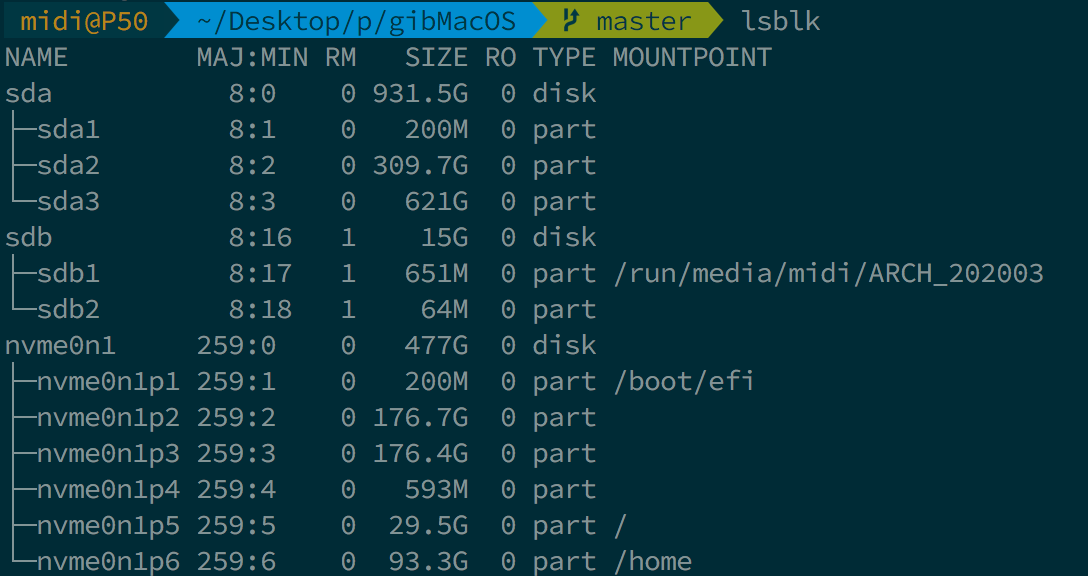
- run
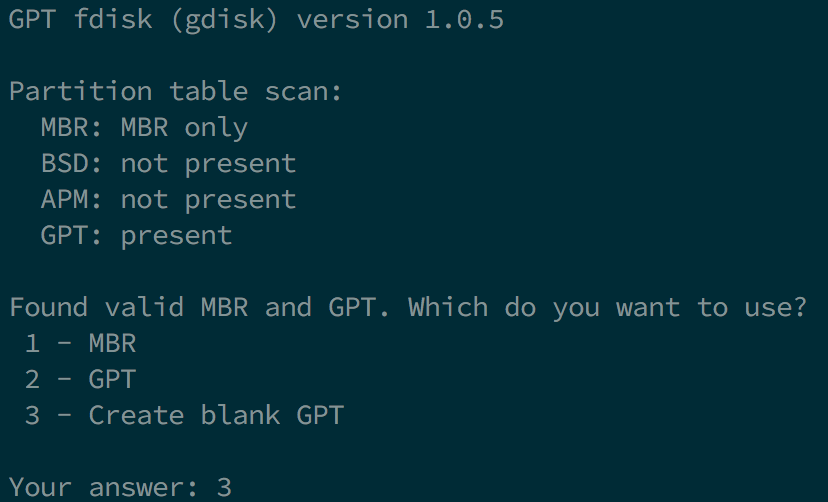
sudo gdisk /dev/<your USB block>- if you're asked what partition table to use, select GPT.
- send
pto print your block's partitions (and verify it's the one needed)
- send
oto clear the partition table and make a new GPT one (if not empty)- confirm with
y
- confirm with
- send
n- partition number: keep blank for default
- first sector: keep blank for default
- last sector:
+200Mto create a 200MB partition that will be named later on OPENCORE - Hex code or GUID:
0700for Microsoft basic data partition type
- send
n- partition number: keep blank for default
- first sector: keep blank for default
- last sector: keep black for default (or you can make it
+3Gif you want to partition further the rest of the USB) - Hex code or GUID:
af00for Apple HFS/HFS+ partition type
- send
w- Confirm with
y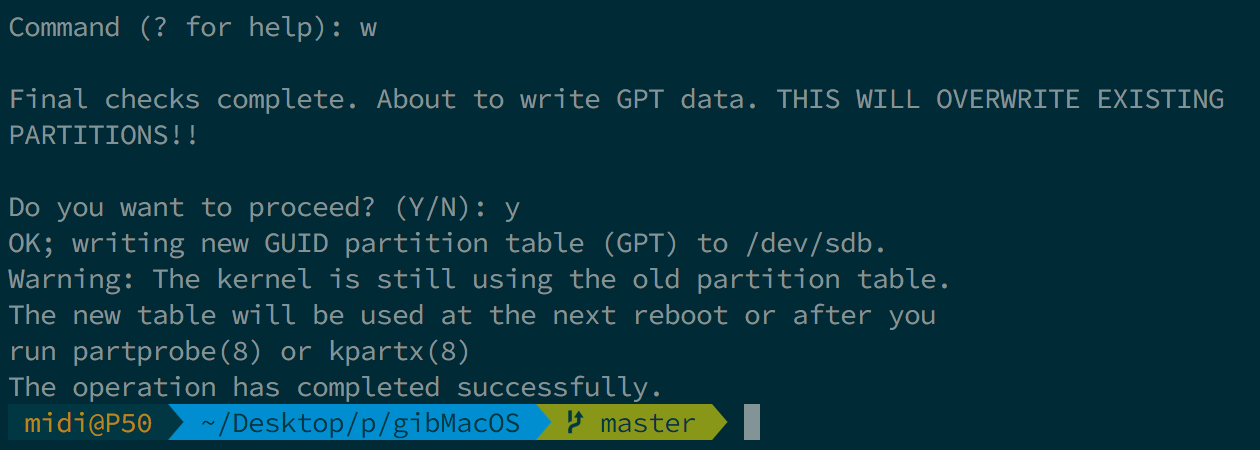
- In some cases a reboot is needed, but rarely, if you want to be sure, reboot your computer. You can also try re-plugging your USB key.
- Confirm with
- Close
gdiskby sendingq(normally it should quit on its own)
- if you're asked what partition table to use, select GPT.
- Use
lsblkagain to determine the 200MB drive and the other partition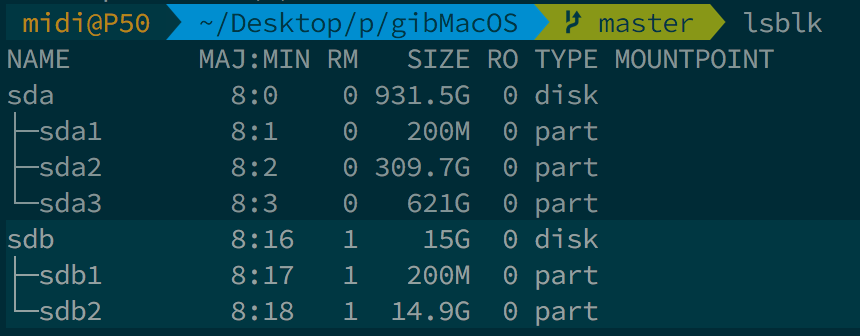
- run
sudo mkfs.vfat -F 32 -n "OPENCORE" /dev/<your 200MB partition block>to format the 200MB partition to FAT32, named OPENCORE - then
cdto/OpenCore/Utilities/macrecovery/and you should get to a.dmgand.chunklistfiles- mount your USB partition with
udisksctl(udisksctl mount -b /dev/<your 200MB partition block>, no sudo required in most cases) or withmount(sudo mount /dev/<your 200MB partition block> /where/your/mount/stuff, sudo is required) cdto your USB drive andmkdir com.apple.recovery.bootin the root of your FAT32 USB partition- download
dmg2img(available on most distros) - run
dmg2img -l BaseSystem.dmgand determine which partition hasdisk imageproperty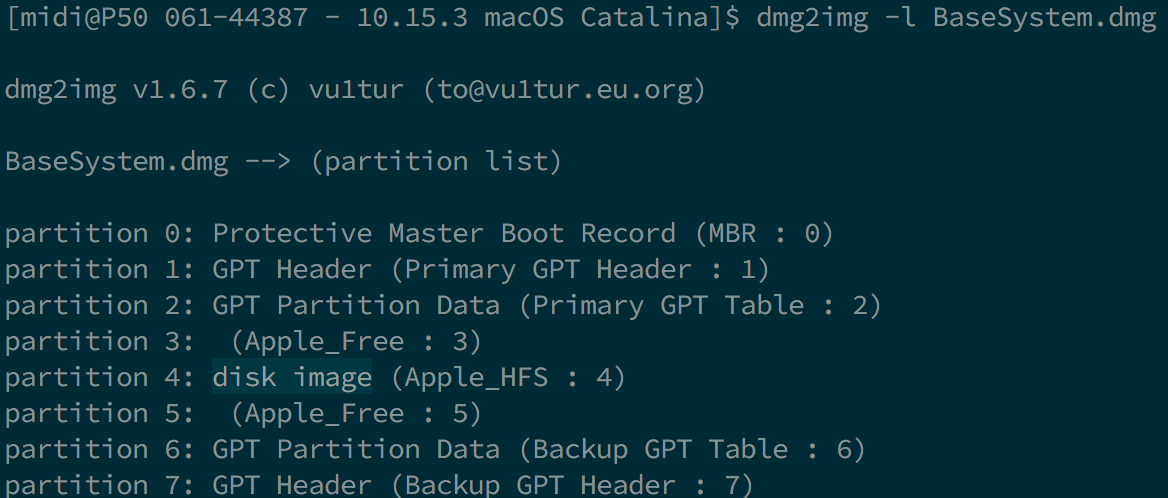
- run
sudo dmg2img -p <the partition number> BaseSystem.dmg /dev/<your 3GB+ partition block>to extract and write the recovery image to the partition disk- It will take some time. A LOT if you're using a slow USB (took me about less than 5 minutes with a fast USB2.0 drive).
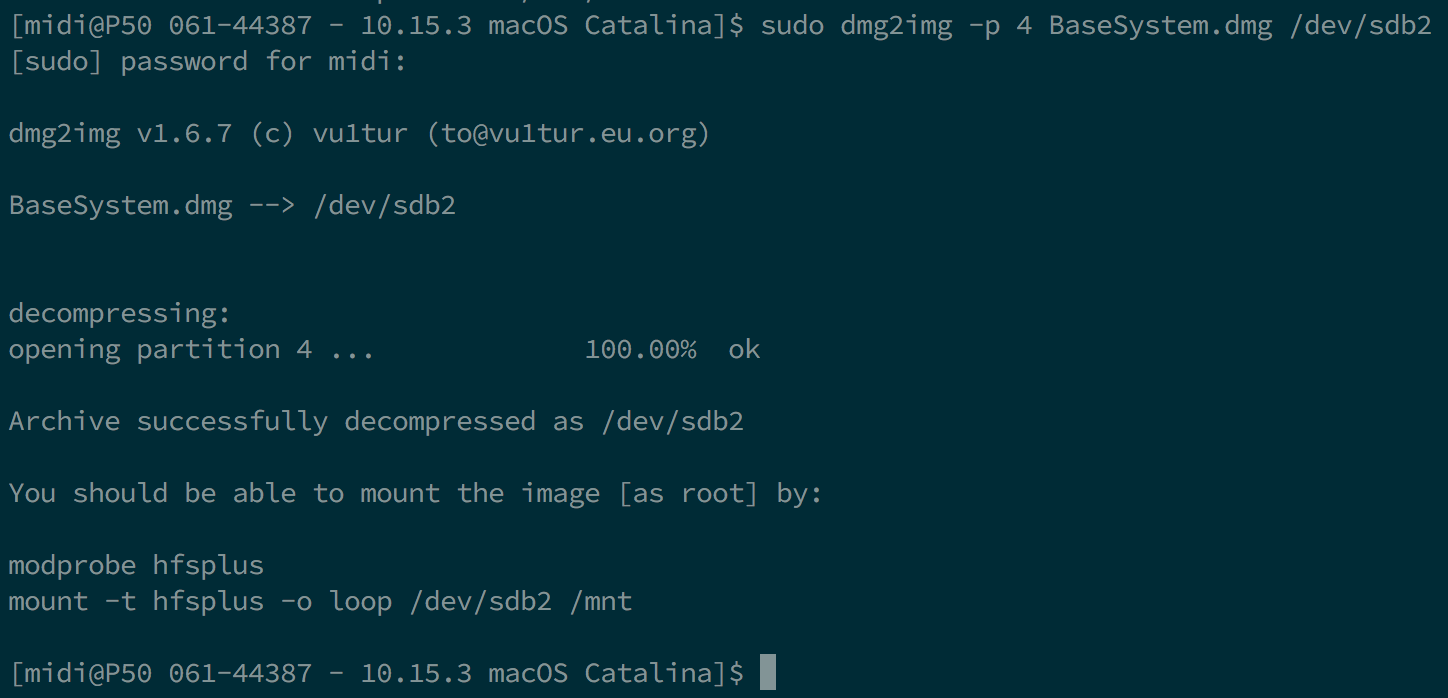
- It will take some time. A LOT if you're using a slow USB (took me about less than 5 minutes with a fast USB2.0 drive).
- mount your USB partition with
